refashioning

You are currently browsing the archive for the refashioning category.

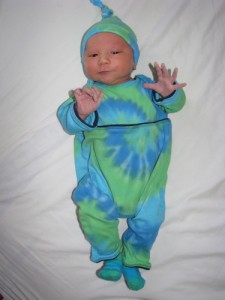
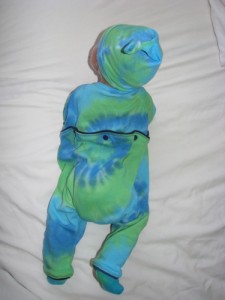
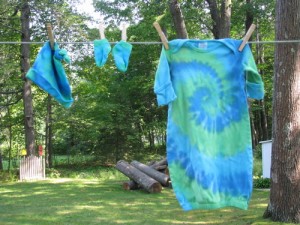
What started out as a blank white cotton knit baby gown eventually became a colorful sleeper with an unusual snap opening across the back. It started this summer when I decided to do some tie dye for the baby. I used my favorite colorway, seaglass, on a white baby gown from Dharma Trading.

tie dye baby gown bunting

Much later I decided that I would like to make a tie dye romper but I didn’t really have time to order a blank and it was getting rather cold to be doing tie dye. So I looked at the beautifully colored gown and thought long and hard before cutting into it. I dug out a favorite newborn sleeper with an unusual opening across the back that I remembered made it easy to change diapers—a definite factor in how often an outfit gets worn by the baby. I took a deep breath and started cutting and ripping out seams. I added some navy blue knit trim and a few snaps and eventually finished turning the gown into a romper without disturbing the existing tie dye pattern much. The matching socks and hat make for a cute outfit.

tie dye baby sleeper snaps across back tie dye romper

Tags: , , ,

I’ve managed a little sewing in the last week. I made four wool diaper covers for the baby, all side snapping wool, my favorite. I used a single layer of the thicker red boiled wool and double layer of blue merino interlock. Each of them is a bit different as I tried out some different techniques and adjusted the pattern. I found the interlock soft but difficult to work with. The army green cover was made for the girl when she was a baby and I think the fabric came from a skirt my mother had made herself. The white cover is not wool at all but PUL lined in microfleece and was made for the boy when he was a baby, before I discovered the advantages of wool. The wool covers just need to be patted down with my favorite lanolin balm from Sudz ‘n’ Dudz and they’ll be ready to go. All the cotton and hemp/cotton diapers have been pulled out of storage and sit in a bin washed and waiting.

side snap wool diaper covers

Another variation on lengthening pants for the boy. This time I cut up an old flannel shirt and gave it a bit of body and thickness with fusible fleece. The faux cuffs do not turn up. I cut off the shirt pocket and sewed it on one leg as a useful and decorative accent. He said they looked “old-fashioned” but wore them anyway. If I do this look again I think I’ll use denim or khaki backed with the flannel rather than the doubled flannel so the cuffs can actually be turned up. But hopefully he’ll get a few more months wear out of them this way. He keeps getting taller but his waist isn’t getting any bigger!

boys pants lengthened with cuffs from flannel shirt

Tags: , ,

IMG_0578

The ballerina kitty and the black ghost ready to trick-or-treat in what’s left of a rather early snowfall. Last year’s ninja masks got reused with a few minor changes. Most everything else came out of their closets or from the Goodwill store. Ballerina kitty was inspired by the cat eared headband and got a black tail sewn on from a length of black feather boa from the craft store.

adult Luigi and Mario hat costume

Here’s Rich coming home from work wearing his Luigi costume. One of his co-workers was Mario. I made their hats. Rich’s was made from tee shirt material leftover from turning a short sleeve tee into a long sleeve tee.

And here’s the candy corn wig I made for answering the door. The pattern is Hallowig by Megan Reardon.

candy corn wig hat

Tags:

And because I’m obviously behind on posting what I’ve been doing so I might catch up a little faster if I just dump a bunch of pictures into one post. Not as much story but you get the idea.

This is a basket/bag (Ravelry link) knitted in the technique called mosaic knitting which I did for a KAL (knit-a-long). The boy has claimed it for his own. The technique creates a thick two color fabric without the usually gyrations required of colorwork.

mosaic knitting two color basket

I had a black tee-shirt left from the boy’s Ninja costume last year. The boy has always liked owls, but we recently watched the movie Legend of the Guardians: The Owls of Ga’Hoole which refueled the owl interest in our house. I handpainted just the eyes, top of the head, beak and a bit of shoulder to suggest an owl staring out of the darkness. I really like how this turned out.

hand-painted owl in the dark tee shirt

owl face hand-painted on black T-shirt

And another skirt for the girl, recycled out of a pair of my old corduroys. I used the fabric but I only kept the hem and side seams and carefully recycled the back pockets. There are pleats in the front and elastic in the waist. It’s in a longer length as requested. I also used some of the fabric from the pants to lengthen a favorite pair of pine green corduroy pants that still have a lot of room in the waist. No picture of that, oops! but similar to what I did to the boy’s pants here.

hand sewn brown corduroy girl skirt

back patch pocket detail on handmade corduroy girl skirt

And the reason behind all the sewing? Besides the motivation of school starting and cooler weather, I spent about a month and a half knitting a sleeveless sweater for myself that turned out . . . well, about the way I expected but I didn’t care for it at all. Sort of turned me off knitting for a bit. I’ve also been working off and on with a bench the boy and I rescued from the side of the road. One corner was in quite poor shape but the rest of it was well made with good quality hardwood so I decided it was worth some work. I’ve cut mortises and tenons, drilled holes of all sizes and mixed and shaped epoxy type filler and sanded, sanded, sanded. I’m not quite done yet but there will be a post with pictures of the transformation when it’s done, since we have about a month left to enjoy it before it gets too cold for this year.

Tags: , , , , , ,

swim skirt

The kids are taking two weeks of swim lessons and they needed goggles and a swim cap for the girl. Goggles I can see getting a good bit of use out of and they seemed like a good incentive for the boy who was a little cautious about swimming in a pool. We generally have our summer water fun at the beach.

Frantically looking around the house for a bit of swimsuit material to make a cap from lead me to the little skirt that matches the girl’s swimsuit. I found an adult size swim cap pattern on the internet and sized it down to fit her head. I made myself sew a rough draft from part of an old tee shirt. There was so little fabric in the skirt that I had only one chance to get it right. I even had to undo the seams in order to have enough fabric rather than simply cutting the seams off as I would usually do when repurposing. I managed to eek out the pieces, sewing up the cap using the elastic and lycra waist trim to finish the bottom edge of the cap. The sewing itself turned out to be quite easy and I’m glad I decided to be frugal because I think the matching cap turned out much cuter than anything we could have bought.

Voila, my bathing beauty!

toddler, little girl swim cap

Tags: ,

For a school field trip, the girl’s class was required to dress in orange shirts. The girl’s teacher was less than thrilled and I do have to admit that orange is not a common color in the girl’s wardrobe. The girl does have a tie-dyed orange tee shirt handed down from her brother that she could have worn but . . . I just can’t leave well enough alone.

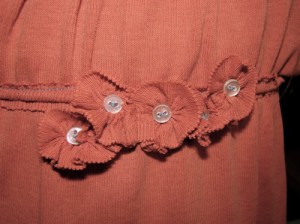
So I took apart a tee shirt of mine in a nice pumpkin pie color. I modified a peasant shirt pattern with a little inspiration from a tee in the girl’s closet featuring raw edges. I had no thread that looked remotely suitable so I pulled out a directly contrasting slate blue and stitched away. I used the neckline trim to create an elastic casing for the neckline and empire waist. Having run out of the round cord I stitched some gathers into the sleeves by hand. I gathered strips cut from leftovers into rosettes and sewed tiny buttons to the centers, placing one on each sleeve gather and a grouping of five off-center on the empire waist. It turned out really cute I think. And the girl loved it.

pumpkin orange raw edge peasant tee

raw edge hand stitched gathered flowers rosettes with button centers

Tags: , , ,

Winter in Maine means months of sweaters and snowpants, hot chocolate and mittens. For Christmas, the girl received a beautiful puzzle inspired by Disney’s Snow White with artwork painted by Tim Rogerson in a style subtly reminiscent of Picasso. I know that sounds like a strange combination but click through to see the original artwork, the artist really makes it work. Apparently the artist’s style made quite an impression on the girl because a few days after we worked on the puzzle she created this mitten picture beginning with a tracing of her own hands.
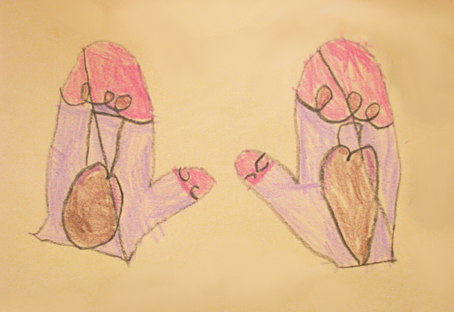
child's drawing of mittens

Later, the boy saw her picture and got an idea. He very carefully explained how we could sew mittens by putting our hands down on fabric instead of paper, tracing and cutting. He went on to describe how he would sew the mittens all around the hand and thumb. He even had some ideas about how to add details such as the hearts in the girl’s picture. I wish I could say we carried out his plan but he lost interest at that point. Sigh.

I did however incorporate his plan into mittens for myself with a little help from the kids. We traced my hand and cut out the pattern. I decided to use the fair isle decorated sleeves of a felted sweater to make my mittens. This lovely wool sweater was sent to me by my sweet friend Amy who thought that I could do something with it. Here’s what we did Amy!
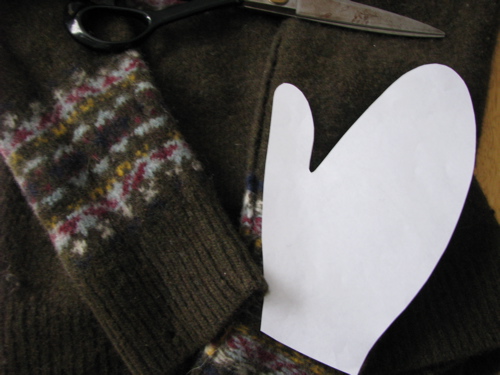
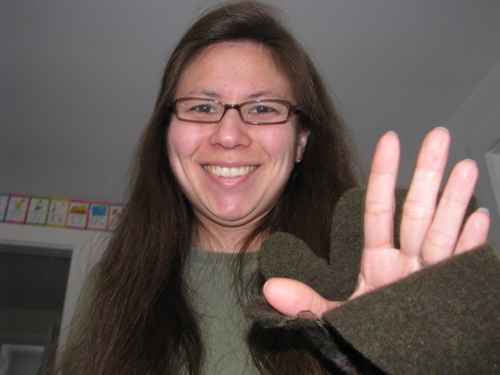
cutting felted fair isle sweater into mittens
partially sewn mitten upcycle recycle refashion wool sweater sleeve

Although I kept the part of the seam that was already sewn, I decided not to sew a standard seam around the thumb and hand. Instead I overlapped the fabric, basted across the overlap and then used my needle felting tool to felt the overlap. My intention was to eliminate a hard seam on the inside, especially at the fingertips. This worked with some success. The sides of the mittens and thumb felted together well leaving almost no visible seam. The fingertip area, unfortunately, did not hold together so well. In fact I’ve been wearing them with the basting stitch holding the ends together which sort of negates the point of wool mittens. But despite the little draftiness at the ends they are still the warmest, softest mittens I have. I do intend to take a minute to work some more on the fingertips and thumbtips to close them up. If I can stop wearing them long enough.
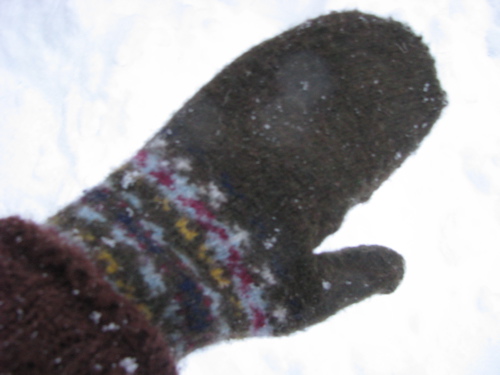
mitten sewn from felted recycled upcycled refashioned wool sweater

P.S. Just in case you want to make your own sewn mittens, I highly recommend sewing in a diamond shaped gusset between the thumb and first finger. If you pin your mitten together and try it on, leaving that spot open, you’ll see why you need just a bit of extra fabric in there.

Tags: , ,

No, not that kind.

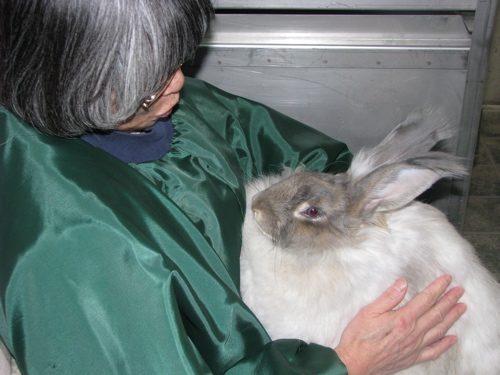
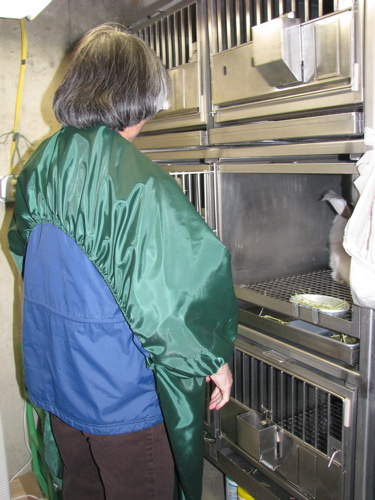
This is for wearing when you are taking care of bunnies. My parents now have three angora rabbits and my mother was wanting some sort of apron/smock to protect her clothes. I’m pretty sure she wanted it to be long sleeved somehow and long enough to cover her lap but not too hot to wear in the summer and easy to go on over a jacket in the winter. The space where the bunnies live is only somewhat climate-controlled.

The fabric needed to be something tough but slick, something that could stand up to the occasional clawed foot but slick enough to shed or at least not attract stray fur. I also thought it would be easiest if there was no hardware—no buttons or snaps, etc. So I used some leftover nylon or acetate lining material that is extremely lightweight but tightly woven and not likely to attract fur. I cut the collar and cuffs off an old knit shirt to re-use. I cut the long sleeves loose and gathered them into the knit cuff. I made the neckhole in a similar fashion. The threaded elastic through the cutaway back allows for arm movement but helps to keep the long front from flying away. Or at least that was the intent. That part still needs work. It could probably use some pockets as well. I have some alternate ideas but I was at a point where I needed to make a full-size draft to see how it actually worked. Here’s my mother trying out the bunny suit . . . bunny smock?

angora rabbit

high no back smock

Tags: ,

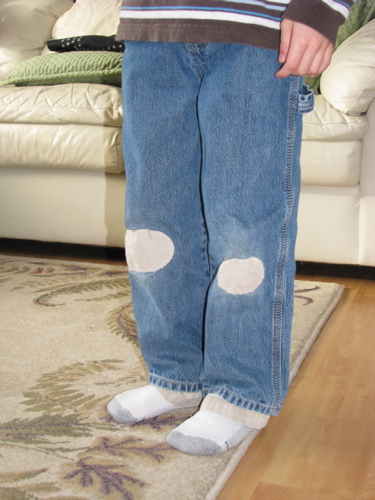
The boy is a bit picky about jeans—he prefers them soft and on the thinner side. He usually wears every other pants in his closet before jeans but this pair he didn’t seem to mind. Unfortunately he tore through the knees and they were getting short but still fit amply in the waist as is usually the case with storebought pants for him. I grabbed the leftover pieces cut off a pair of khaki pants that had already been turned into shorts. I used the already hemmed bottoms to lengthen the jeans and then used a double layer of the khakis to cut patches for the knees of the jeans. A fast fix and it turned out rather cute. The mom of one of his friends thought I had bought them that way. I’ll take that as a complement.

jeans patched and lengthened with contrast fabric

Tags: ,

I actually wrote this on Friday but didn’t upload the accompanying picture until today.

I’m not a bling kind of person. I don’t wear much jewelry, beads, sequins, etc. But the girl likes bling. Apparently it goes well with the passion for pink. So we were passing by the clearance section of the craft store and she spotted some pink name appliqués. Despite the appearance of a number of unusual names, hers was not one of them. Too bad, they were quite cute. Before I could stop myself, I pointed her toward the non-personalized iron on jeweled designs from Jolee’s Jewels. She picked one out with glee and happily carried it to the register. When we arrived home I pulled out an almost new black shirt that I thought would work well. She agreed heartily and we set to work. Although the directions were a little strange it was not hard to do. And the results are admittedly quite pretty.

IMG_8952

I am a little concerned about the durability of the now hand-wash, drip dry tee shirt. In retrospect, I wish I had trudged down to the basement and pulled out the heat press. Later, I confirmed my suspicion with a quick internet search which revealed that the crystals can be heat pressed at 350°, quite a bit higher than the temperature of an average household iron. That’ll have to wait since she wore the shirt to school. Hopefully I can give it an extra pressing tonight.

Tags: ,

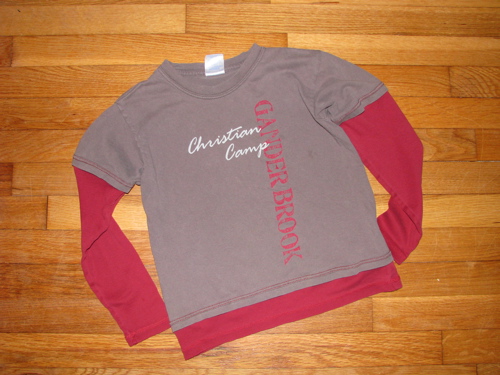
I can’t stand to waste anything, especially a favorite piece of clothing. Here are two cases where I have quickly transformed something old into something “new”.

First rescue:

two tee shirts ready for refashioning tee shirt refashion in progress

finished tee shirt refashion layered look

I took a favorite tee shirt of the boy’s and winterized it by cutting up an old long sleeve tee shirt of mine in a coordinating color. I cut the sleeves and a few inches of the hem off the long sleeve tee shirt and sewed them onto the boy’s tee shirt with contrast thread using a double needle on the regular sewing machine. The double needle creates a stretchy seam that works well with the knit fabric and contrast thread adds to the purposeful look of the additions. And in this case, I still have enough of the second tee shirt left to make something else.

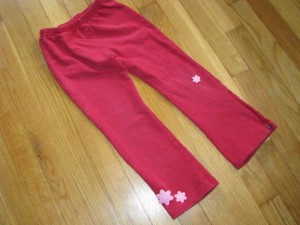
Second rescue:

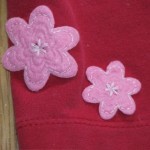
yoga pants embellished with hand stitched felt flowers to cover hole in knee detail of purchased felt flowers handstitched to cover darned hole

These were some cute hand-me-down pants that actually fit the girl’s long legs. Unfortunately they had a hole in the knee. She doesn’t care much for pants but since she liked these I decided it was worth a little work to make them more presentable. On an impulse, I purchased a package of pressed felt flowers. After darning the hole in the knee I hand stitched one flower over the hole. I then added some more flowers to the ankle of the other pants leg for visual balance.

Tags: , ,

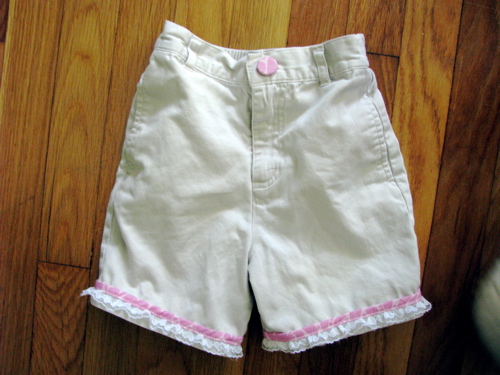
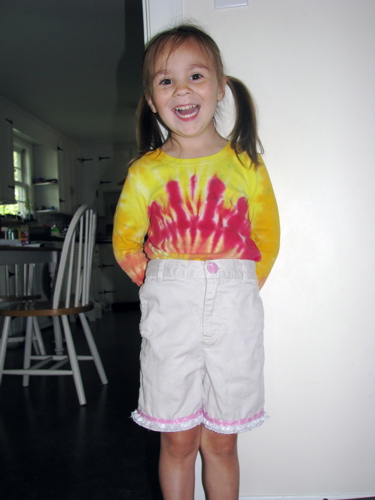
These shorts began life as standard storebought khaki pants for the boy, at some point got cut off into shorts and today got a little girlifying with some graphic pink floral print scraps and some rather scratchy polyester “lace”. I’m fairly certain the fabric is a Jane Sassaman design but I couldn’t identify it positively. I also switched out the old plain buttons for covered buttons using the same pink print.

boys khaki shorts trimmed in pink fabric and lace for a girl

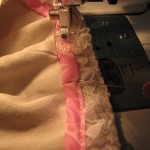
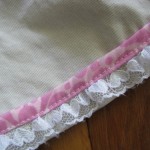
After I did the first side I decided to take pictures so here’s a quick tutorial. For the fabric trim you can use purchased bias trim, or handcut bias or straight grain fabric as I did. I cut mine about one inch wide and a little longer than the distance around the hem of the shorts leg. Cut the lace to the same length. First turn your shorts inside out so you can work on the right side of the fabric more easily. I prefer to offset the seam of the trim a little towards the rear to eliminate extra bulk at the inseam.

Step 1: Lay the fabric strip face down with the top edge of the lace overlapping the width of your zigzag stitch. Pin as desired. Skipping the first centimeter, zigzag down the overlap until you are nearly back around to the beginning. Trim your fabric and lace to fit under the beginning with a little extra to fold over. Fold the fabric end up but underneath the beginning flap. Fold the lace ends at a right angle with the short ends underneath or towards the right side of the shorts, trimming if necessary. Finish zigzagging.

shorts trim tutorial by random-charm 1/9 shorts trim tutorial by random-charm 2/9 shorts trim tutorial by random-charm 3/9

Step 2:
Fold the left edge of the fabric to meet the edge of the trim and finger press. (Or iron if you prefer.) Then finger press again to conceal the zigzag stitching. (I finger press a little at a time as I stitch.) Topstitch the open edge slowly. When you get to the end you will reach the folded end of the fabric trim. You can sew that little space shut if you choose but I didn’t bother. Your fabric and lace trim is now secure. You may add a decorative line of topstitching to the top edge of the fabric trim if you like.
shorts trim tutorial by random-charm 4/9 shorts trim tutorial by random-charm 5/9 shorts trim tutorial by random-charm 6/9

shorts trim tutorial by random-charm 7/9 shorts trim tutorial by random-charm 8/9 shorts trim tutorial by random-charm 9/9

And the finished shorts modeled rather reluctantly by the girl. Don’t let the grin fool you, her contrariness is barely concealed by her choice of the most unpink shirt she owns. After I took the picture she insisted on wearing the shorts backwards for the rest of the day.
IMG_8083

P.S. Isn’t she getting tall?? I’m telling myself it’s just the picture but . . . the camera doesn’t lie, does it?

Tags: , ,

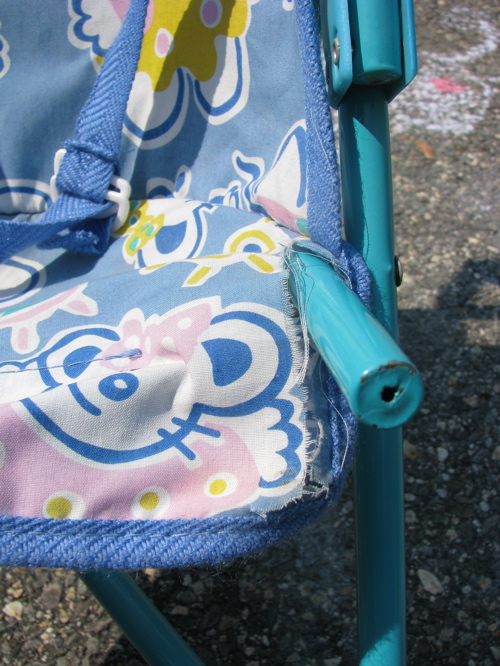
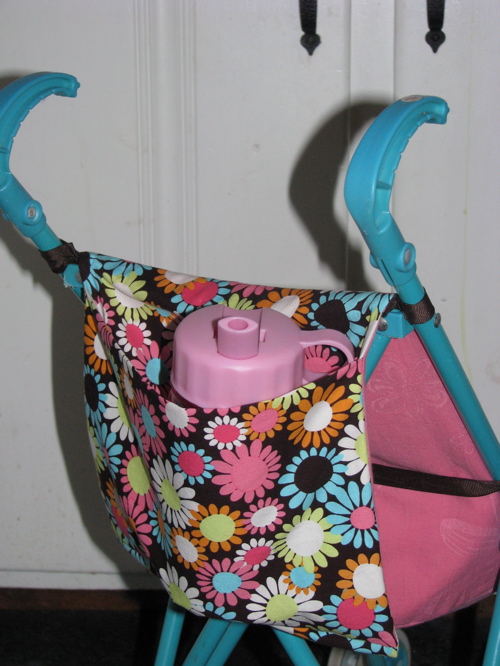
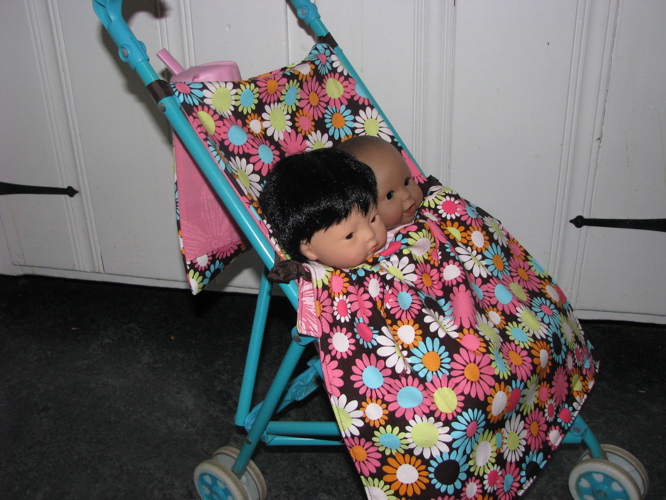
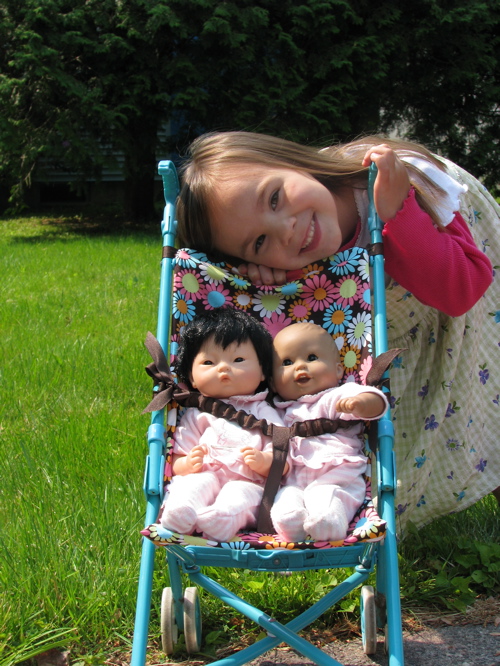
The girl has had this doll stroller or “rolly stroller” as she calls it for quite a while but has only recently started using it. Unfortunately the fabric cover did not survive long and developed a tear I could not mend nicely. Since I’d already had to repair an errant strap I decided it was time to just make a new cover. Okay, I admit I never liked how the pastel bears fabric clashed with the aqua stroller frame. Some Michael Miller daisies, brown grosgrain ribbon and an odd hot pink remnant to the rescue!

torn doll stroller cover

I used the old cover as a pattern but used two layers of cotton with flannel in between for a sturdier cover. Elastic encased in grosgrain ribbon rather than the typical buckle for the seatbelt is easy to use. I added a pocket that hangs down the back for the girl’s water bottle or other belongings. I meant to edge the little matching blanket with some nice vintage baby ric rac but I was already topstitching before I remembered so that didn’t happen. Oh well.

back pocket for doll stroller cover

handmade hand sewn doll stroller cover with matching doll blanket

IMG_8006

I think the babies like their updated ride quite a lot.

Tags: ,

I haven’t posted any of my children’s funny words and phrases in a while so here are a few that I keep forgetting to share.

zazoo: looks like a whistle but makes buzzing noises, courtesy of the girl

egg noggin: you know, eggs, milk, sugar, vanilla, yummy stuff. It’s good for your brain according to the boy.

dracamole: an imaginary creature that likes Mexican food (think avocados), as used by the girl

pig, pig, turkey: an answer to what kind of meat are you? or a game similar to that old waterfowl favorite. This was a coordinated sibling effort at Thanksgiving dinner, far funnier than the original.

And one of my favorites from the girl:
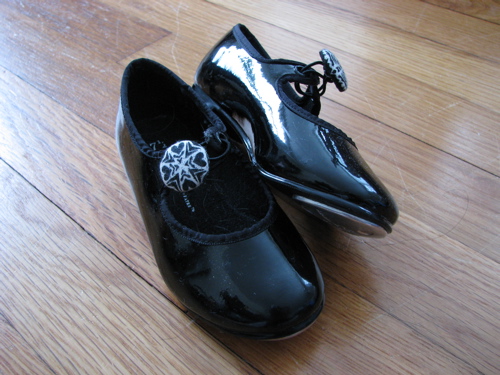
clap shoes: as worn by Gene Kelly or Shirley Temple. They sure do make a racket on our wood floors!

tap shoes with covered button elastic closure

The idea for the covered button closures on the tap shoes came from a post on the forum at Sew, Mama, Sew! from this blog: http://etownhooks.blogspot.com/2009/10/craftiness.html

Tags: ,

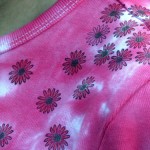
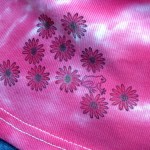
pink tie dye shirt with scattered daisies

Please excuse the silly look on my face. Rich told me I looked too serious. An old white shirt freshened up with pink on pink tie dye and then embellished across one shoulder with a little daisy rubber stamp using fabric inks. And a little frog hiding in the daisies at the hip.

rubber stamp with fabric ink on tie dye shirt rubber stamped frog and daisies embellish tie dye shirt

Tags: , , , , ,

« Older entries