December 2010

You are currently browsing the monthly archive for December 2010.

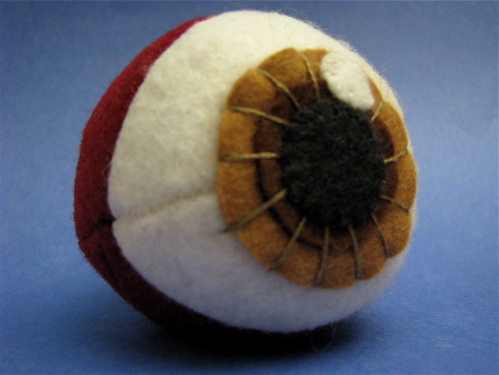
wool felt ball eyeball toy

I admit that I shamelessly copied this oogly eyeball from a picture on the internet. Unfortunately I cannot find the original source now to give credit but I see it’s not as unique as I first thought. I did make my own pattern and chose my own colors and my version is likely smaller than the picture that I looked at but it’s pretty much identical. I rarely if ever do that. Mostly because I’m not good at copying when I want to and moreso because I always have my own ideas on what and how I want to do things. The boy had wanted to make some monster stuffies and knowing how popular those are I thought we’d look around on the internet for images that we liked and then combine our favorite features into our own monster stuffie pattern. Along the way we saw these fabric eye balls that were just perfect the way they were. So we made wool felt eyeballs. This was the first and unfortunately I didn’t get a picture of the second which the boy did most of the sewing on because he wrapped it up and gave it away about as fast we got it finished. Made with wool and rayon felt and a little embroidery, and filled with wool stuffing and poly pellets. I still want to make the monsters but these were more fun than I would have guessed. Sewing a sphere is never an easy proposition but felt makes it fairly painless.

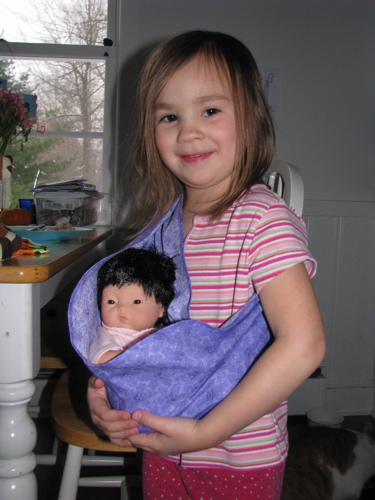
pouch style baby carrier for doll

Here’s the girl carrying a baby doll in a pouch style baby carrier that I made for her cousin. Don’t worry, I made the girl one too. Now I’ve made so many baby pouches I could practically cut one out without a pattern and that’s exactly what I did here. But the style that came to mind as particularly appropriate for a doll carrier, was inspired by a real pouch style baby carrier idea from my friend Jen. I traced the finished pouch so that I’d have the pattern for keeps. I may post the pattern here after I try it out on a few more kids and different sized baby dolls/stuffies. I’m also going to “stick a pin” here to remind myself to tell you a little trick I thought up regarding handmade presents.

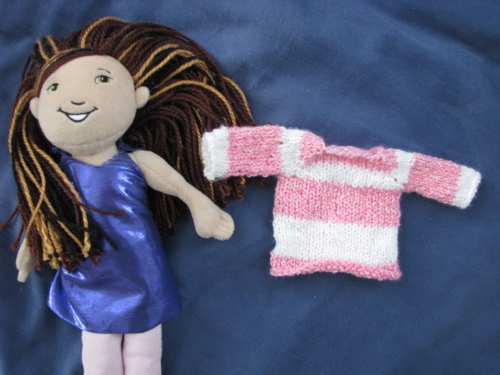
groovy girl doll and handknit doll sweater

Just last week my neighbor shared with me several bags of yarn she’d received from someone else. The girl had seized on a small ball of pink and white novelty yarn which I decided to turn into a sweater for her favorite doll. (Don’t ask about the “dress” she has on.) My first top-down raglan sweater, ha ha. Maybe I’ll feel better about starting on a person-sized sweater now. I accidentally left the little sweater out and the girl saw it. I thought the surprise was ruined because of course she asked who it was for. But I answered with the name of her doll. The girl replied very seriously that she would wrap it up so that said doll would not see it before Christmas!

Tags: , , ,

I am so proud of the girl. She has been making a list of all her favorite people and making gifts for them. Some of her choices have been interesting but I’ve done my best to help her carry out her plans. This faux leather wallet is for one of her boy friend/heroes. Though he is nearly 6 years older, he has always been kind to her and she looks up to him like another brother.

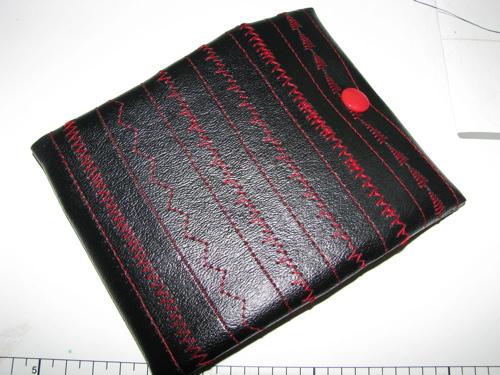
pleather faux leather wallet with contrast stitching hand made

I was a bit dismayed when she said that she wanted to make him a wallet but after a bit of thought I pulled out this remnant of black vinyl. She sat on my lap at the sewing machine and chose one of his favorite colors, red, for the thread. We then turned the dials of my simple machine through the different stitch patterns and sewed parallel lines of red stitching against the black. I folded the rectangle wrong side out and sewed; her eyes danced as we turned it right side back out revealing the simple pouch shape. She chose a matching red resin snap to close the wallet.

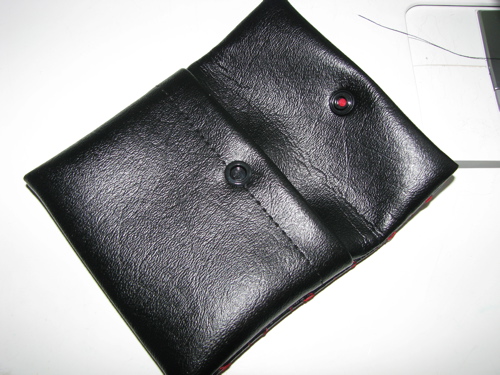
hand sewn pleather vinyl snap wallet pouch

It didn’t photograph so well, and it’s a bit on the bold side, but I think he will actually like it. She seemed matter-of-factly pleased with the finished project and immediately wrapped it and wrote the label. I had to retrieve it after she went to bed and carefully unwrap it to photograph it!

Tags: , , , , , ,

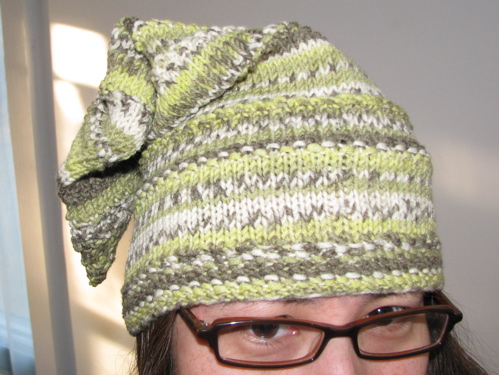
hand-knit stocking cap seed stitch self-striping green

I originally bought this self-striping yarn to make socks for myself. I did but they were a little snug so the boy happily took possession. Then I made the girl socks out of the leftover. Then their Nana requested a hat made from the same yarn. Now discontinued. Ravelry saved the day—I posted an ISO on a Wednesday and had another skein in hand on Saturday!

I wanted to make something that showed off the self-striping yarn but didn’t look like just any storebought hat. So I used seed stitch, random texture and the stocking cap shape. I think it turned out fairly well. More details on my Ravelry project page.

It can also be worn with the seed stitch brim up or down and the point to the side or to the back. I also tried sticking the point down into the hat and wearing it like a slouch. I’ll make some modifications the next time I make one but it turned out to be the general shape I intended. All in all, I’m pretty happy with my improvised design.

Tags:

Coming soon to a dinner table near you . . .

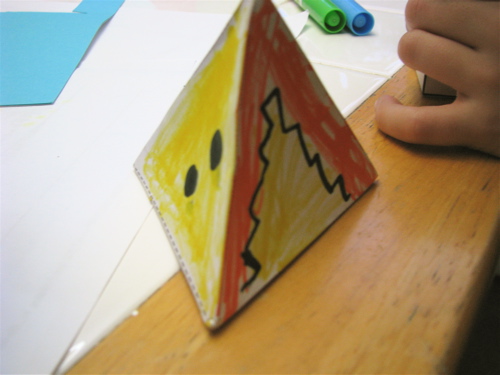
The boy has been studying geometric solids in school and brought home a tetrahedron pattern (like a pyramid with a triangle base). We glued it to cardstock and then glued it together. He colored one, two and three dots on three of the sides and a set of scary teeth on the last side.

grabbermouth tetrahedron die

Then he made up a game, Grabbermouth, to play with his pyramid shaped die. Simple and surprisingly fun! Each player rolls the die in turn hoping to be the first to add dots to equal six. If the “grabbermouth” lands face down you lose all your points. This was easier for the girl using tokens so she didn’t forget how many points she had. He then set to making a similar die with a cardstock cube.

cardstock paper cube and tetrahedron pyramid

The rules for Double Grabbermouth got a bit more complicated. I was impressed with his creative use of the shapes and his ability to create the rules to a new game that probably owed a bit of inspiration to the dreidel game but certainly has its own character.

Links are included to templates from Zoomschool so you can make your own geometric solid shapes from paper.

Tags: ,

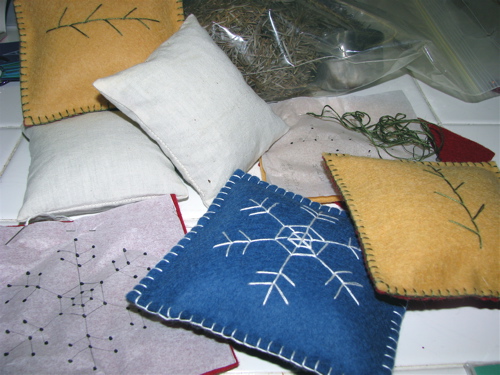
I’ve had in mind to make some balsam sachets for a while. I saved the needles from last year’s wreath and they still smell wonderful. My first step was to haphazardly cut up a scrap of muslin, quickly sew two sides through the serger and then stuff with the fir needles and leisurely sew up the last side by hand. I tried sewing up the last side with a straight stitch on the machine but it was more trouble than it was worth. There are some instances where I can handstitch neater and faster than the machine can.

I’ve had lots of different ideas on how to decorate the outer covers for these but this one popped up at the last minute. I paired up these toasty squares of wool felt and pulled out some embroidery floss. I then looked at pictures of balsam branches, drew some and forced myself to simplify until I had a pleasingly spare design. I then traced the final pattern onto tissue paper, labeled each dot with a letter and wrote down letter pairs in order of sewing. I borrowed this method from the boy’s second grade math homework. It worked a treat and the girl was pleased as punch to be able to follow the letters much like a dot-to-dot puzzle. The hardest part for her was sticking the needle up through the back.

wool felt embroidered with cotton DMC floss balsam fir and snowflake design balsam needle sachet

The snowflake ended up being more complicated so I decided to try working out the stitching pattern before writing it up. Halfway through the boy wanted to help and I was pleasantly surprised to find that not only was he able to accurately stick the needle up through the back side of the work, but he was also able to figure out a thread conserving stitching pattern with very little guidance. Both were suitably impressed when we gently tore away the tissue paper to reveal the design. I finished the sachets by blanket stitching round the squares, stuffing the balsam filled muslin bags in between before closing up the last side. You can see we have a few more to finish. I will let the kids decide who to gift these to. We used to have one in the back of our car and the warmth of the heater in the winter or the summer sun would give the car just a hint of balsam fir fragrance.

Tags:

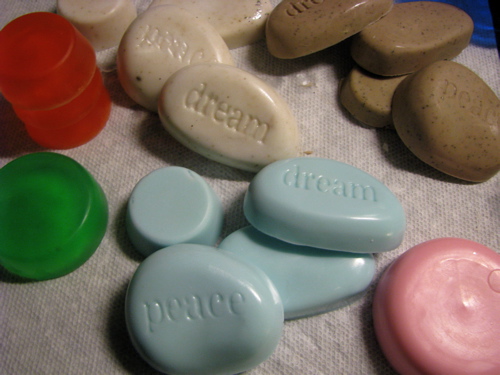
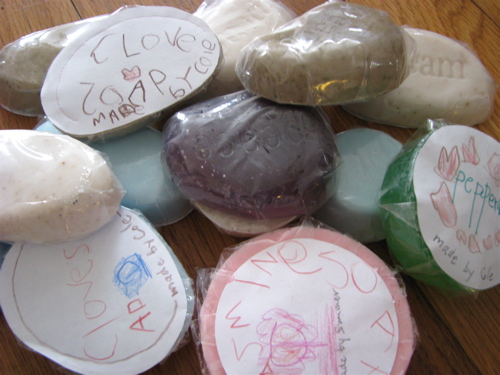
melt and pour soap handmade

Last week I pulled out the ingredients for melt and pour soap. My crafty double boiler, some clear soap base, various fragrance and essential oils, a stone shaped mold previously used for plaster, a silicone mini muffin tin and regular old food coloring. Soap molding isn’t something I do regularly but I’ve done it a few times and some of the ingredients overlap with other crafts such as candlemaking. The girl and I started on this project one morning and once the boy saw what was going on I ended up having to get more soap base, creamy white shea butter. The boy ended up making most of the different combinations but the girl enjoyed making the labels, which I cut from full sheet label paper I had on hand.

handmade melt and pour soaps with kid made labels

Purple glittered gentle rain, light blue clove, light brown clove with actual ground cloves mixed in, clear green peppermint, pink jasmine, clear orange bergamot, natural white cinnamon with cinnamon sprinkles, and maybe a few others that didn’t make it into the picture.

This project is so easy and fast that it is fun to do with kids and I think I have mostly done it with kids other than mine until this time. You can even use a glass mixing bowl in the microwave to melt the soapbase and any plastic container can be a mold. Clean up is a breeze of course!

Tags: , ,

I actually wrote this on Friday but didn’t upload the accompanying picture until today.

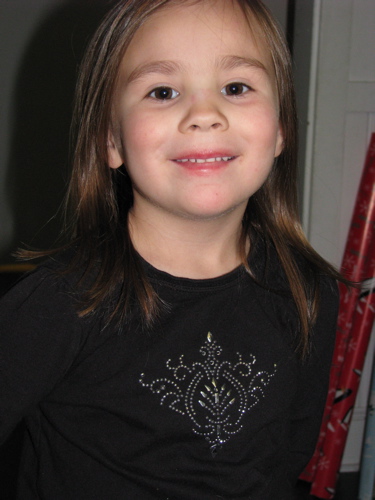
I’m not a bling kind of person. I don’t wear much jewelry, beads, sequins, etc. But the girl likes bling. Apparently it goes well with the passion for pink. So we were passing by the clearance section of the craft store and she spotted some pink name appliqués. Despite the appearance of a number of unusual names, hers was not one of them. Too bad, they were quite cute. Before I could stop myself, I pointed her toward the non-personalized iron on jeweled designs from Jolee’s Jewels. She picked one out with glee and happily carried it to the register. When we arrived home I pulled out an almost new black shirt that I thought would work well. She agreed heartily and we set to work. Although the directions were a little strange it was not hard to do. And the results are admittedly quite pretty.

IMG_8952

I am a little concerned about the durability of the now hand-wash, drip dry tee shirt. In retrospect, I wish I had trudged down to the basement and pulled out the heat press. Later, I confirmed my suspicion with a quick internet search which revealed that the crystals can be heat pressed at 350°, quite a bit higher than the temperature of an average household iron. That’ll have to wait since she wore the shirt to school. Hopefully I can give it an extra pressing tonight.

Tags: ,