December 2009

You are currently browsing the monthly archive for December 2009.

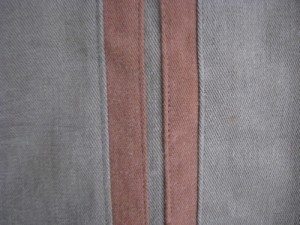
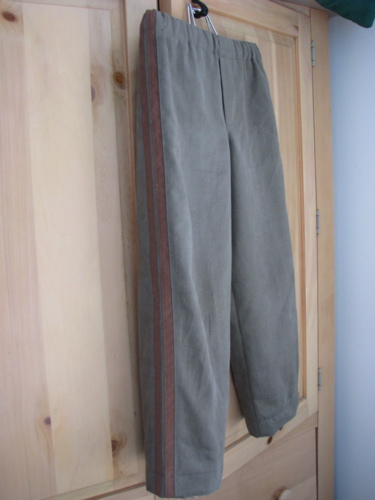
Or something like that. I have apparently lost the boy’s basic pants pattern, waaah. I looked high and low for it and finally gave up and drew up a new one, mostly based off the most recently finished pair. I was planning special Christmas pajamas but I needed to test the pattern before I cut into my nice new flannel. I decided to use this great moss green brushed twill and accent it somehow. But I didn’t have time to deal with pockets and patches and a bunch of topstitching, etc. so I decided for some reason that tuxedo stripes a.k.a. windpant stripes down the sides would be less trouble. You’re laughing at me right?

tuxedo stripe or windpant stripe on little boy's hand sewn pants

Guess what! I found a great way to apply these stripes using a variation of my flat-felled seam variation. You know that doubled over and double topstitched seam on your jeans? That one, except I have my own way of doing it on a home sewing machine. I probably owe you all a tutorial on that too.

Anyway, I applied these stripes in a similar manner which requires very little pinning and relies almost entirely on your sewing machine and iron to make the straight lines. Much better than appliqué turning those little stripes and then pinning and stitching them down perfectly.

close-up of tuxedo stripes on boy's pants

But of course what really matters is that the boy liked them immediately despite the lack of pockets. He even told me that he likes the pants I make him better than his other pants. Words to melt my heart. Of course I know it’s really about that soft brushed twill I use.

PS. These pants were made before Christmas. I have lots of stuff to post but I’ve been working hard at reorganizing the kids’ room. The boy has been very excited about this but the girl has been none too pleased. Such is life. You win some, you lose some, and perhaps eventually I’ll be caught up and everything will be put away.

Tags: ,

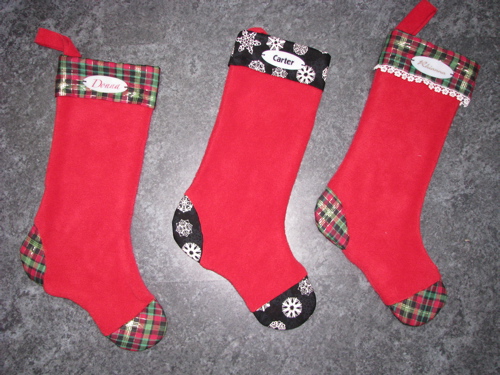
Our church received a request over the weekend for Christmas help for a family with young children. Several of us coordinated getting various things to “make Christmas”. I went looking for stockings and was appalled at the selection available in the big box store. Most of the stockings available were cheaply made of such grotesque fabric that I was depressed that anyone would use those as part of their family traditions. So despite the deadline projects hanging over my head I went home and started pulling out the ingredients to make some personalized stockings.

handmade Christmas stockings

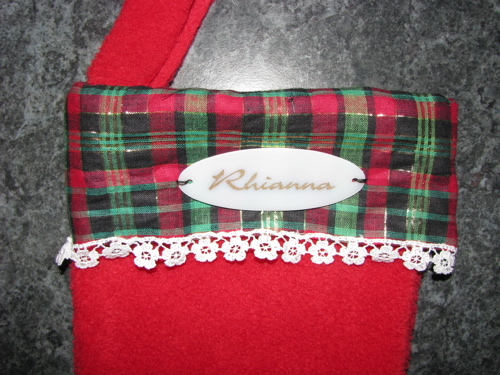
I cut the main body of all three stockings out of a thick red textured fleece and then pulled together a few wintry prints to make the contrasting heels, toes and cuffs. The boy helped me with the sewing. I was planning on using a white dimensional paint to write the names on the stockings but I did not read the directions until about 10pm. Since I didn’t have 24 hours for the paint to dry flat I had to come up with another plan! After fooling around a bit I pulled out the last piece of matte shrink plastic and the permanent markers. I picked out some (hopefully) appropriate typefaces to set their names in on the computer and then printed out a template to trace. A few seconds in the oven and a quick rubdown with the sandpaper, and I had some nice thick white ovals that I stitched onto the stocking cuffs with black upholstery thread. Although putting the names on shrink plastic tags was a last ditch idea, I like how well it turned out so I will probably find some way to use it again.

Christmas stocking with shrink plastic name tag

Tags: , , ,

Production Artist wanted for tiny creative studio engaged in use of variety of media for various purposes. Ideal candidate will possess quiet enthusiasm for spontaneity and the ability to execute bizarre concepts with unswerving dedication using only materials at hand.

Must be proficient in organizing, knitting, crochet, machine sewing, hand sewing, pattern drafting and grading, copy editing, paper cutting, carpentry and general crafting. Familiarity with paper maché, traditional upholstery, polymer clay, jewelry making, soldering, screen-printing, shoe-making, welding, nalbinding, Romance languages, architectural periods, art movements, and musical styles helpful.

Must be discerning in the use of all types of glues; punctuation; threads; yarns; fibers, both animal and vegetable; acid and fiber-reactive dyes; papers, both commercial and cottage; wood; fabrics of all kinds; tin cans; fishing line and neoprene.

Ability to take brilliant product shots and short videos necessary.
Ability to illustrate will garner serious brownie points.

Ability to work in Photoshop, Freehand, InDesign and various social media preferred. Knowledge of Quark and Microsoft irrelevant. Ability to find and use information from printed books essential.

Compensation will be provided in the form of endless tea, warmly purring cats, giggling children and the occasional home-cooked meal. (Guess which one of the above is subject to availability?)

Interested parties should reply with the number and type of non-Altoid tins in their collection; a two page essay on favorite organizational methods and preferred storage containers categorized by brand, size, material and usage; tea preferences; favorite flavor of Star Trek and/or Law&Order; number and type of musical instruments played; and the answer to this question: Phineas or Ferb?

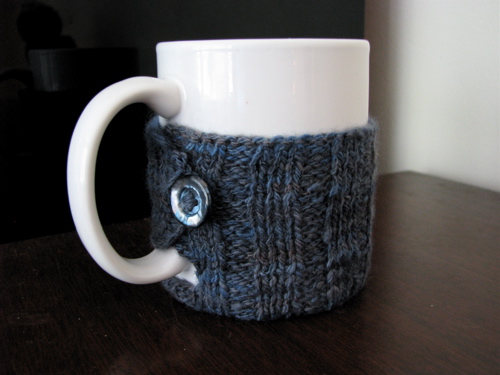
I’ve seen many of these mug cozies lately on the internet, usually just a knitted or crocheted tube that goes around your mug or travel cup, sometimes with a closure of some kind to fit into the closed handle of a mug. I’m not sure if it’s inspiration or just repeated exposure, but I finally decided I needed to try this out for myself. Not too out of the blue as we are a family that drinks hot drinks a lot: tea, coffee and hot chocolate. My kids sometimes complain that the mug is too hot to hold.

random-charm's mug cozy/coaster

So I chose to make my mug cozy with a flat bottom so the part that you hold is all enclosed and bonus! you can set it down on any surface without the need for a separate coaster. This is a great use of leftover yarn from other projects. There were a couple of tricky spots to figure out. I thought that making the flat bottom would be the hardest but that wasn’t bad actually. I’m still working on shaping/sizing the hole for the bottom of the mug handle. I’m also going to make the button hole as I knit next time instead of doing it as an afterthought as I did with these first two. The first one was a bit too big and the second was a bit too small. Aggressive blocking made it work though. I think they look warm and inviting on these plain white mugs that I happened to have stashed in the basement. Oh the joy of being a packrat!

Tags: ,

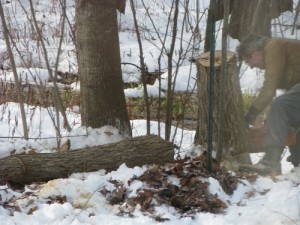
IMG_6395

Here’s the mailman cutting it down. The mailman? Yes, we live in a friendly town. He noticed when part of the tree came down and offered to take the rest of it down safely in exchange for the wood to heat his home. Waste not, want not. Sounded like a great deal to me!

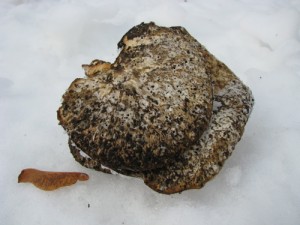
And look what survived the fall. The fungus that had survived the original break landed safely in the snow. Freeze-dried, ha! Maple seed for scale. Apparently you can clear coat dried mushrooms to preserve them. Not sure I’ll take that project on. They may just end up in the compost.

frozen mushrooms from dead tree

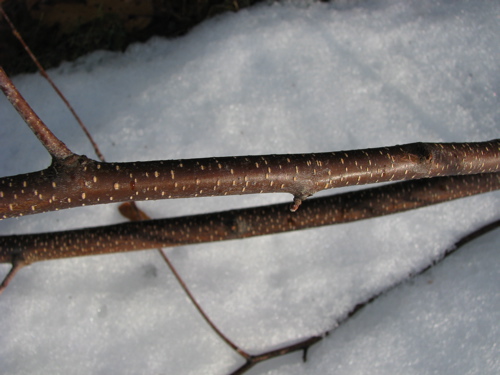
I did save what was left of a little birch that had to come out. Young birch branches are smooth, easy to cut and have such a pretty pattern to them. Not sure what I’ll do with it just yet.

young birch branches

Tags:

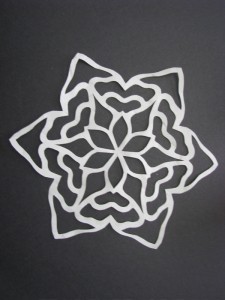
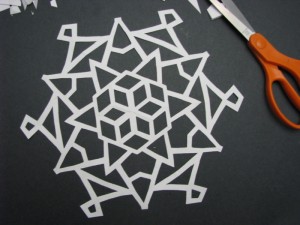
six pointed paper snowflake

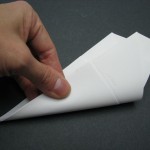
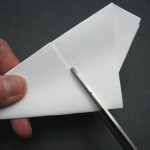
I’ve been making these paper snowflakes for as long as I can remember and I never get tired of cutting these pretties. I know that some people are a bit intimidated by the folding required to create the six-pointed shape so this year I decided to make a snowflake folding template that will hopefully make that easier. Then you can get creative about the cutting! All the directions are printed on the pdf with numbered, dotted lines for where you fold. Here are some photos of the process. So if it isn’t snowing where you live, make your own snow!

paper snowflake folding 1 paper snowflake folding 2 paper snowflake folding 3 paper snowflake folding 4 paper snowflake folding 5 paper snowflake cutting example 1 finished paper snowflake 1

You can do this with ordinary copier/printer paper but it is easier to cut if you use something thinner. If you fold precisely then you will find that at step three you have a tiny bit extra sticking out of both sides. This is intentional. It accounts for the thickness of the paper when you make the final fold. Start out by cutting out simple triangles from alternating sides. I like to cut so that the bridges of paper left in between are the same width. After you unfold your creation you can press it in a book or carefully run a warm iron over it to minimize the fold lines.

If you make a paper snowflake you really like, preserve it by laminating it. I use Therm-o-Web Iron-on Vinyl which looks a lot like good old contact paper but is thinner and you seal it in seconds with a warm iron. Just trim around the outside edge with scissors. We like to tape these to a window.

Tags: ,

IMG_6099

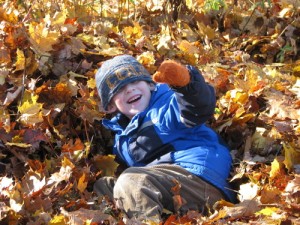
Admittedly, this photo is about a month old but I just realized I’d never shared it. The boy in the leaf pile. We had a great time that day, jumping in, playing leaf monster, piling on dad, etc. There’s some other things I’ve missed as well but I’m just going to offer some random favorite photos here until I get myself reorganized.

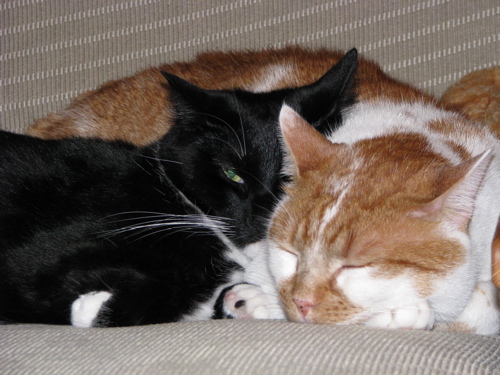
sleeping cats

Lila and Duke, curled up on the couch, just about every evening. Sometimes they let us sit with them too.

IMG_6264_2

The girl, as Rudolph, with her ballet teacher, as the Nutcracker, after her very first performance. She was thrilled to be on a real stage although she did say more than once that she would have preferred to be Clara so that she could dance with her teacher. And of course she was quite enamored with all the beautiful costumes. The Maine State Ballet has a cute tradition of Father Christmas and his reindeer (the youngest ballet class) pulling the sleigh with Clara in it off the stage at the end of the ballet. It has nothing to do with the story and they are only on the stage for about 20 seconds but everyone loves it. Her brother and a special friend attended with us and all three of them sat in rapt attention through the performance. Tchaikovsky has such a universal appeal.

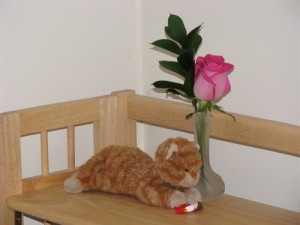
IMG_6274

The girl cleared the top shelf of her bookcase of all its usual oddments and carefully arranged this sweet vignette. I had to snap a picture of it. The rose her daddy gave her after her performance in the Nutcracker, her well-loved kitty, given to her by her Nana, and Abby, her little Lego girl that I handpicked the pieces for and assembled to look like her.

Tags: , , , ,

Have you noticed? I seem to have this mild obsession with lower life forms. Mushrooms, mosses, etc.

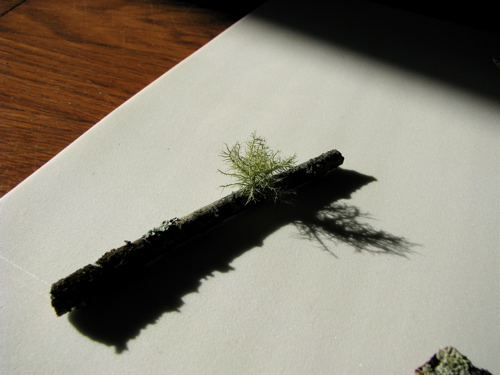
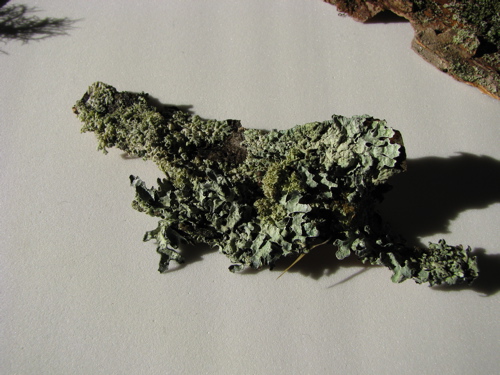
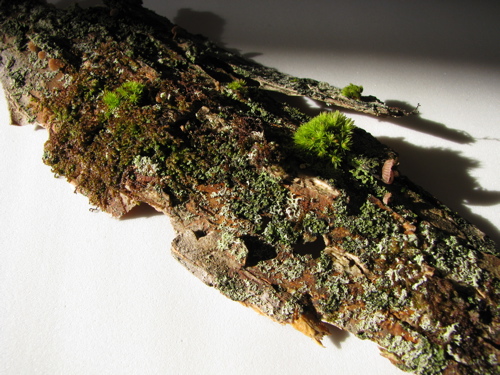
There is a tree on the back line of our lot that has probably been dead for some time. A storm last week brought down an upper branch, dry enough to crack into hundreds of pieces, shedding bark and twigs nearly to the street. But among those pieces I found an amazing world. Perfect tiny mushrooms only 2 or 3 millimeters across. Delicate, lightest green reindeer moss. Curling gray-green lichens, lush green mosses, creeping brown moss, things I don’t even know the name of. But all living—thriving on the dead wood.

reindeer moss on bark from a dead tree

lichens growing on fallen bark

moss, lichen and tiny mushrooms on tree bark

Tags:

If you have small children and you’ve watched the Wonder Pets too many times I have now gifted you with that song stuck in your head. You’re welcome. At least I’m giving you a cute image to go with it, yes?

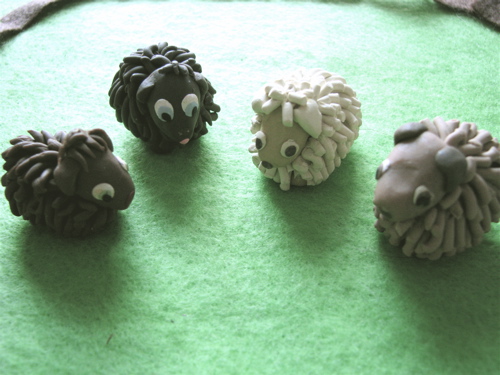
polymer clay sheep

The boy helped me make these little polymer clay sheep (about 1 to 1.25 inches long) for a game we played to go with a lesson at church. I made a felt pasture with a gated fence and a pool of water, there were also two different colors of felt stepping stones which the kids could arrange and rearrange into paths. A cliff and a little lion puppet provided dangerous distractions from the goal of following the shepherd’s voice to reach the pasture. We played it similar to “Simon Says” but instead I would say “The Shepherd Says” because sheep will only listen and follow their own shepherd, did you know that?

The game, and the sheep, met with giggling approval from the K-1 kids at church but I realized that with a few tweaks the game could be improved so that they could play it themselves. I haven’t quite worked out the mechanics of the game but my friend Jan made some suggestions similar to Candyland which would make it easier and more fun. When I work that out I’ll show you the improved game board.

The kids named the sheep Chocolate, Coffee, Vanilla and Cinnamon (left to right). There are no purely black or white sheep because we are running out of Sculpey but you can always mix whatever you have to make shades of brown!

Tags: , ,