paper crafting

You are currently browsing articles tagged paper crafting.

One night the girl asked me how paper is made. Being a graphic designer, I actually learned about this in school and was able to give her a pretty thorough explanation which she was surprisingly attentive to. She then asked if we could make paper at home. Hmmm . . . Well, we can’t start with wood pulp and cotton or linen rags but we can recycle used paper into new paper. Many people don’t know this but the paper industry has been recycling it’s own waste since long before it was environmentally fashionable.

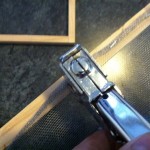
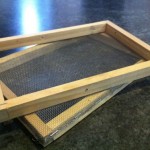
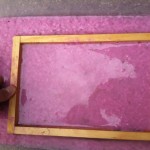
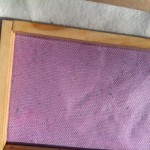
So the next day I started scouring the house for materials. I built a mold and deckle from some half inch wood trim and old window screen left over from other projects. I made it a little bigger than a half sheet of paper.

tools and supplies to build mold and deckle for papermaking stapling the screen on the frame to make paper hand made mould and deckle for making paper

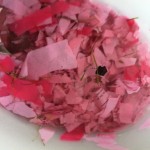
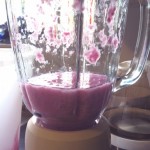
The kids bring home so many papers from school and I keep anything that is blank on one side in a scrap pile with the other art supplies. We went through a pile of mostly copier paper and pulled out all the pink sheets we could find. The girl and a friend tore up the paper into one inch size pieces, dropping them into a bucket of water which we allowed to sit out overnight to soften the paper so that it would be easier for my blender to chop up. The blender chopped up the pieces into slurry that looked rather like a pink milkshake. With the occasional piece of grass. . .

torn up used copier paper soaking in water for papermaking tear up scrap paper and shred in the blender to make your own paper pink copier paper turned into slurry to make handmade paper

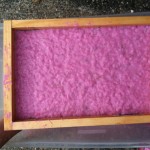
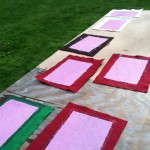
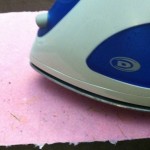
I poured the slurry into a rectangular plastic bin several inches larger than the mold and added water to make the slurry thinner. I put the mould on top of the deckle and the kids took turns slipping it into the water and watching the bits of fibers swirl around and settle onto the screen as they pulled it back up. After gently removing the mold, I laid a piece of felt on the wet paper, gently patted it to squeeze some water out, and then tipped the whole thing upside down onto a flat surface. I tapped the deckle a bit to get the paper to separate and left each sheet to dry in the sun. Wool felt would probably work better since it’s much more absorbent but I used cheap acrylic felt and it seemed to work fine. I admit to getting impatient and ironing the paper to dry the pieces. This also helped flatten the paper. When the paper is dry it will peel off the felt quite easily.

making paper by hand mould and deckle with freshly pulled wet paper handmade new piece of handmade paper still wet

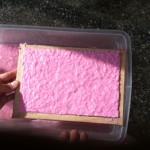
making handmade paper sheets of handmade paper drying in the sun IMG_0277

Our finished papers.
The girl proudly took several pieces to her teacher to show her exactly what we had done with her homework pages!

sheets of handmade pink paper recycled from used copier paper scraps

Click any of the thumbnails to view a larger picture. I included a lot of pictures because there were some parts of the process that I had a hard time finding clear pictures of. We are currently making a batch of blue paper. I’m going to count how many pieces we can make to see what the ratio is of old paper to new paper.

Here is a link that gives much more detailed instructions than mine as well as some interesting history about papermaking.

Tags:

I guess they missed me. : )

A few pictures of things we’ve done over the last few months.

For Valentine’s Day we made corner bookmarks like this lighthouse one I made for our dear neighbor E. I cut 2.5 inch corners off of envelopes (red ones left over from Christmas cards were especially useful) and then attached 2 inch triangles of a different color or patterned paper to each side. The kids had fun mixing up colors and decorating with stamps, stickers and cut-outs from magazines and catalogs. We found the nursery/seed catalogs and the quilting fabric catalogs to be gold mines for this activity. You can find instructions for a similar corner page marker here at Tally’s Treasury.

lighthouse collage corner page marker bookmark

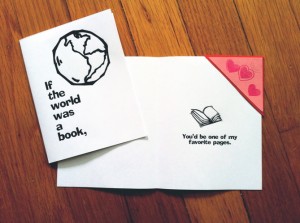
Then we stuck the bookmarks into these Valentine cards. I think I made up this sentiment myself, but it’s possible I heard it somewhere. In any case I found some free clip art online and made this card. I printed out enough copies for all the students in both of the kids classes and they colored and decorated as desired, making each one special for the recipient.

all occasion card for readers books world bookmark earth

I’m including links to the printable pdf version here if you’d like to use it, just print on cardstock or regular paper, fold in half and in half again. original Valentine’s Card. And the write-your-own-occasion card pictured above.

knitting a tapered skinny scarf with novelty yarn

I knit several skinny scarves out of novelty yarn. This is the sort of yarn that looks pretty or fun but you really don’t know what to do with, or at least I don’t. But I finally figured something out that is easy to make and looks good. With extra large needles, I knit loose garter stitch scarves about 3″ wide with a single ball of novelty yarn, about 75 yards, for a long accessory scarf that can wrap around the neck and hang down fashionably. These won’t keep you warm at all but they are fun to wear. Rather than making a blunt end I figured out how to increase and decrease to make tapered ends that give a little extra finishing touch. My construction notes are on my project page in Ravelry.

hand knit skinny scarf with tapered ends novelty yarn

rock candy crystals homemade kitchen science

The subject of gems and crystals came up and on the way to explaining how crystals grow, I decided we needed to do an experiment. This falls under the category of what I call kitchen science—real experiments you can do with stuff you already have around the house. Even though I know I’ve done this before, it took two tries to produce a sugar solution that grew several of these rock candy sticks. I used the instructions from About.com. Our crystals did not retain either the flavoring or coloring that we added to the solution. Nobody complained when it came time to eat them.

smashed pansy bookmark flower ink

I cannot remember why we did this but we had fun. The girl and I picked pansies out of the garden to make some smashed flower art. The colored juices from the plant are transferred to soft paper by force. I used some bookmark sized pieces of heavy paper left over from another project. We used a regular hammer, sandwiching the flower face down on the paper between a piece of paper towel on top and wax paper on the bottom, on top of a scrap piece of wood. I cut the green fleshy calyx off the pansy with sharp scissors after positioning it on the paper. You could use this technique to make cards, placecards for a summer meal, or even art to frame. Get more details on how to make prints from botanicals from this great post by Wendy of Build/Craft/Make/Bake. Too bad I read her post after we did this project but there is plenty of summer and plenty of blooms yet to try!

Tags: , , , , ,

scrunch painted paper washable markers

This is a super easy project for rainy or sunny days. This can be done by any kid old enough to grab a washable marker! (And not immediately stick it in the mouth.) It’s fast so you can work with several kids at the same time and each can do several pieces and experiment with different techniques and colors.

First scrunch a piece of tissue paper into a ball. (You can experiment with other kinds of white paper, we actually used exam table paper in these pictures. Tracing paper works well too especially for younger kids, because it doesn’t tear as easily as tissue paper.)

Pick out a few colors of washable marker and scribble all over the ball, getting as much color on the outside and in the cracks as possible.

scrunch painting tissue paper

Carefully open your wadded paper ball and smooth it out with your hands. See how the color is now randomly distributed all over the paper? Scrunch it up again and color again using the same colors.

tie dye paper

Open, scrunch and color again. About three times gives a good amount of color. (You can also color the whole ball with one color per scrunching.)

wadded paper dyed with washable markers

You can stop at this point and use a warm iron to flatten out your paper. A smaller piece can simply be glued to a little larger piece of contrast color paper and hung as art. A larger piece can be used as wrapping paper or cut up for other projects. Laminate it and cover a book or a journal.

spray water on scrunch painted paper washable markers

If you want to go one step further . . . take your flattened out paper outside. If it’s raining you can experiment with holding it flat on a cookie sheet for a few seconds or holding it vertically and see what happens to the colors! Don’t keep it out too long or your colors will run away in the rain! Bring it inside to dry. If it’s a sunny day, use a spray bottle filled with plain water to squirt your paper, put some rocks in the corners and let it dry in the sun. This project even works in the snow! Lay your artwork on a cookie sheet and let fat flakes fall on it for a few minutes or throw a loosely packed snow ball and then shake off the excess snow. Water softens the colors for a different look, as seen in the first photo above taken before ironing flat.

Enjoy!

Tags: ,

paper hat worn by cat

Paper hat made in the “French style” according to the boy. He had just finished reading a version of the fairy tale, Puss in Boots, with lots of froofy clothing. Hat modeled patiently by Duke the cat.
plumber's tape and water bottles

I have these small water bottles that don’t leak when they tip over and are just the right size for the kids. Unfortunately with much use the lids no longer screw down tightly. On a crazy whim I pulled out the plumber’s thread seal tape, read the box (it is food-safe), and wrapped a length around the threads of the bottle. I screwed on the lid and tested it out. Super, watertight once more. They’ve been through the dishwasher twice and I haven’t had to replace the tape yet. I think they’ll make it through the rest of the summer.

hand knitted lunch bag

I knit this “lunch sack” from a pattern I found on Ravelry. The pattern was written to be knit flat and then sewed up after. Although I don’t mind sewing, one of the things I like about knitting is the ability to create shaping without having to sew seams. So with a little math I converted the pattern to knit in the round, preserving as much of the original details as I could. It turned out pretty well although it is a little too stretchy to hold a full water bottle and a piece of fruit. But it would be just fine for a sandwich and a snack.

Tags: , , ,

Coming soon to a dinner table near you . . .

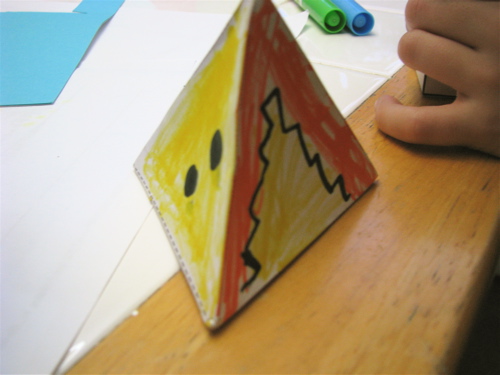
The boy has been studying geometric solids in school and brought home a tetrahedron pattern (like a pyramid with a triangle base). We glued it to cardstock and then glued it together. He colored one, two and three dots on three of the sides and a set of scary teeth on the last side.

grabbermouth tetrahedron die

Then he made up a game, Grabbermouth, to play with his pyramid shaped die. Simple and surprisingly fun! Each player rolls the die in turn hoping to be the first to add dots to equal six. If the “grabbermouth” lands face down you lose all your points. This was easier for the girl using tokens so she didn’t forget how many points she had. He then set to making a similar die with a cardstock cube.

cardstock paper cube and tetrahedron pyramid

The rules for Double Grabbermouth got a bit more complicated. I was impressed with his creative use of the shapes and his ability to create the rules to a new game that probably owed a bit of inspiration to the dreidel game but certainly has its own character.

Links are included to templates from Zoomschool so you can make your own geometric solid shapes from paper.

Tags: ,

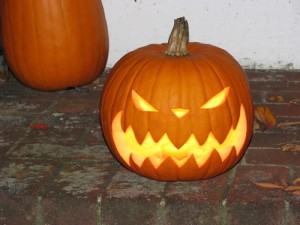
Rich and I have often used the traditional Halloween pumpkin carving activity as an opportunity to do a messy art project. As graphic designers, much of our work is often done on the computer, so it’s nice to have a reason to create something tangible (if fleeting) with our hands. We’ve carved bats and cats and spiders. We’ve hacked pumpkins in homage to Batman, Jiji of Kiki’s Delivery Service, and some other characters I can’t remember.

This year we were in the mood for a little Nightmare Before Christmas. Rich recreated the likeness of Jack, the Pumpkin King.
halloween jack o' lantern Jack Skellington Nightmare before Christmas jack skellington jack o' lantern Pumpkin King

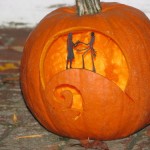
I chose to portray a tender moment between Jack and Sally in scherenschnitte. I carved the hill out of the pumpkin so the glow of the candle would illuminate the full moon. I then snipped the silhouettes out of black cardstock and mounted them to the pumpkin with thumbtacks. I’m pleased with the juxtaposition of the delicate paper cutting against the chunky carved pumpkin.

Nightmare Before Christmas Jack and Sally scherenschnitte pumpkin paper silhouettes in jack o' lantern Nightmare before Christmas pumpkin

Tags:

This post is for you, ArTchrJan.

rag rolled hair curls

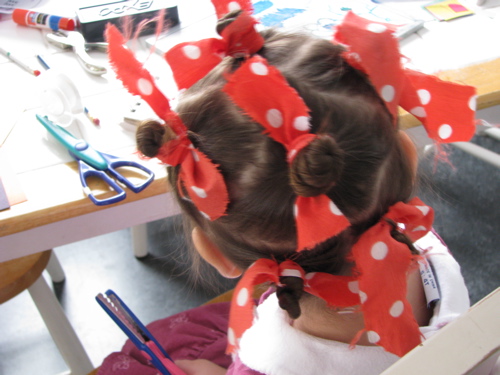
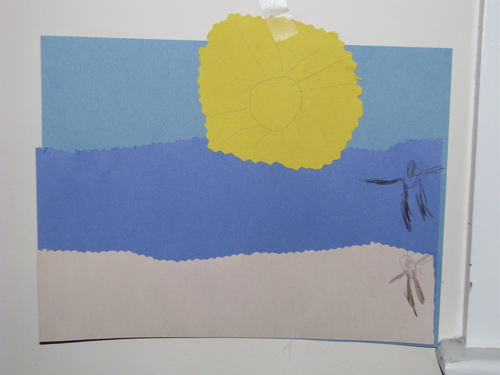
Okay, this is actually the back of the girl’s head while she is working on the project to follow. She asked for curly hair so I put her hair up in rag rolls, too cute huh? Anyway, here’s her beach scene collage cut with the “special” scissors. We have an assortment of scissors with different edges like waves, scallops, etc. That’s a person on the beach and a sea monster in the water.

construction paper collage

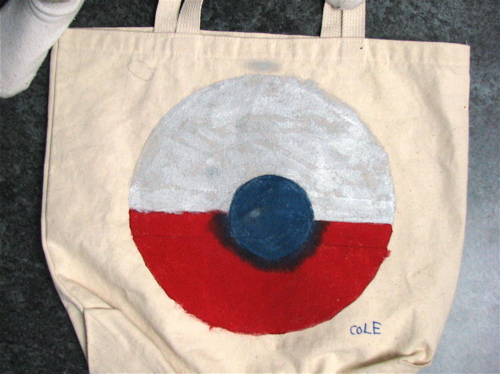
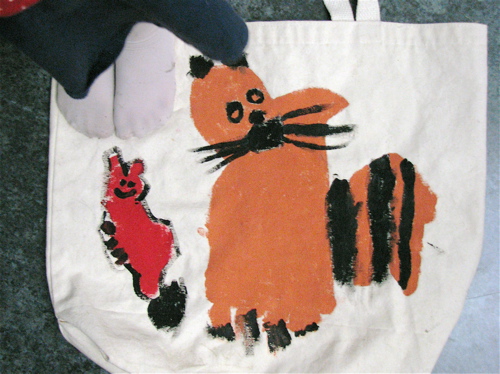
Friday the boy brought one of our plain canvas bags to me and asked to paint it. The girl immediately wanted to paint too of course. As usual, I requested they make a sketch first. Otherwise the girl is apt to just scribble. Here are the results, including the feet of the artists; a Pokémon ball (or so I was told) and a tiger cat with red rat. And now we have a one-of-a-kind library bag! I think I’ll request they paint some others.

pokemon ball painted on canvas bag

tiger cat and red rat painted on canvas bag

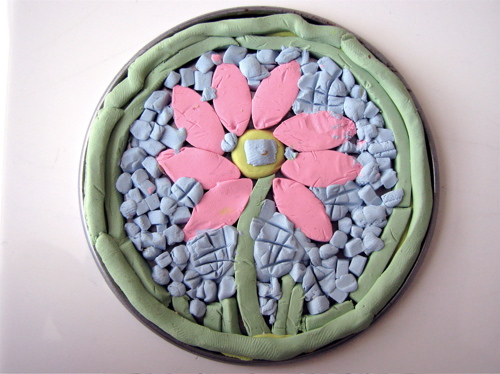
And this project is a little older, maybe a week or two ago. the girl and I made this juice can lid mosaic out of Sculpey. Actually she did most of it, rolling the clay through the pasta machine and cutting out the shapes with canapé cutters, I just helped fill in the blue background and worked the oven.

polymer clay sculpey mosaic flower on juice can lid

Tags: , , , ,

IMG_6954
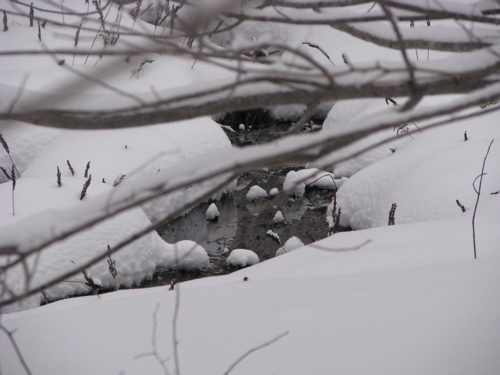
Would you guess this is the drainage ditch that runs through the wooded lot behind our house? Looks pretty in the snow doesn’t it?

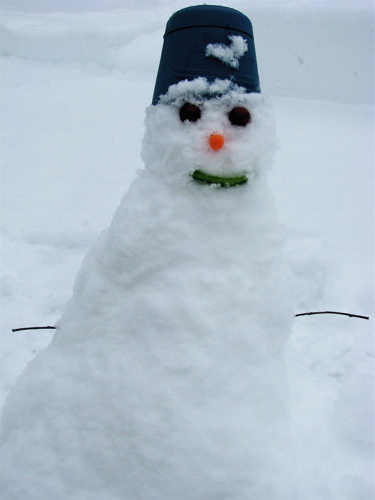
Nice, soft snow and just a bit sticky. We got about 10 inches Sunday night into Monday so it’s not like we really needed more today but it was pretty and fun. Yesterday I took the kids to the big hill in the woods but today we stayed closer to home. First things, the girl and I attempted a snowman. Grapes for eyes, a carrot nose and a green pepper smile. I wonder if some squirrel or bird will be enjoying a little frozen fruit and veggies soon.

snowman with grape eyes, carrot nose and green pepper mouth

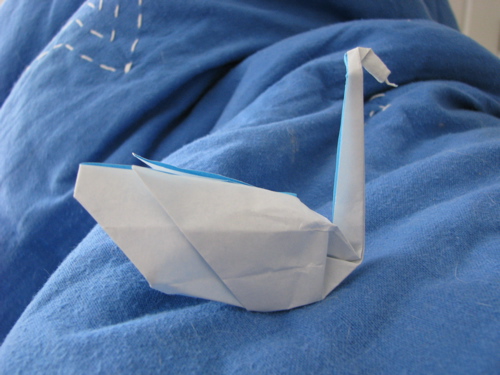
Back inside we were sad to discover that ballet class was cancelled so we consoled ourselves by putting on American Ballet Theatre’s Swan Lake and making origami animals, including a swan of course.

origami swan

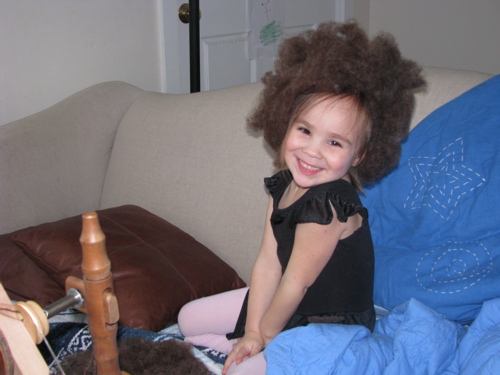
Silliness broke out as I spun brown wool. The girl was giving me handfuls of wool as needed and then decided that I wasn’t moving fast enough for her. She started patting the handfuls of wool on top of her head! Now how do you like that ‘do?

IMG_6926

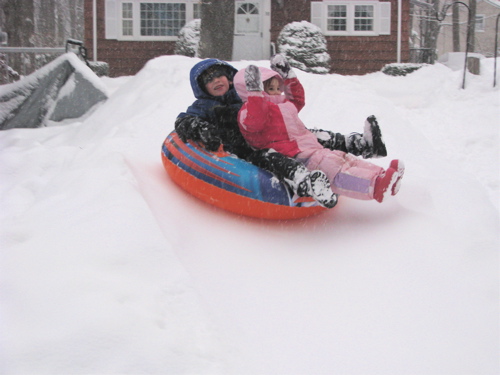
When the boy got home we all decided to take a walk, waving to neighbors and kicking through several inches of new snow. Back at the house the boy went in to get the snow tube and I got the camera. The end of our driveway had a fairly good plow pile left from the last storm and Rich snowblowed even more on top last night making for a pretty good high spot to slide down from into the backyard.

IMG_6957

And just a bit more silliness as we used up the last of the daylight.

IMG_6969

Tags: , , ,

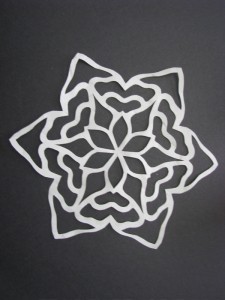
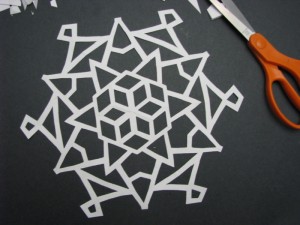
six pointed paper snowflake

I’ve been making these paper snowflakes for as long as I can remember and I never get tired of cutting these pretties. I know that some people are a bit intimidated by the folding required to create the six-pointed shape so this year I decided to make a snowflake folding template that will hopefully make that easier. Then you can get creative about the cutting! All the directions are printed on the pdf with numbered, dotted lines for where you fold. Here are some photos of the process. So if it isn’t snowing where you live, make your own snow!

paper snowflake folding 1 paper snowflake folding 2 paper snowflake folding 3 paper snowflake folding 4 paper snowflake folding 5 paper snowflake cutting example 1 finished paper snowflake 1

You can do this with ordinary copier/printer paper but it is easier to cut if you use something thinner. If you fold precisely then you will find that at step three you have a tiny bit extra sticking out of both sides. This is intentional. It accounts for the thickness of the paper when you make the final fold. Start out by cutting out simple triangles from alternating sides. I like to cut so that the bridges of paper left in between are the same width. After you unfold your creation you can press it in a book or carefully run a warm iron over it to minimize the fold lines.

If you make a paper snowflake you really like, preserve it by laminating it. I use Therm-o-Web Iron-on Vinyl which looks a lot like good old contact paper but is thinner and you seal it in seconds with a warm iron. Just trim around the outside edge with scissors. We like to tape these to a window.

Tags: ,

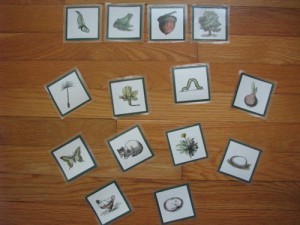
This cut-and-color activity was originally created to accompany a lesson on the parable of the mustard seed (Mark 4:30). I found the wonderful black and white illustrations on an educational site allowing use of the images for personal or educational use. I chose pairs of young and adult animals and plants that have fairly different looking forms.

random-charm's cut-and-color matching game, young and adult animals and plants

I did this activity with several kids ages 4-7 and it was challenging enough to all of them to make and to play. If you are making these with more than one child in the same house, use different colors of cardstock for the backing so that each child will know which set is theirs. You can play at least two different games with these cards and I’m sure they will spark interesting conversations, walks outdoors and field trips! Enjoy!

2 page PDF 5.5 MB download

random-charm's cut-and-color matching game, young and adult animals and plants random-charm's cut-and-color matching game, young and adult animals and plants

Tags: , , , ,

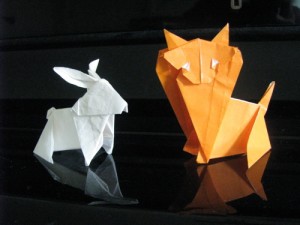
The girl requested that I make some origami animals yesterday so of course I was happy to oblige. I have quite a collection of books and beautiful papers from Japan but oddly enough I generally turn to the solid colors. One side of traditional origami is colored and the other side is left white. Many feature incredible traditional floral and graphic designs. The paper is smooth and crisp and fairly thin. Most craft stores in the States carry origami paper now but when I was a kid I hoarded the beautiful packages I received from my family in Japan.

None of these models are particularly traditional. The rabbit and the cat belong to what is sometimes referred to as modern creative. They are more realistic than traditional models but also more difficult.

origami rabbit and cat

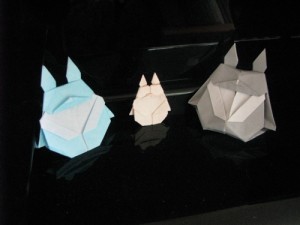
I found the instructions online for the three Totoro figures. Totoro are forest spirits from the agelessly appealing animated film My Neighbor Totoro by Studio Ghibli’s Hayao Miyazaki. The English version is a favorite in our house.

origami totoro

Tags: ,

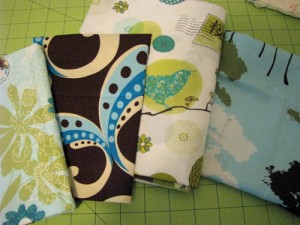
avocado green, light blue, white, dark brown fabric prints

I’m gearing up to decorate my “studio” and I’ve chosen a palette of colors. The walls are a very pale butter yellow which I will keep. I think I’ll be using these fabrics as accents. They have similar avocado-y green tones, light blues with a hint of aqua and dark browns. I have some dark brown and blue canvas as solids and a great deal of the trees on blue print. That one may get used for curtains. Anyway, spur of the moment I decided to use a bit of one of those remnants to make something pretty.

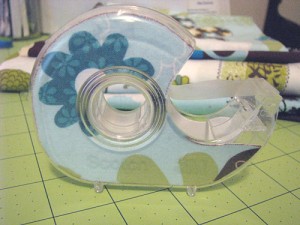
make your own insert for refillable tape dispenser

Here’s my “new” refillable tape dispenser. I simply removed the paper label from the inside and used it as a template to cut out cardstock-backed fabric inserts. You could also use any pretty paper you might have. It’s really quite simple but here’s a tutorial if you’d like a little more direction. I’m practicing making tutorials. :)

Tags: , , ,

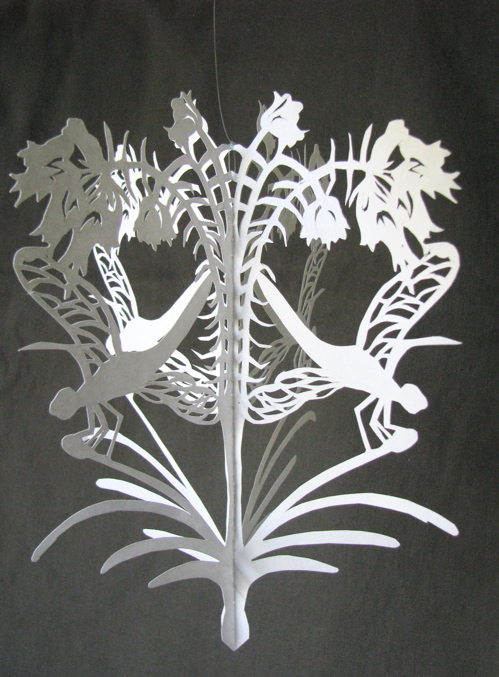
3D dragonfly scherenschitte by snippety gibbet

This incredible three dimensional scherenschnitte dragonfly arrived in the mail yesterday from Snippety Gibbet. Jan is an elementary art teacher (brave soul!) and a fearless explorer of art and cycling. I connected with her recently when I was working on my first scherenschnitte piece for the boy’s school show program. I’m going to have to find a special place to hang this in our house full of varieties-of-white walls. Astute of her to pick up on my fondness for dragonflies. Thanks Jan!
Tags:

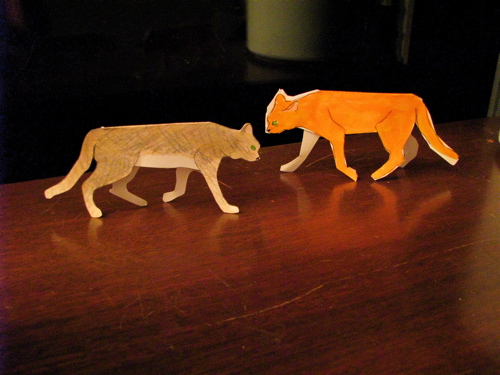
paper cats 3D three dimensional

It’s a bit of a story how I ended up doing this particular cut-and-color. I was making paper mouse and cat puppets on popsicle sticks at the urging of the boy who has been studying and creating fairy tale puppet shows in school. The puppets he had brought home were all colored on one side only but I thought it would be nice to have both sides of the mice colored so I cut the teardrop body on the fold so that I could enclose the popsicle stick. While the boy was busy coloring the simple mice and pasting on the tails and ears, I went to work on the cat. It wasn’t so easy to make a good cat shape that would fold over the stick in the same way. But the attempt set the wheels in my head turning.

Later I googled images of hunting cats until I found several with their backs straight and heads and tails down. This allowed me to place the spine of the cat on the fold of the paper. It then occurred to me that I could make the legs on each side of the cat different for a more realistic pose. This was a bit tricky but I think it turned out rather well. By creasing the spine and then gluing just the head and tail, your hunting cat will stand up on its own with a bit of a three dimensional look. I could probably carry that idea further but I’ll leave that for another time. I knew this one was a more difficult cut so I asked a nine year old friend to give it a try. He made the larger orange cat and I made the tan cat. As usual, the pdf pattern is best printed out on cardstock but will work with regular paper.

Tags: ,

img_3706
A little lamb for you my friends.

Tags: ,

« Older entries