free patterns

You are currently browsing the archive for the free patterns category.

Coming soon to a dinner table near you . . .

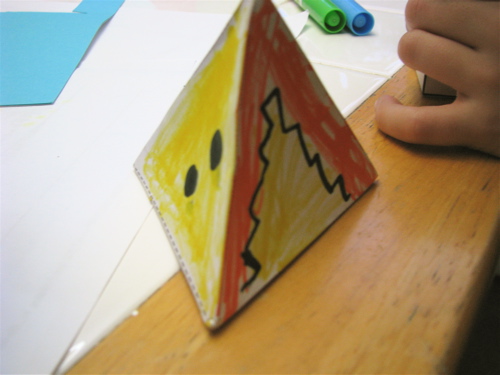
The boy has been studying geometric solids in school and brought home a tetrahedron pattern (like a pyramid with a triangle base). We glued it to cardstock and then glued it together. He colored one, two and three dots on three of the sides and a set of scary teeth on the last side.

grabbermouth tetrahedron die

Then he made up a game, Grabbermouth, to play with his pyramid shaped die. Simple and surprisingly fun! Each player rolls the die in turn hoping to be the first to add dots to equal six. If the “grabbermouth” lands face down you lose all your points. This was easier for the girl using tokens so she didn’t forget how many points she had. He then set to making a similar die with a cardstock cube.

cardstock paper cube and tetrahedron pyramid

The rules for Double Grabbermouth got a bit more complicated. I was impressed with his creative use of the shapes and his ability to create the rules to a new game that probably owed a bit of inspiration to the dreidel game but certainly has its own character.

Links are included to templates from Zoomschool so you can make your own geometric solid shapes from paper.

Tags: ,

I haven’t been posting so much lately. I’m not really sure why. I thought I would have more time to myself with the girl in afternoon kindergarten. It doesn’t seem to have worked out that way. But I suppose I have been able to volunteer at both of the schools.

Various photos:

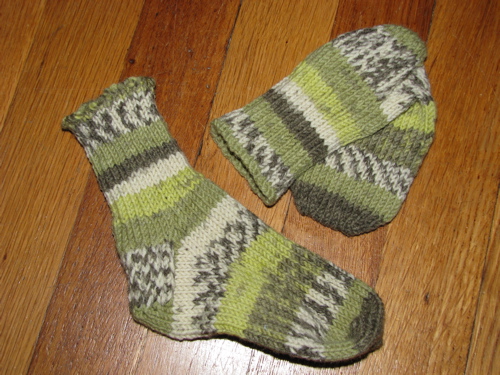
socks handknit from self-striping yarn

This is the second pair out of the same ball of self-striping yarn. Matching socks for the boy and his sister.

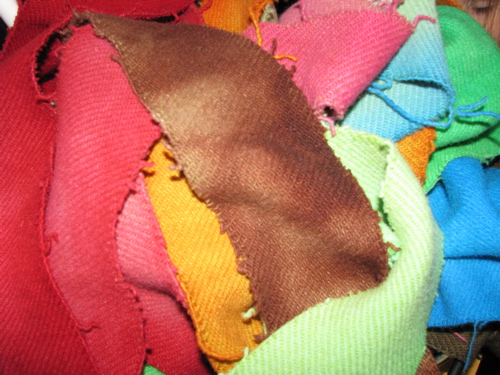
dyed wool blanket remnants scraps

These are scraps of an old wool blend blanket that the boy and I dyed various colors. It was originally a light green and the boy had a great time seeing what would happen when we overdyed with various colors. It took the dye fairly well but unfortunately it did not felt well. That may change the intended use.

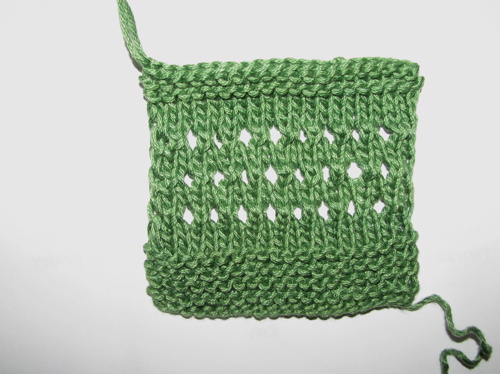
swatch of eyelet lace border

Swatch of eyelet lace border that I originally improvised for the strangling vine lace scarf. Someone on Ravelry saw my project photos and asked about the border. I had already gifted the scarf so I had to look at the photos to try and figure out what I had done. I hope I got it right. Although the pattern is quite simple, I have a hard time remembering to stop and write down what I am doing. Probably why I didn’t write it down in the first place. So my Ravelry notes for this are now out there and I really hope there aren’t any mistakes for the sake of anyone who may try to knit from them.

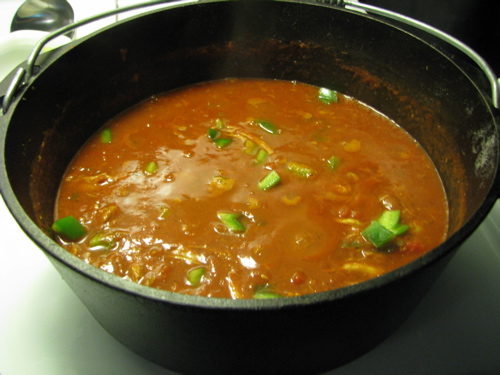
homemade chili in iron pot

This one because you need a food photo don’t you? Recently I have made chili with pulled chicken instead of beef in it and I like it very much. I use poached chicken thighs and pull the meat apart with two forks. And I always put the diced green pepper in just before serving so they stay nicely crunchy.

Tags: ,

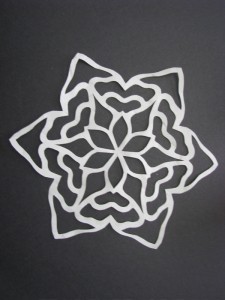
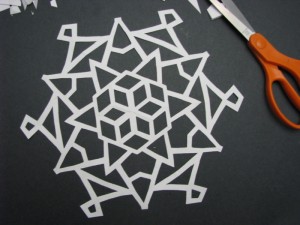
six pointed paper snowflake

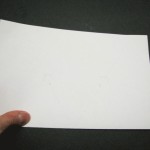
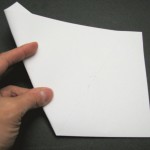
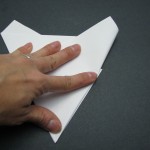
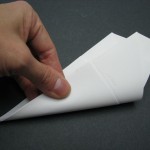
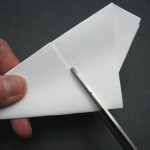
I’ve been making these paper snowflakes for as long as I can remember and I never get tired of cutting these pretties. I know that some people are a bit intimidated by the folding required to create the six-pointed shape so this year I decided to make a snowflake folding template that will hopefully make that easier. Then you can get creative about the cutting! All the directions are printed on the pdf with numbered, dotted lines for where you fold. Here are some photos of the process. So if it isn’t snowing where you live, make your own snow!

paper snowflake folding 1 paper snowflake folding 2 paper snowflake folding 3 paper snowflake folding 4 paper snowflake folding 5 paper snowflake cutting example 1 finished paper snowflake 1

You can do this with ordinary copier/printer paper but it is easier to cut if you use something thinner. If you fold precisely then you will find that at step three you have a tiny bit extra sticking out of both sides. This is intentional. It accounts for the thickness of the paper when you make the final fold. Start out by cutting out simple triangles from alternating sides. I like to cut so that the bridges of paper left in between are the same width. After you unfold your creation you can press it in a book or carefully run a warm iron over it to minimize the fold lines.

If you make a paper snowflake you really like, preserve it by laminating it. I use Therm-o-Web Iron-on Vinyl which looks a lot like good old contact paper but is thinner and you seal it in seconds with a warm iron. Just trim around the outside edge with scissors. We like to tape these to a window.

Tags: ,

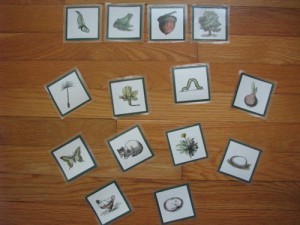
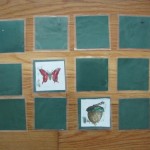
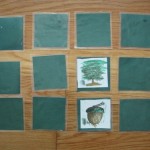
This cut-and-color activity was originally created to accompany a lesson on the parable of the mustard seed (Mark 4:30). I found the wonderful black and white illustrations on an educational site allowing use of the images for personal or educational use. I chose pairs of young and adult animals and plants that have fairly different looking forms.

random-charm's cut-and-color matching game, young and adult animals and plants

I did this activity with several kids ages 4-7 and it was challenging enough to all of them to make and to play. If you are making these with more than one child in the same house, use different colors of cardstock for the backing so that each child will know which set is theirs. You can play at least two different games with these cards and I’m sure they will spark interesting conversations, walks outdoors and field trips! Enjoy!

2 page PDF 5.5 MB download

random-charm's cut-and-color matching game, young and adult animals and plants random-charm's cut-and-color matching game, young and adult animals and plants

Tags: , , , ,

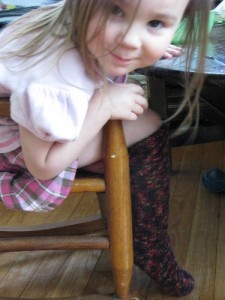
first handknitted spiral socks

Actually they’ve been done for a while but this is the best picture I’ve been able to get since the girl appropriated them. She wears them constantly but has been rather coy about allowing me to take a picture. And they look positively silly without feet in them. The pattern is free from from Vintage Purls. I did make a number of modifications (see my project notes on Ravelry if you are really interested in making this sock for children) for size and just because I can’t follow directions to the letter even if I’m doing something for the first time. It’s a disease I’m sure.

Tags: ,

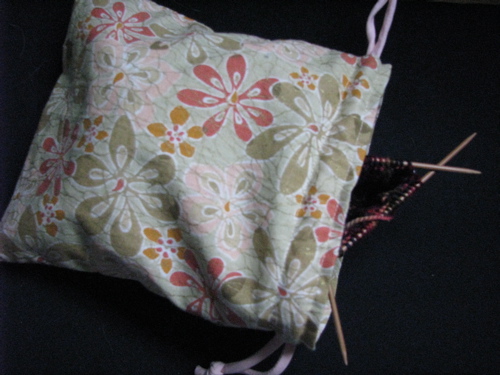
self lined drawstring bag with knitting project
This is the shoe bag tutorial I promised a long time ago. I realized that although I first made it as a shoe bag, it really could be used for anything. Here I have one just the right size for holding a ball of sock yarn, and the sock-in-progress itself. I can pull the knitting out, pull the drawstrings onto my wrist and knit and walk at the same time. It’s sad, just goes to show how suddenly obsessed I am with knitting.

This self-lined drawstring bag is a great way to use pretty remnants of any lightweight fabric. It makes up easily in quilter’s cottons, flannel, satin or velvet, even a salvaged length from a favorite garment. You can piece your fabric to make up enough length or to have a contrast lining. You can even add pockets to the inside or outside before making the bag for even more versatility. A shoestring, ribbon, twill tape, cord or what-have-you can be be used as the drawstring. These make great gift bags especially in smaller sizes and can also be made as a purse for a young girl or a treasure bag for boys. Make one to hold the pieces of a game whose cardboard box is disintegrating. Custom size bags to store craft tools or projects, lingerie or shoes. There are no raw edges, no handsewing and the bag can be used inside out as well.

There is no pattern. It’s just a rectangle, you choose the size for your application. Grab some favorite remnants and the tutorial and make some cute bags. And if you use this pattern, e-mail me a picture of your bag! I’d love to see what you come up with.

Tags: ,

img_3847Phew. That was harder than I expected. But since I intend on doing more patterns and tutorials this was good practice. If you sew at all I would greatly appreciate it if you would take a look at this and see if it all make sense. I’m sure there are some problems, hopefully nothing major, but please let me know if you find anything that is confusing or wrong. I didn’t want to leave anything out but at the same time I didn’t want it to be 7 pages long either. It’s really easier than it looks. So get the pdf pattern and the pdf tutorial (3.9MB), a yard each of two great prints, 5.5 yards of bias tape and make yourself a fun spring bag!

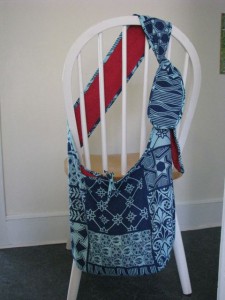
bias trimmed slouch bag with tie straps

PS. Included in the tutorial are instructions on how to join bias tape into a loop which would be useful for lots of other projects such as pillow covers, quilts of course, potholders, etc.

Tags:

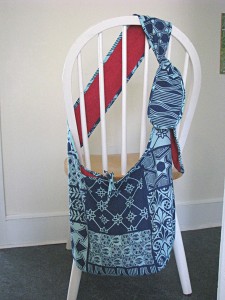
slouch bag with tie strap

JenP’s teenage daughter saw a hobo style bag in a store and loved the shape but not the fabric. A search for a similar pattern came up empty. Since I love to make patterns I volunteered to draft a pattern based on a picture. Yeah, I like to go off on tangents like that.

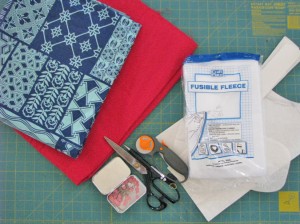
Since I wasn’t making the bag for anyone in particular I just pulled fabric out of my stash. I got this turquoise Israeli fabric in a trade, I’ve always thought it was interesting but I didn’t know what to do with it. I figured it would look pretty good on a big bag. I had pulled the lipstick red out as a lining for another possible fabric and decided to use the combination as it brought to mind some recent pictures I’d seen of a room decorated in these colors and a fantastic quilt by CocoaDreams. It’s a total departure for me!

It didn’t take me too long to draft the pattern. It requires 3/4 to 1 yard of the outer print, 3/4 of the lining, 5 yards of bias tape and about two or three hours. Also a small piece of stabilizer of some sort for the base, I used fusible fleece but craft foam would work as well. Mine is made of quilting cotton so it is really lightweight. It’s huge and could easily work as a diaper bag, beach bag, anything. I took pictures along the way so that I can make a tutorial to go along with the pattern which I digitized after I finished the bag. Details: two inner patch pockets, wide tie straps, oval bottom, bias bound straps and top edge, single snap closure and two decorative ties. I wish I had some big red beads to put on the ends of those . . . And guess what? All machine sewing and totally reversible!
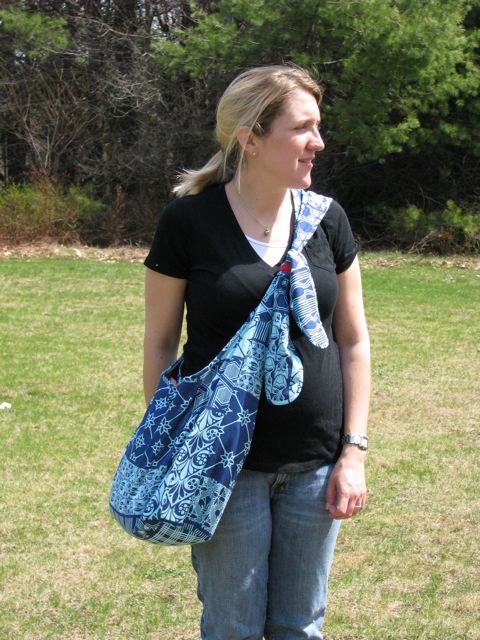
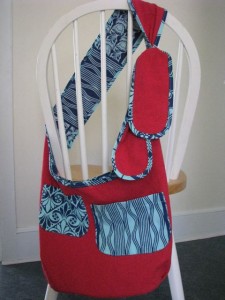
slouch bag reversible slouch bag in turquoise and red

I’m not sure how to post the tutorial as it’s quite a lot of pictures for which I have yet to write the accompanying text. It’s all there in my head. So as soon as I figure that out I’ll post the tute and pdf pattern.

I almost forgot. I pulled an AmyDawn to get the photo! The lovely model is a playground aquaintance, not quite a total stranger but almost. I met her about a week ago when she was at the playground with a friend of hers who is the mother of one of the boy’s classmates. Did you get all that? We happened to be the only ones at the same playground again today and she graciously agreed to model the bag for me, isn’t she cute?

Tags: ,

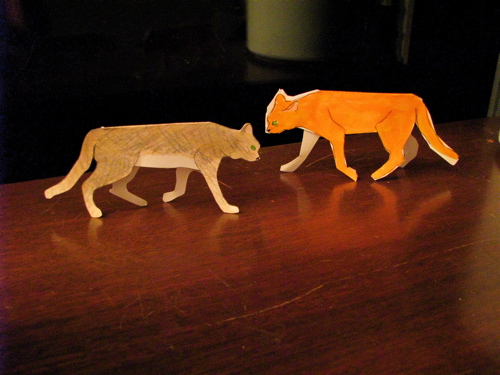
paper cats 3D three dimensional

It’s a bit of a story how I ended up doing this particular cut-and-color. I was making paper mouse and cat puppets on popsicle sticks at the urging of the boy who has been studying and creating fairy tale puppet shows in school. The puppets he had brought home were all colored on one side only but I thought it would be nice to have both sides of the mice colored so I cut the teardrop body on the fold so that I could enclose the popsicle stick. While the boy was busy coloring the simple mice and pasting on the tails and ears, I went to work on the cat. It wasn’t so easy to make a good cat shape that would fold over the stick in the same way. But the attempt set the wheels in my head turning.

Later I googled images of hunting cats until I found several with their backs straight and heads and tails down. This allowed me to place the spine of the cat on the fold of the paper. It then occurred to me that I could make the legs on each side of the cat different for a more realistic pose. This was a bit tricky but I think it turned out rather well. By creasing the spine and then gluing just the head and tail, your hunting cat will stand up on its own with a bit of a three dimensional look. I could probably carry that idea further but I’ll leave that for another time. I knew this one was a more difficult cut so I asked a nine year old friend to give it a try. He made the larger orange cat and I made the tan cat. As usual, the pdf pattern is best printed out on cardstock but will work with regular paper.

Tags: ,

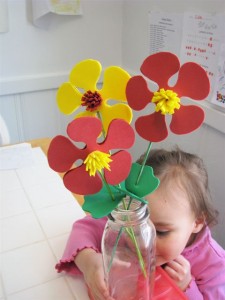
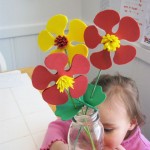
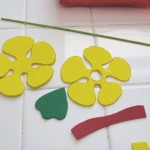
craft foam flowers

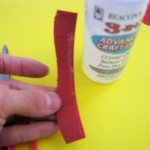
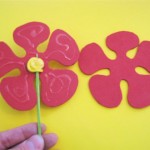
I really can’t draw but I’m trying to learn. Having two kids who want me to draw something fast with fat crayons really helps. You can’t think too much you just have to draw something that has the simplest relevant details. I always draw the same sort of flowers, large round center with five round petals crowding around the center. It’s taken me about three years to get the petals all about the same size and shape. Today when the girl asked to make flowers I almost drew those same old flowers. Then I decided it was time to try something different. Without looking at anything I took a pen and drew on some craft foam (yeah that stuff I don’t really care for). Admittedly I had to sketch it several times before I had a decent shape I could cut out but it’s totally different! Almost modern looking. I also attempted a different leaf shape than my standard teardrop. Here are a few pictures to illustrate the process of making the flowers less two dimensional. I’m also including a printable PDF with the patterns and instructions to make your own craft foam flowers or simply print, color and cut on sturdy paper. When I traced the flowers into bezier curves in Freehand, I did my best to retain the loose hand drawn shape of the petals. You’ll notice one of the petals is quite lopsided, almost like a boot shape, makes it easier to line up the mirror images!

PS. I also apologize for the fuzziness of these pictures. I’m trying to work on using natural light because that usually produces truer colors but I was having a hard time getting good focus at the same time.

PPS. A good way to use up those leftover bits of colored paper and craft foam is to cut them into relatively small pieces and use them to make a mosaic on black paper. Kids love this!

Tags: , ,

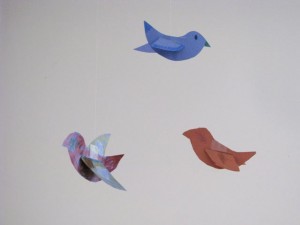
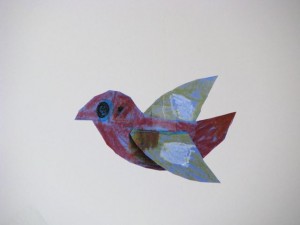
With all the birds chirping outside lately I thought we’d have fun making some birdies for inside the house. Both the girl and the boy were able to cut these out themselves and color them. I cut the slits in the body for them and they put the wings in and then we just hung them with thread taped to the dining room ceiling. Then we admired our handiwork swaying happily.
hanging paper birdscolored paper bird

They enjoyed it so much I thought I’d include a downloadable pdf for you to cut and color your own birdies! The shapes are very simple for easy cutting for little hands. Best printed on a bit heavier paper if you have it. Don’t forget to color both sides. :)

Tags: ,