girl clothes

You are currently browsing articles tagged girl clothes.

Sometimes I get an idea and even though I know it’s crazy, I can’t get it out of my head so I do it anyway. This was one of those ideas. Not only is the skirt of this baby dress made from fabric, the bodice portion is both knit and crocheted. I’m not an expert in either knitting or crochet but I’ve done enough of both that there are certain usages that feel more comfortable in one or the other. So it was easier for me to switch back and forth between knitting and crochet rather than to make the whole bodice in one or the other. I’m not explaining this very well am I? Anyway, I’m pleased with how it turned out and you can see a picture of the dress modeled by the recipient on my Ravelry project page. There are also some more pictures and detailed notes there.

fabric skirt knit crochet bodice baby dress and bloomers

This is sized for 6-12mo. Making baby clothes for a baby you have never seen is always risky business so I poured over clothing measurements and knit and crochet patterns to figure out the right dimensions. I remember that when my girl was that age you didn’t want a dress that was too long because it got in the way of sitting up and crawling. It was also mostly useless to have any dress that didn’t have matching bloomers or tights because by the time you found something to cover the diapered bum that didn’t clash, she’d grown out of the dress. So the matching diaper cover was made from a Simplicity sewing pattern.

back of knit and crocheted dress bodice showing buttonhole straps

I’m rather proud of the little detail I thought of for the straps. I crocheted them with buttonholes along the entire length. The smallish buttons are on the inside of the back of the bodice. This way the straps are fully adjustable and can be worn crossed or uncrossed without looking like overalls. Don’t misunderstand, I love overalls on babies, but the regular overall style closure on the front wouldn’t have been suitable for this dress.

Tags: , , ,

And because I’m obviously behind on posting what I’ve been doing so I might catch up a little faster if I just dump a bunch of pictures into one post. Not as much story but you get the idea.

This is a basket/bag (Ravelry link) knitted in the technique called mosaic knitting which I did for a KAL (knit-a-long). The boy has claimed it for his own. The technique creates a thick two color fabric without the usually gyrations required of colorwork.

mosaic knitting two color basket

I had a black tee-shirt left from the boy’s Ninja costume last year. The boy has always liked owls, but we recently watched the movie Legend of the Guardians: The Owls of Ga’Hoole which refueled the owl interest in our house. I handpainted just the eyes, top of the head, beak and a bit of shoulder to suggest an owl staring out of the darkness. I really like how this turned out.

hand-painted owl in the dark tee shirt

owl face hand-painted on black T-shirt

And another skirt for the girl, recycled out of a pair of my old corduroys. I used the fabric but I only kept the hem and side seams and carefully recycled the back pockets. There are pleats in the front and elastic in the waist. It’s in a longer length as requested. I also used some of the fabric from the pants to lengthen a favorite pair of pine green corduroy pants that still have a lot of room in the waist. No picture of that, oops! but similar to what I did to the boy’s pants here.

hand sewn brown corduroy girl skirt

back patch pocket detail on handmade corduroy girl skirt

And the reason behind all the sewing? Besides the motivation of school starting and cooler weather, I spent about a month and a half knitting a sleeveless sweater for myself that turned out . . . well, about the way I expected but I didn’t care for it at all. Sort of turned me off knitting for a bit. I’ve also been working off and on with a bench the boy and I rescued from the side of the road. One corner was in quite poor shape but the rest of it was well made with good quality hardwood so I decided it was worth some work. I’ve cut mortises and tenons, drilled holes of all sizes and mixed and shaped epoxy type filler and sanded, sanded, sanded. I’m not quite done yet but there will be a post with pictures of the transformation when it’s done, since we have about a month left to enjoy it before it gets too cold for this year.

Tags: , , , , , ,

I think those are the right descriptive words. I’m proud of myself for making quick work of the math it took to make this pattern. I may need to make a few adjustments but it worked out pretty well. And I used up some chambray remnants to achieve the look of denim without the weight. The girl had requested a jeans skirt, but one that she could play in. Since she’s quite the monkey, that meant it had to have lots of room to move in.

rounded yoke, flared circle skirt for girl

Here’s a detail of the waist which I made adjustable by putting elastic in the back and sets of snaps in the front. When she grows past the smallest snap I can cover the one that will show with a brass cap which I think will look fine. It would have been better with buttons but this machine does not make the best buttonholes and I was more interested in getting the skirt finished.

adjustable waist skirt using snaps

I take neither credit nor issue with her choice of accompanying garments and accessories. . .

flared chambray denim jeans skirt

Tags: , ,

swim skirt

The kids are taking two weeks of swim lessons and they needed goggles and a swim cap for the girl. Goggles I can see getting a good bit of use out of and they seemed like a good incentive for the boy who was a little cautious about swimming in a pool. We generally have our summer water fun at the beach.

Frantically looking around the house for a bit of swimsuit material to make a cap from lead me to the little skirt that matches the girl’s swimsuit. I found an adult size swim cap pattern on the internet and sized it down to fit her head. I made myself sew a rough draft from part of an old tee shirt. There was so little fabric in the skirt that I had only one chance to get it right. I even had to undo the seams in order to have enough fabric rather than simply cutting the seams off as I would usually do when repurposing. I managed to eek out the pieces, sewing up the cap using the elastic and lycra waist trim to finish the bottom edge of the cap. The sewing itself turned out to be quite easy and I’m glad I decided to be frugal because I think the matching cap turned out much cuter than anything we could have bought.

Voila, my bathing beauty!

toddler, little girl swim cap

Tags: ,

For a school field trip, the girl’s class was required to dress in orange shirts. The girl’s teacher was less than thrilled and I do have to admit that orange is not a common color in the girl’s wardrobe. The girl does have a tie-dyed orange tee shirt handed down from her brother that she could have worn but . . . I just can’t leave well enough alone.

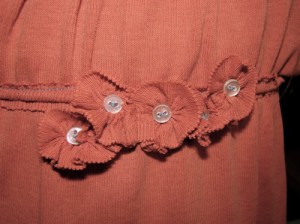
So I took apart a tee shirt of mine in a nice pumpkin pie color. I modified a peasant shirt pattern with a little inspiration from a tee in the girl’s closet featuring raw edges. I had no thread that looked remotely suitable so I pulled out a directly contrasting slate blue and stitched away. I used the neckline trim to create an elastic casing for the neckline and empire waist. Having run out of the round cord I stitched some gathers into the sleeves by hand. I gathered strips cut from leftovers into rosettes and sewed tiny buttons to the centers, placing one on each sleeve gather and a grouping of five off-center on the empire waist. It turned out really cute I think. And the girl loved it.

pumpkin orange raw edge peasant tee

raw edge hand stitched gathered flowers rosettes with button centers

Tags: , , ,

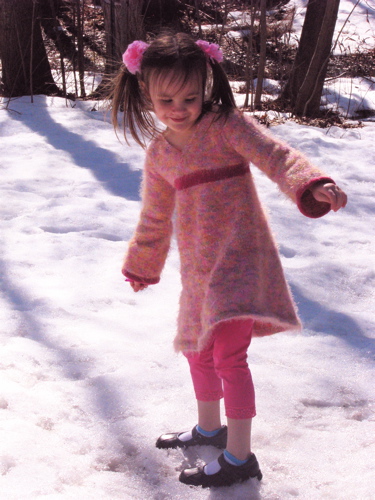
hand-knit pink sweater dress

Over the last month I have been knitting on this project nearly every night after a certain princess went to bed. The free pattern is the Oriental Lily dress by Georgie Hallam and I followed it pretty closely except for using size 3 for the width and size 5/6 for the length. Not only is this the biggest project I’ve knitted but it is has also been one of the most interesting, not because of any detail of the pattern but because of the way in which it came together.

In so many ways this dress (Ravelry project link) was a group effort. Two different members of the Ravelry community gave me the two yarns I knit together for the main color. My dear neighbor E. gave me a huge bag of odds and ends in which was the perfect contrasting berry color. I read through the notes on Ravelry from the other knitters who have made up the pattern before me, allowing me to make the perfect size. When I was done with the bodice but having a mental crisis on whether the dress was hideous or Pinkalicious, so many people on Ravelry responded to my forum post. They gave me the overwhelming support I needed to go on and finish with confidence.

The girl was quite pleased and came bounding into our room this morning full of thanks. She whirled and twirled all day and then proclaimed that she wants to wear it every day, forever!

Tags: , ,

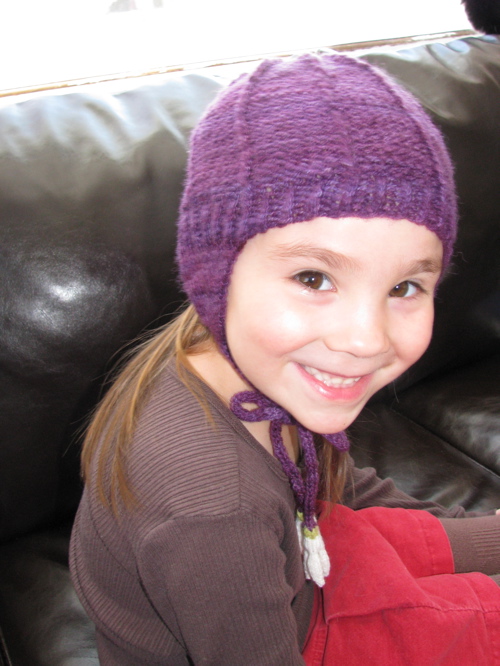
This is the hat I made from that PURPLE yarn. I am enamored with it. I’m usually relatively satisfied with the things I make but this one—this one makes me happy.

hand knit earflap hat handspun hand-dyed yarn

I really, really like how this project (Ravelry link) turned out. Did I already say that? It probably has more mistakes than anything else I’ve knitted but I decided it was more important to keep on and finish it rather than get bogged down in fixing little mistakes and lose my momentum. I made a few minor modifications to the Monarch Lyon Hat by Veronica O’Neil. I used the sizing from another hat pattern by the same author. In the original pattern the earflaps are detachable using buttons but I decided that the girl did not need one more thing to lose since part of the reason I knit this hat is because she has already lost several hats and mittens this winter. I’m wondering what we will find in the spring when the snow melts.

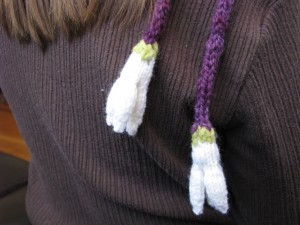
knitted snowdrop flowers

The main modification I made was to integrate knitted snowdrop flowers into the bottom of the i-cord ties. I chose snowdrop flowers since they are a delicate winter/early spring flower and they natural hang down in real life. I used a pattern by Lesley Stanfield from the book 100 Flowers to Knit and Crochet, although I was able to download it from the Lion Brand website for free. It was a bit fiddly but after trying several other flower patterns, this is the one I liked best. I think I’ll have to put this book on my wishlist, I like the variety and realistic look of the flowers in this book. The girl would probably prefer I put all 100 flowers on the same hat but she’ll have to live with my preference for simplicity for now. I guess she likes it, she graciously posed for a number of pictures.

Tags: , , ,

I actually wrote this on Friday but didn’t upload the accompanying picture until today.

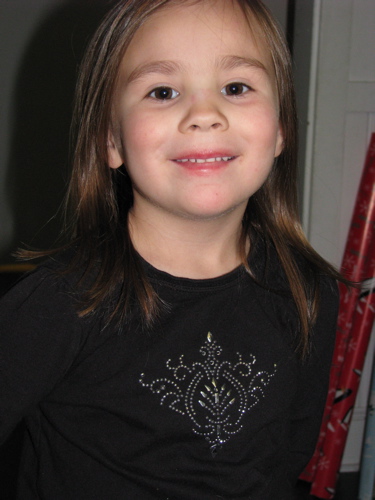
I’m not a bling kind of person. I don’t wear much jewelry, beads, sequins, etc. But the girl likes bling. Apparently it goes well with the passion for pink. So we were passing by the clearance section of the craft store and she spotted some pink name appliqués. Despite the appearance of a number of unusual names, hers was not one of them. Too bad, they were quite cute. Before I could stop myself, I pointed her toward the non-personalized iron on jeweled designs from Jolee’s Jewels. She picked one out with glee and happily carried it to the register. When we arrived home I pulled out an almost new black shirt that I thought would work well. She agreed heartily and we set to work. Although the directions were a little strange it was not hard to do. And the results are admittedly quite pretty.

IMG_8952

I am a little concerned about the durability of the now hand-wash, drip dry tee shirt. In retrospect, I wish I had trudged down to the basement and pulled out the heat press. Later, I confirmed my suspicion with a quick internet search which revealed that the crystals can be heat pressed at 350°, quite a bit higher than the temperature of an average household iron. That’ll have to wait since she wore the shirt to school. Hopefully I can give it an extra pressing tonight.

Tags: ,

Girly Socks

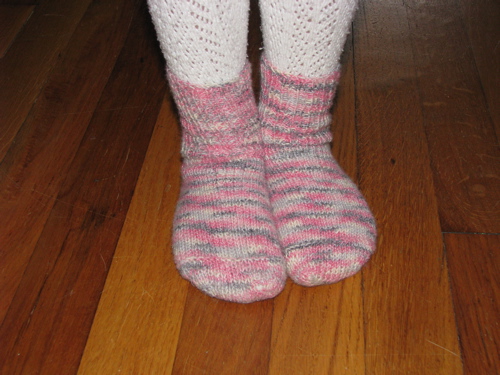
pink gray white hand knit socks

Girly socks. Plain knitting, nicely colored commercial yarn. This is a wool/cotton/nylon/elastic blend from Patons, available in chain stores. We’ll see how it holds up. Quick knit done in short bursts mostly in the car or while waiting for something/someone. It’s getting easier to make plain socks as I go. And I’m glad that I do not apparently suffer from second sock syndrome – the difficulty of finishing the second sock in a pair. Soon I think I’ll be able to make plain socks without consulting my charts and instructions. Next pair is mine.

The girl wore the first sock mismatched as soon as it was off the needles. I finally finished the second sock so she wore them together today over her tights. I only used half the skein so I could either make a pair of mitts, another pair of socks or maybe a doll sweater.

Tags: , ,

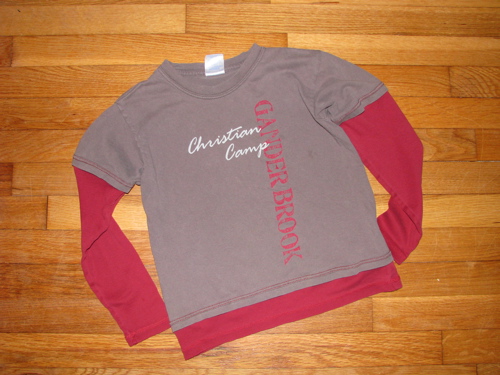
I can’t stand to waste anything, especially a favorite piece of clothing. Here are two cases where I have quickly transformed something old into something “new”.

First rescue:

two tee shirts ready for refashioning tee shirt refashion in progress

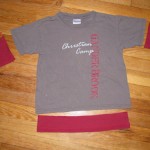
finished tee shirt refashion layered look

I took a favorite tee shirt of the boy’s and winterized it by cutting up an old long sleeve tee shirt of mine in a coordinating color. I cut the sleeves and a few inches of the hem off the long sleeve tee shirt and sewed them onto the boy’s tee shirt with contrast thread using a double needle on the regular sewing machine. The double needle creates a stretchy seam that works well with the knit fabric and contrast thread adds to the purposeful look of the additions. And in this case, I still have enough of the second tee shirt left to make something else.

Second rescue:

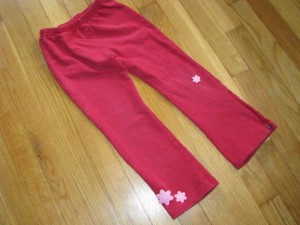
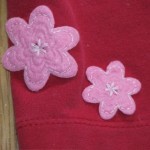
yoga pants embellished with hand stitched felt flowers to cover hole in knee detail of purchased felt flowers handstitched to cover darned hole

These were some cute hand-me-down pants that actually fit the girl’s long legs. Unfortunately they had a hole in the knee. She doesn’t care much for pants but since she liked these I decided it was worth a little work to make them more presentable. On an impulse, I purchased a package of pressed felt flowers. After darning the hole in the knee I hand stitched one flower over the hole. I then added some more flowers to the ankle of the other pants leg for visual balance.

Tags: , ,

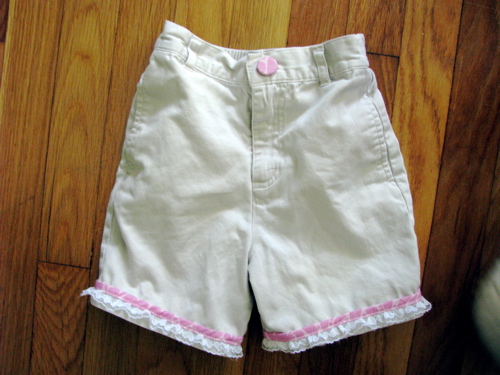
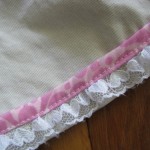
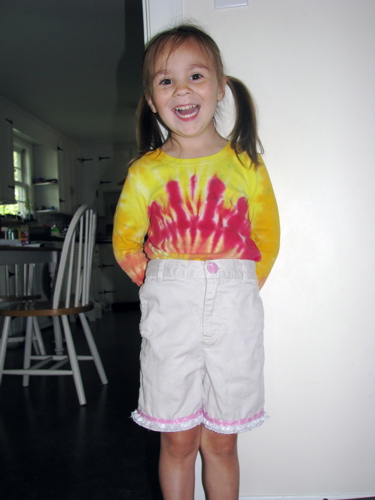
These shorts began life as standard storebought khaki pants for the boy, at some point got cut off into shorts and today got a little girlifying with some graphic pink floral print scraps and some rather scratchy polyester “lace”. I’m fairly certain the fabric is a Jane Sassaman design but I couldn’t identify it positively. I also switched out the old plain buttons for covered buttons using the same pink print.

boys khaki shorts trimmed in pink fabric and lace for a girl

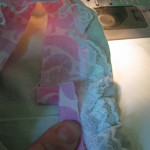
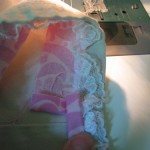
After I did the first side I decided to take pictures so here’s a quick tutorial. For the fabric trim you can use purchased bias trim, or handcut bias or straight grain fabric as I did. I cut mine about one inch wide and a little longer than the distance around the hem of the shorts leg. Cut the lace to the same length. First turn your shorts inside out so you can work on the right side of the fabric more easily. I prefer to offset the seam of the trim a little towards the rear to eliminate extra bulk at the inseam.

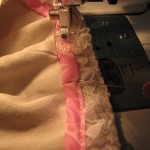
Step 1: Lay the fabric strip face down with the top edge of the lace overlapping the width of your zigzag stitch. Pin as desired. Skipping the first centimeter, zigzag down the overlap until you are nearly back around to the beginning. Trim your fabric and lace to fit under the beginning with a little extra to fold over. Fold the fabric end up but underneath the beginning flap. Fold the lace ends at a right angle with the short ends underneath or towards the right side of the shorts, trimming if necessary. Finish zigzagging.

shorts trim tutorial by random-charm 1/9 shorts trim tutorial by random-charm 2/9 shorts trim tutorial by random-charm 3/9

Step 2:
Fold the left edge of the fabric to meet the edge of the trim and finger press. (Or iron if you prefer.) Then finger press again to conceal the zigzag stitching. (I finger press a little at a time as I stitch.) Topstitch the open edge slowly. When you get to the end you will reach the folded end of the fabric trim. You can sew that little space shut if you choose but I didn’t bother. Your fabric and lace trim is now secure. You may add a decorative line of topstitching to the top edge of the fabric trim if you like.

shorts trim tutorial by random-charm 4/9 shorts trim tutorial by random-charm 5/9 shorts trim tutorial by random-charm 6/9

shorts trim tutorial by random-charm 7/9 shorts trim tutorial by random-charm 8/9 shorts trim tutorial by random-charm 9/9

And the finished shorts modeled rather reluctantly by the girl. Don’t let the grin fool you, her contrariness is barely concealed by her choice of the most unpink shirt she owns. After I took the picture she insisted on wearing the shorts backwards for the rest of the day.

IMG_8083

P.S. Isn’t she getting tall?? I’m telling myself it’s just the picture but . . . the camera doesn’t lie, does it?

Tags: , ,

This is third in a series intended to show the steps from fiber to finished item. You can click on following the fiber under categories to see them all.

The fiber: handpainted blue-faced leicester top in a colorway called “blush” including pinks, peaches and a bit of yellow with some natural white showing through. I received this in a trade so I don’t know who did the handpainting.

handpainted blue-faced leicester BFL spinning wool pink peach yellow

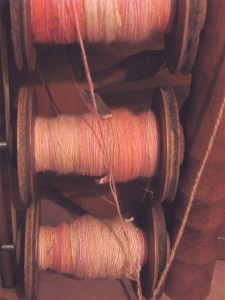
the plies: three singles on the bobbins ready to be spun into yarn

three singles of handpainted BFL ready to be plied into yarn

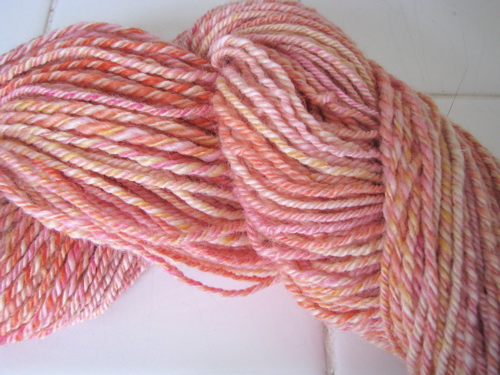
the yarn: three-plied sport weight yarn, about 110 yards

sport weight handspun handpainted BFL wool yarn

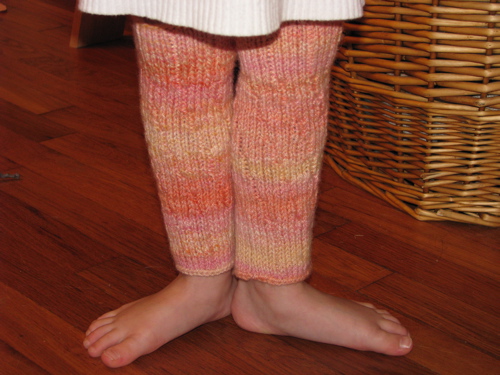
the project: spiral legwarmers inspired by Spiral Bedsocks, a free pattern from Vintage Purls. Full project details on Ravelry.

hand knit legwarmers made from handspun yarn

These legwarmers were actually done last month but it took this long to get the girl to pose for a picture. Now I have about fourteen of course. That’s first position there, in case you’ve forgotten your ballet steps.

Tags: , ,

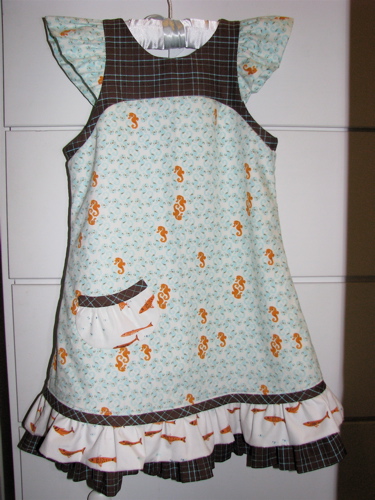
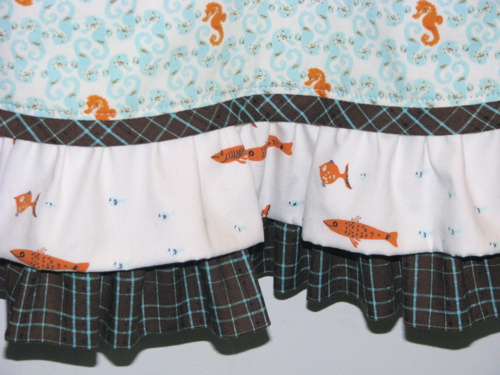
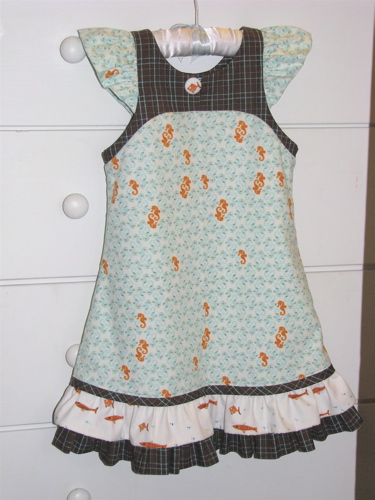
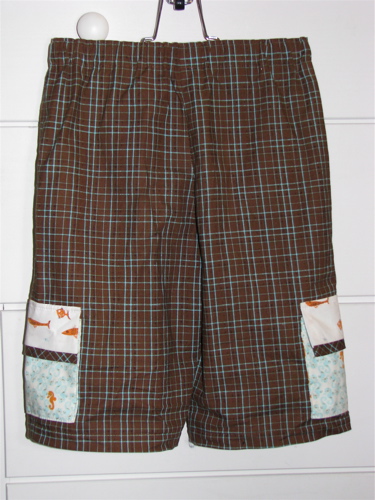
Please excuse the over-abundance of photos and text but I’m pretty proud of this project and I want to show you all the details. First I have to admit that this is a long neglected Work-In-Progress. I actually cut out most of the fabric for these outfits LAST YEAR! Generally you can’t get away with that when making clothes for kids but luckily my kids have mostly grown taller and not all that wider. I did make a few changes. The dress got an extra ruffle for length and I changed the bodice shape completely. I had originally cut out a button up shirt out of the fish fabric for the boy and then decided not to sew it as it is miserable, nigh on impossible, to get him to wear a dress shirt. So instead I opted to let him wear a polo (only slightly less miserable) with shorts sewn out of the brown plaid from Michael Miller and embellished with the fish and seahorse fabrics from Heather Ross’s Mendocino collection for Free Spirit ’08.

The Dress:
Front:
little girl's summer dress Heather Ross Mendocino fish seahorses plaid

Teeny pocket bound with bias binding cut by hand:
Heather Ross Mendocino pacific fish pocket on seahorse little girl dress

Piped double ruffle:
piped double ruffle on girl's dress schoolgirl plaid

Back:
schoolgirl brown plaid Heather Ross Mendocino fish seahorse toddler girl summer dress

Ruffled cap sleeve and covered button with elastic loop placket:
ruffled cap sleeve covered button elastic loop placket little girl dress

The dress is my own pattern. It is fully lined with the bottom ruffle attached to the lining. The cap sleeves were made by folding a long marquise shape in half and gathering the cut edges into the upper armhole which is deep enough to allow wearing over a close fitting long sleeved shirt. The elastic loop that holds the placket shut was made from a color matched hair elastic—one of my favorite tricks—easy to sew and usually makes the dress “I do it” friendly. Except for the little pocket on the front the dress could easily be worn with the placket in the front. The dress could also be made reversible as the manner of construction makes the inside as neatly finished as the outside.

Now for the shorts:
Front:
boys shorts sewn with Michael Miller brown and aqua plaid Heather Ross Mendocino fish seahorse pockets

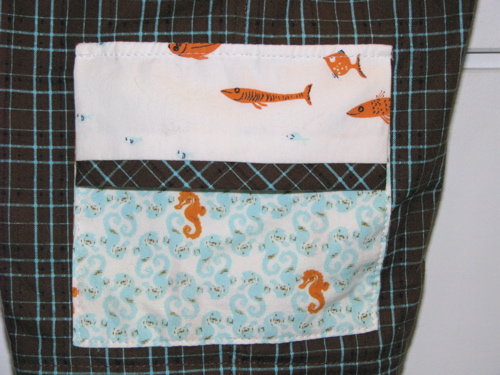
Pocket detail:
cargo pocket on boy's shorts Heather Ross Mendocino pacific

I used a commercial pattern for the brown plaid shorts and added flap topped cargo pockets made from the Mendocino prints and trimmed with the bias cut plaid. The placement looks low on the hanger but seems fine when worn with an untucked shirt.

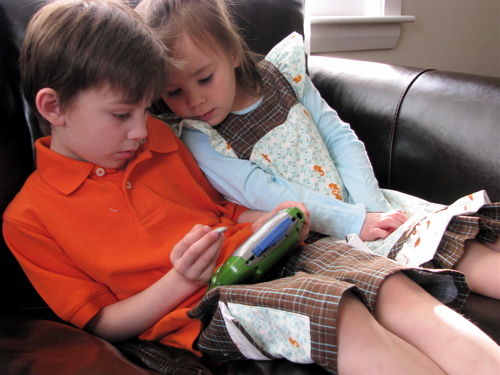
The boy and the girl intent on a new Leapster game.
brother and sister matching Easter outfits orange brown aqua

Tags: ,

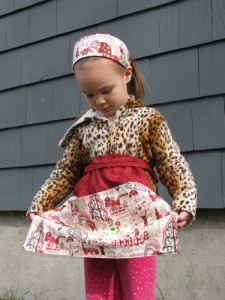
little girl wearing apron and matching headband, Alexander Henry Granville fabric

We have a little friend who is turning 7 soon and I asked the girl what we should give her for her birthday. I was quite impressed that the girl suggested a headband since our little friend does like to wear headbands. Since dress-up is a favorite activity I decided to make a matching apron and headband. The girl and I went through my fabrics and chose this sweet pastoral fantasy print, “Granville” by Alexander Henry. I chose a tone-on-tone Victorian floral in a wine color by Moda to use as the lining.

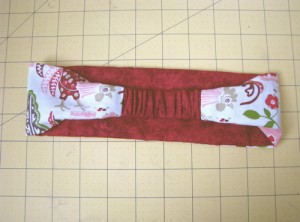
I remembered seeing a tutorial ages ago for a headband and quickly cut and sewed a scrap version to test my memory of the idea. I couldn’t find the original but here is one very similar. The great thing about this technique is that there is no hand sewing involved yet all the raw edges are hidden neatly and easily. After the test version met with the girl’s approval I cut out the fabrics for the apron and headband. The headband went together fast again and the apron went well down to the last seam which I ended up ripping out and redoing about three times. Arg. But I like the finished project. The apron is two layers of the wine floral with the pocket made from the Alexander Henry fabric which features fanciful roosters, trees and country buildings. I really like this color palette, it’s pretty and girlish but not overly “cute”. I sewed an off center line down the pocket to divide it into two pockets. Here’s a picture of the other side of the headband so you can see the elastic band that holds it snug when worn. Now I have to make a second set for the girl to keep of course.

headband sewn from Alexander Henry "Granville"

Tags: ,

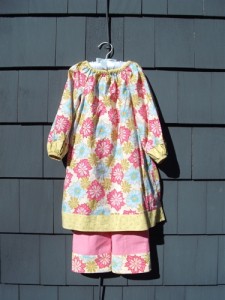
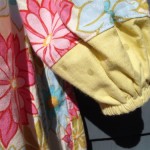
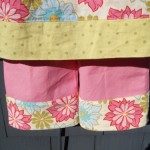
I actually made this dress a few weeks ago but the pants did not get finished until this week. I’ve had this in mind for quite a while and it all started with a very small remnant of the Ginger Blossom fabric in corduroy. I paired it with some yummy stretch baby canvas from Robert Kaufman in bubble gum pink. I then got a yard of the quilter’s cotton in the same print from an online sewing friend. The kiwi dots are from Michael Miller I think. I don’t usually buy patterns but I had wanted to try out one of Sandi Henderson’s patterns as they came well recommended. I chose Claire since the top is close to what I had in mind for this outfit.

peasant tunic and pants using Sandi Henderson Ginger Blossom fabric

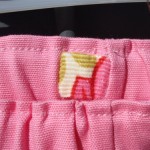
I made a number of alterations to create the long sleeved tunic pattern including the wide bands of the kiwi green dot print at the hem of the tunic and the sleeves. I also made my dress without a waist seam. The pants are from my own simple pattern with slightly flared bottoms and an elastic waist. I added the corduroy bands to the bottom to mimic the bands on the dress. The girl has been delighted to wear the dress but, not surprisingly, refuses to wear the pants beyond the initial trying on. I even remembered to add a little “tag” to the back of the waist. Oh well, I don’t mind that she prefers dresses. I have some fabric ready for a second dress that will follow the Claire pattern more closely.
DSCF1799 DSCF1797 DSCF1800

Tags: ,

« Older entries