
February 2009

You are currently browsing the monthly archive for February 2009.

Cute cow shirts

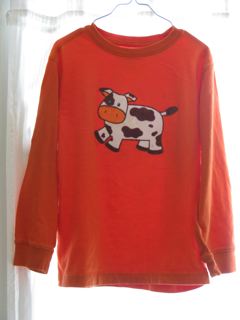
orange tee shirt with hand drawn cartoon cow appliquethe girl in red shirt with cow appliqueThe boy got this very nice orange long sleeve tee shirt for Christmas. He did not want to wear it because it didn’t have an animal on it. So I asked him what animal he wanted on it and we went google image searching for cows. It turned out that he wanted a cute cartoon style cow. So after looking at several, I ended up drawing this cutesy (not my choice) cow for his approval. He also requested that I make one for the sister. I hunted up one of his old tee shirts to use for her. I used my lightbox to transfer the cow design to fusible web backed white cotton knit. I then colored the images with the boy’s help using my Tsukineko fabric inks. The boy’s cow has orange nose and inner ears and girl’s cow has pink nose and ears.

I attached them to the tee shirts with a straight stitch and then finished the edge with a simple zigzag stitch. Simple, ha ha! For whatever reason, the stabilizer method I had used previously to sew on a knit applique did not work well at all. So that would be why there are no close-ups of the cow! And that would also be why it took more than a week to finish these. But they look cute on, especially with braided pigtails. :)

Tags: , , , ,

I wrote a while back that I wanted to do a few things to start organizing my sewing/craft room. I have done two of those three things, yay me! The third just needs a trip to the hardware store for some hinges. I also semi-reorganized the large shelves. Made me think I need to bring the other set up from the basement. Then I could have a massive wall of cubbies to really dominate this little room. I still have at least a dozen clear shoeboxes to go through. And let’s not mention all the clear plastic tubs in the basement.

But I’ve been looking at some images and blogs for ideas on how to further organize and improve the function of my space. The Domestic Diva has a very thorough and helpful listing of ideas on organizing your sewing and crafting room. Her info is categorized into several very logical steps and includes hundreds of pictures of all kinds of organizers, big and small. Start here. And I thought I had a lot of stuff!

Before I tackle a new room arrangement though, I’ve decided that I really need an idea board or a muse board. Obviously I could simply make a list on paper but I think it would be more motivating to tack up my rough scribble of a dress with a swatch of the actual fabric. Or whatever. I had two great ideas in the shower this morning that I don’t want to lose. (The shower is the only place I can think for more than two minutes without getting interrupted. Reminds me of Harrison Bergeron’s headphones.)

Anyway, stay tuned for a picture of my idea board, a fire swan and soapfulls. I’m writing this down here because I don’t have that idea board yet and it does help me (eventually) get projects done if I know someone else knows about them. So the first person to comment besides DH will get a soapfull!

PS. While I was writing I heard the sweet voices of my children busy at some project. In walks the girl with ten tiny barrettes in her hair, all coordinated to her dress, courtesy of her brother, the hairdresser! Unfortunately she declined to be photographed.

PPS. The first person to comment and a random person who comments before midnight EST Friday 3/6/08 will both get soapfulls.

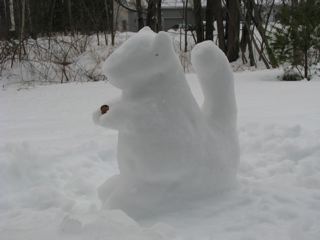
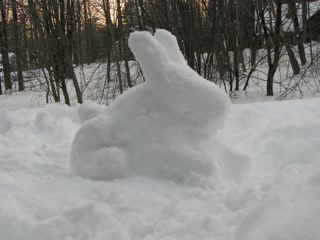
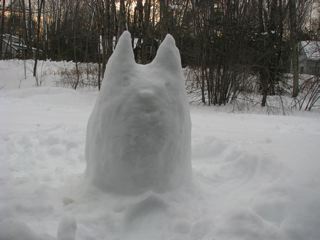
snow Totorosnow squirrelsnow rabbitIt was quite warm today. The snow was melting, the icicles were growing and sometimes falling. The boy and I had fun cracking previously indestructable ice off the driveway. I was feeling lucky (or dangerous) so I threw ice chunks at the icicles, hoping to break the icicles and not hit any windows. Tomorrow is supposed to be warm too with rain later in the day so hopefully we will have more melting occurring on the roof. Not keen on the ground thawing though because that means water in the basement. But for today we decided to enjoy the softened snow and make some animals.

All of these were made to face a window on the back of the house so they can be seen from the inside. First came the snow Totoro. He ought to have black eyes but I was feeling lazy. Then the girl asked for a squirrel outside her window. I gave him the biggest acorn I could find out of my fall stash. I wonder how long it will stay there before it gets claimed by a real squirrel.

When the boy came home he admired our handiwork and helped me fashion a rabbit in front of the last window. These were much easier than I had expected. I guess if you have the right snow, it’s really not hard. I do need to get some better gloves though. We collectively soaked through three pairs of gloves, two pairs of tights and at least three pairs of socks today. I guess that’s spring snow for you.

Tags: ,

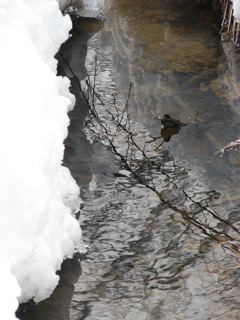
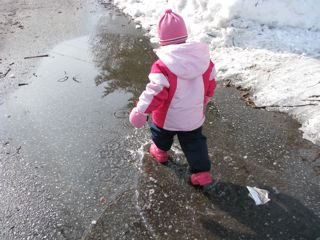
sun through snowy branchessnowmelt runoffThe girl and I take a walk almost every day. Here are a few favorite sights. Despite the foot of fresh snow from a few days ago and the ridiculously high snowbanks, the sun is shining, the birds are flitting about singing happily and water is running through the drainage ditch. Looks like a stream doesn’t it? I suppose it is, I think it runs year round. The girl happily splashed through puddles as I paused to take pictures of some of our favorite things. We didn’t make it around the block as the sidewalk on Main St. is still impassable. Usually the town makes quick work of clearing the sidewalks with a huge orange tractor/snowblower thingy but we didn’t see it today. It’s had a busy winter, maybe it’s taking a break. I don’t expect that was our last snow but it’s possible it was the last really good dumping. Who knows when we’ll see the ground again! (The last photo was taken the day after the storm.)
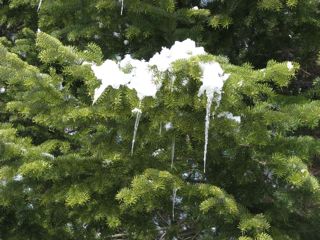
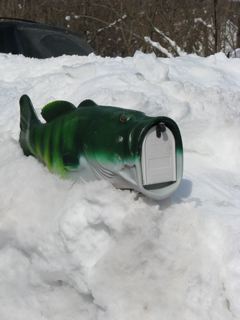
icicles on a fir treefish mailbox in the snowbanksplashing through the puddleshome again

Tags:

stick garden in the snow

stick garden in the snow

the girl and her stick garden

the girl and her stick garden

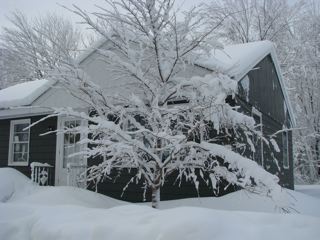
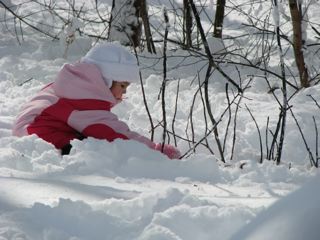
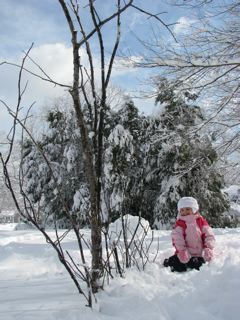
Sunday night brought a heavy spring snow that added a foot of fresh snow to our already piled yard. The heavy snow also took a toll on the trees and brought down lots of branches and smaller sticks as well. Monday was a snow day from school for the boy but the sun came out and made for great playtime out in the snow. The girl was delighted as she loves sticks and the snow cover has made it very hard to find sticks on our walks. The girl began picking up fallen sticks and planting them in the snow with just a little help from me. Here she is, quite pleased with her completed stick garden.

Tags:

Lego creatures with hand drawn instructions

Lego creatures with hand drawn instructions

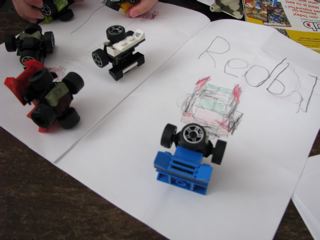
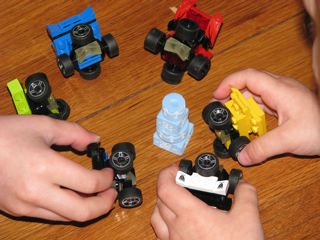
The boy spent the weekend creating super hero “bats” out of his Mini Racer Legos (first rate sets BTW). First came “Redbat”, complete with a hand drawn instruction booklet! (I drew, he colored and wrote in the numbers of pieces needed just like in the booklets from Lego.) Redbat was quickly joined by Blackbat, Yellowbat, Bluebat, Whitebat and Greenbat.
Among the adventures of the bat heroes was celebrating Whitebat’s birthday with a foam bead birthday cake. I don’t remember when we made that but it’s gotten a lot of pretend play use.
Lego creatures having a birthday party

Lego creatures having a birthday party

Tags:

My left thumb is in deep distress, has been for at least a week. I don’t think I’ve been abusing it but I haven’t necessarily babied it either. I have unexplained stiffness in my hands. Last fall it was worst in my right index finger which seems like an obvious target for a repetitive movement injury considering I do a lot of crafting and computer work. It was bad enough I went to the doctor, no help.
Now it’s my left thumb. I’m right-handed but I do a lot with my left hand. I hadn’t realized how much. Not only is it affecting my crafting but it’s affecting my ability to make a peanut butter and jelly sandwich, which is a far worse state of affairs. Take care of your hands.

eating snow ice cream

eating snow ice cream

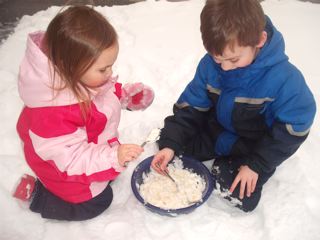
We finally got some fresh snow yesterday and last night. The boy and I retooled the luge tunnel. I groomed the steps to our mini-hill and the girl and I tested the hill. Better with every snow. We had friends over yesterday and the kids had fun climbing all over a creature of unknown species that us mamas were attempting to make. It was perfect snowman snow or snow camel, snow elephant, snow blowfish . . . While the boy and his sister were wishing their friend was back to play I ran in the house for a big bowl, spoons and a large measuring cup into which I splashed cream, sugar and vanilla. We found an untouched patch of fresh snow to scoop into the bowl. Then the boy poured in the cream mixture and I mashed at it with the whisk. Snow cream! I’ve never done this before but I’ve heard about it. It was much better than I thought it would be. Maybe because we made it ourselves. Some things are like that, yes?
Okay, no comments about acid rain please, don’t spoil the fun!

wool roving colors

wool roving colors

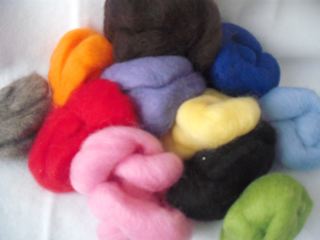
I’ve been looking for this bag of wool roving for a felting project I’ve been working on. I can’t remember when I got it or where but it’s been handy to have all these yummy colors for little projects. I didn’t pack up my craft stuff very well when we moved so unfortunately I can’t find the things I want most of course. In the same box I also found lots of hand sewing needles, yay! thread, buttons, elastic thread, yay again! and various knitting needles and crochet hooks, triple yay! Now I have to find an organized place to put all this stuff. Sigh. Now, if I could just find the drop spindle. I’m seriously considering laying it all out on the driveway in the spring so I can sort it out properly.

Tags: , ,

corn with red peppers

corn with red peppers

I’m not a big fan of corn so I generally throw something extra in to liven it up. Usually that’s green peppers. I steam frozen corn in the microwave and then throw in fresh diced peppers raw. I don’t care for cooked peppers so much, they usually lend a little too much of their flavor to the rest of the dish. Tonight I had some red pepper on hand so I threw that in to the corn instead. Then I tossed in some grated parmesan and a little caesar dressing. Now that was some goooood corn! And it looked pretty too.

Tags:

It was about this time of year that I first sang this to the boy, his first winter if I recall correctly. I was in the habit of singing to him in the car as that seemed to be the only thing that kept him from wailing if I had to slow down or stop. One gray afternoon we were rounding the last corner on the way home and I was running out of songs to sing. This was the result.

Sleep tonight
under the moonlight
the snow falls soft and white
into the quiet night.

Sleep tight
and dream of sunshine bright
’cause everything’s alright
in mama’s arms tonight.

©2003 Cynthia Davies

I was touched to hear my husband singing this softly to the girl one night recently. Maybe one of these days we’ll get around to recording it.

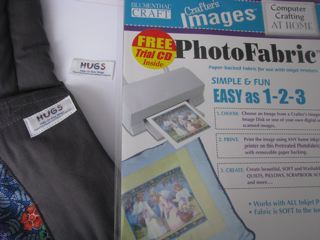
img_3182Did that title make any sense at all? I suppose this is somewhat of a review. I originally got this paper-backed fabric for use with inkjet printers for another project. I used it this week to make labels for some baby carriers I donated to a not-for-profit group, HUGS. HUGS is run by two sisters who sell selendangs through their website. A selendang is a traditional piece of cloth used in Indonesia for many purposes, one of the most important being carrying babies. The sisters then donate the profits back to providing traditional selendang baby carriers to mothers in need, mainly in Indonesia I think. Go check it out, a really lovely family effort.
Anyway, you are wondering what this has to do with me printing fabric labels on my inkjet printer. I purchased and used some of the beautiful HUGS fabric to make into more structured two shoulder carriers. I wanted to put their logo on the strap so I decided to try out this product, PhotoFabric from Blumenthal Craft. I think there are many other brands of this same type of stuff. While the colors could have been more vibrant, I was impressed at the detail I was able to get, 5 point type was perfectly readable. I cut out the labels and turned under the edges with the iron and then sewed them on. It worked very well and looks nice. I test washed one of the labels and it did not bleed at all even under hot water.

You can also draw easily on this paper with colored pencils, which makes it great for kids. You can take their drawing and incorporate it into a sewn fabric creation. I’m curious to see if it can withstand machine washing. If so, I’ll certainly be using it to put “made by mom” tags into my kids’ clothes!

Tags:

making heart shaped crayons

I know this post is probably a little late, seeing as it’s 11pm EST on Valentine’s Day but I’m posting it anyway. We did these earlier in the week, I just haven’t had time to upload the pictures.

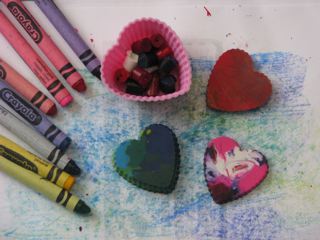
The boy and I, with help from the girl, made heart shaped crayons for Valentine’s day for all their school and church friends. This is quite easy to do and you can use up the broken crayons this way. There are lots of instructions already available on the web but I will give my method and suggestions having done it several times now. The easiest way to make your own heart shaped crayons is to use:

  • Crayola brand crayons*
  • silicon mini muffin molds in any shape
  • toaster oven at 300°
  1. First peel the paper off the crayons. Using a craft knife to slice down the paper makes it much easier. If you are using new crayons, you will need 9-12 crayons to fill 6 wells of a mini muffin tray.
  2. Cut up your crayons with craft scissors or a kitchen knife. If you are making single color hearts it doesn’t matter how small the pieces are as long as they fit in your molds. If you are using multiple colors, I like to cut them into 1/4 inch to 1/2 inch size pieces depending on the size of your molds.
  3. Silicone molds are the easiest because you can easily pop the finished crayons out when they are fully hardened. If you use a metal tray, stick it in the freezer for a few minutes and the molded crayons should come out fairly easily. In either case use at least a layer and a half of crayon bits to make a 1/4 inch thick molded crayon. More bits makes a thicker crayon. Do not fill all the way to the top of the mold!
  4. If you are using individual molds, like I did, place them on a cookie sheet so you can easily slide them in and out of the toaster oven. Be especially careful when removing from the oven as you want your pretty colors to stay separated. Stirring the melted wax is not necessary and will leave a mark on the other side. Depending on your oven and the size of your molds it can take 5 to 10 minutes for the crayons to melt.
  5. Allow the molded crayons to cool fully before unmolding. Be patient!

The bottom side will be the prettier side. Any little edges sticking up can be smoothed by simply sliding the crayon over paper. I like to use two to three complimentary or analogous colors. But experiment and find your own favorite combinations! Pair a handmade molded crayon or two with a little notebook for a nice little gift any time of year for a friend of any age. Everyone should draw with crayons, not just kids!

*If you have used other brands of crayons there will most likely be a layer of clear/cloudy wax that hardens on the top. This is not pretty and it’s frustrating to kids. You can fix this by very carefully sliding the crayons across a vegetable slicer until you have removed the clear layer.  This will actually make the inferior crayons draw better than before because the process concentrates the pigments and removes excess wax.
It’s also prudent not to use the same tools for food and for crafting. I admit to not always being prudent. eek!

Tags: , ,

lego play tray

lego play tray

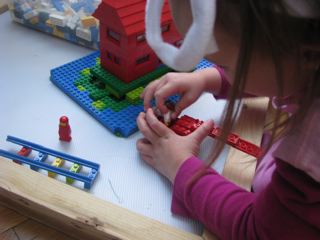
I’m not exactly sure when I built this but within the last month or so. I think I’ve mentioned previously that it was a Lego Christmas and then after Christmas my husband dug out his old Legos and added those to the pile. Soon we had far more Legos than would stay neatly on my favorite bankrupt airline food service-turned-crafting trays. But with a tile top kitchen table and wood floors everywhere we desperately needed something with a lip to keep stray Legos from skittering away into oblivion.

So I went down into the basement and dug up an old corkboard and an old artist’s canvas that happened to be the same size, about 2 feet by 3 feet I think. I’d been meaning to recover the corkboard with fabric and paint it or something but that hadn’t happened in several years so I decided to get over that idea and use it. The canvas was rotting off the frame so it was quick work to pull that off, a little slower to remove all the staples and the corner braces. I cut a piece of spare neoprene to fit the depression on the corkboard and then glued some leftover nylon boat canvas on top of that and screwed the emptied frame on top of that into the corkboard’s frame.

The whole thing is light, , super easy to clean, fits behind or under the sofa and can hold a lot of Legos. Don’t ask me why I have spare neoprene, I don’t remember but it comes in handy! I’ve been very pleased with how well this tray works for the kids, especially considering everything I used was leftover or salvage. I suppose it might be nice to paint or seal the frame . . .

Tags: , ,

mini-luge tunnel

mini-luge tunnel

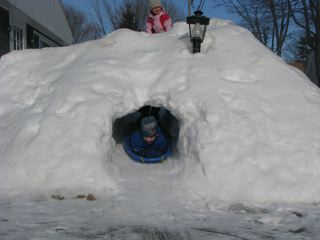
We’ve had a great amount of snow this winter and the huge bank on one side of the driveway tempted my husband into digging a tunnel through it. With a bit of work from both ends we managed to dig it out just wide enough for a sled to pass through. It’s best to go down prone and feet first, luge style. Or if you’re younger than 10 you might get away with skeleton style, head first. Adults may get stuck and need to be rescued by energetic kindergartners. I wish I knew how to put a video in but I haven’t figured that out yet. We’ve had great fun with it, especially the girl, last year she hated the snow, this year she is considering the pre-school winter X-games!

Tags:

« Older entries