November 2009

You are currently browsing the monthly archive for November 2009.

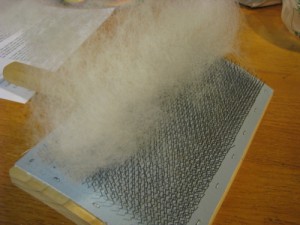
My mother “bought” a Romney fleece for the ridiculous price of $15 from a local farmer. I didn’t see it to begin with but I gather it was very dirty. She and my dad scrubbed and sorted and washed and dried. The thing is probably worth $1500 in blood, sweat and tears by now. But we’re having fun with it, at least my mother and I are! Here are some before and after picks of us carding the washed locks into “top” which I then spun on a quickly improvised drop spindle.

Here’s a bag of washed locks . . .
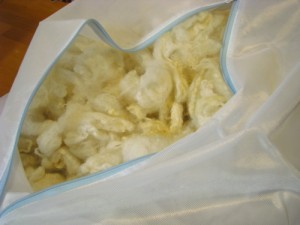
washed Romney wool locks

Note here that neither of us really have any idea how to card wool so constructive comments only please! Placing the locks on the cards . . .
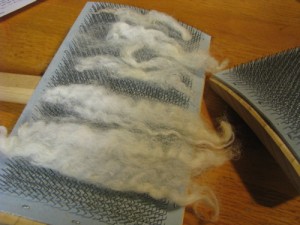
romney locks on hand card before carding

Carding and the resultant fluff . . .
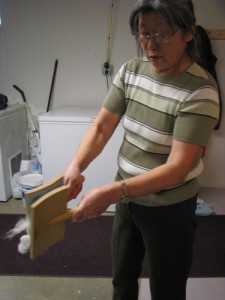
carding fleecehand carded Romney wool still on the carder

This picture to show that you can indeed spin wool with just about any old stick and round thingy (very fat crochet hook stuck through a spool of ribbon taped to a CD shown here) The top card was spun from a rolag-ish piece and the bottom card from a more top-ish piece. I can’t say I could tell much difference. I’m sure it will be more obvious as we get more practiced.
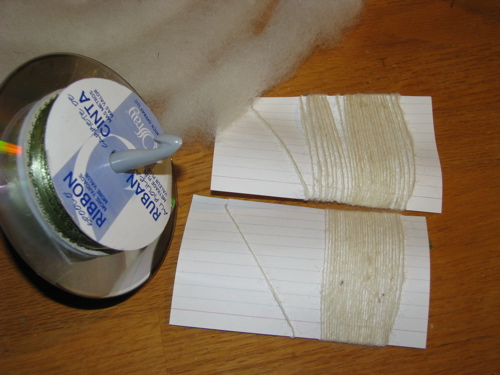
emergency DIY spindle with wool and spun singles samples

And one last picture to show the after – carded spinnable fluff on the left and the before – washed locks on a hand card on the right.
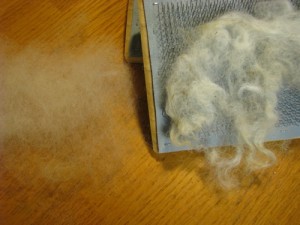
carded fluff and uncarded locks on the handcarder

And right now that fiber is in a dye bath in the oven. Better go check on it!

Tags: , ,

IMG_6179 IMG_6180

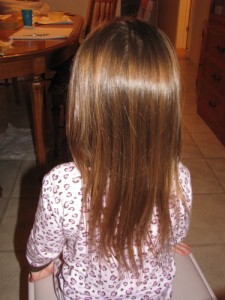
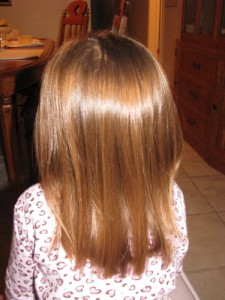
Sniff, sniff. My baby’s first hair cut. 4 years and 2 months. It will never look the same again. I’ve delayed and delayed but it seemed like it was finally time. After I recklessly wacked at my own hair and had to get my mother to fix it, the girl pronounced it beautiful and then quickly asked that I cut her hair too. She’s asked before several times and I’ve put her off but I gave in and cut off a few inches. Sigh.

Birthday sewing

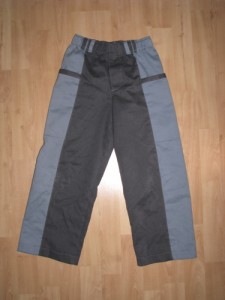
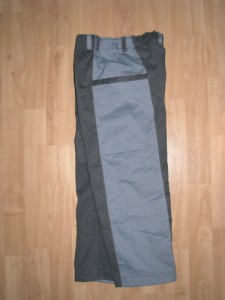
side panel boy pants side panel boy pants with trimmed pocket

After eight days the fever finally petered out. We had to reschedule the boy’s party but we did have cake and presents after turkey dinner. I didn’t get nearly as much done as I had hoped but I did manage these pants. Based on the same basic pattern as these brown pants and using the same soft brushed twill in grey and river blue. The deep pockets built into the full length side panels received the ultimate praise from the boy – “awesome”.

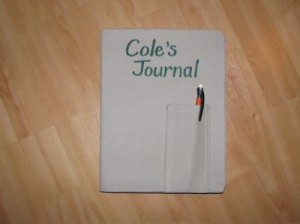
I also found this neat composition book with pages that are half blank and half lined. I sewed a cover for it with a pencil pocket and used a fabric marker to personalize it. Still a bit plain but already in use. Maybe I’ll suggest he doodle on the cover with fabric markers.

composition book with half blank and half lined pages

journal cover with pencil pocket

Tags: ,

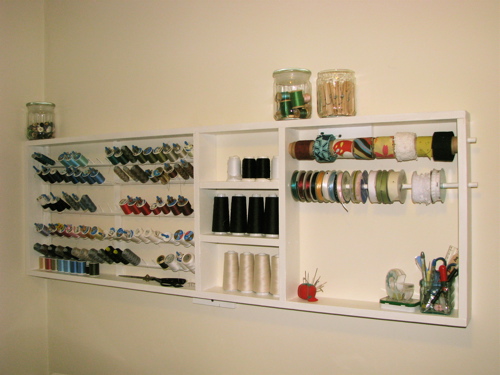
hand made wooden thread and ribbon organizer

Yes, I just put that photo in at the largest size because I am that excited about this. I haven’t been sewing but I have been cutting! With the power miter saw. Okay, no angles but still. I’ve been planning this organizer for a while. I wanted something functional but reasonably nice to look at as well. I finally made this custom fit thread and ribbon organizer to the same length as my sewing table (5 feet long). By myself! Of course the kids insisted on helping me paint it. That was fun, no really, they are starting to be truly helpful. My dad helped me hang it on the wall. Plaster walls confuse those stud finding gadgets.

Almost all of the wood came from leftovers in the basement, all I bought was some screws, a skinny dowel and a piece of quarter round trim. Building the main parts of the shelf went really fast. The thread rack part did not, mostly because I was trying to recycle pieces of a store bought wooden thread rack that was too small and not made all that well. Sometimes it does not pay to recycle.

I now have twice as many pegs for thread, a space for my serger thread spools and dowels for my handmade bias trim and assorted ribbons. I can easily add some more dowels for ribbons and such later. The serger spools can also be stacked two deep so there is plenty of room.

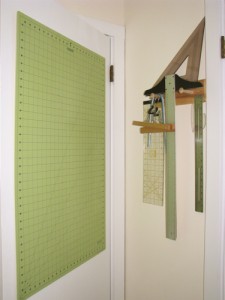
In the glass jars above are buttons, vintage wooden thread spools and clothespins. I’ll probably add some more jars as needed. Of course there is a reason you can’t see anything else in the picture. Everything below four feet is a mess. But here is one other bit of organizing that I did quite a while ago actually but it has been working out very well. Behind the door I put up a shortened length of coat rack with a few extra nails to hold my various rulers, triangles, T-squares, etc. And the cutting mat hangs on a nail on the back of the door.

cutting mat and ruler organization

PS. I have been doing some knitting but it may be difficult to get a picture of the latest finished project. I’ll try.

Tags: ,

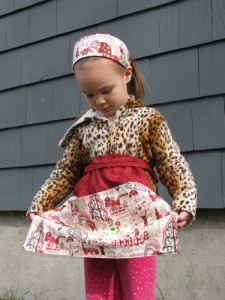
little girl wearing apron and matching headband, Alexander Henry Granville fabric

We have a little friend who is turning 7 soon and I asked the girl what we should give her for her birthday. I was quite impressed that the girl suggested a headband since our little friend does like to wear headbands. Since dress-up is a favorite activity I decided to make a matching apron and headband. The girl and I went through my fabrics and chose this sweet pastoral fantasy print, “Granville” by Alexander Henry. I chose a tone-on-tone Victorian floral in a wine color by Moda to use as the lining.

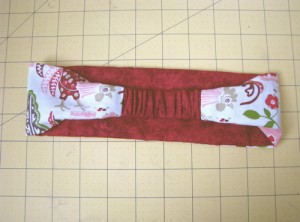
I remembered seeing a tutorial ages ago for a headband and quickly cut and sewed a scrap version to test my memory of the idea. I couldn’t find the original but here is one very similar. The great thing about this technique is that there is no hand sewing involved yet all the raw edges are hidden neatly and easily. After the test version met with the girl’s approval I cut out the fabrics for the apron and headband. The headband went together fast again and the apron went well down to the last seam which I ended up ripping out and redoing about three times. Arg. But I like the finished project. The apron is two layers of the wine floral with the pocket made from the Alexander Henry fabric which features fanciful roosters, trees and country buildings. I really like this color palette, it’s pretty and girlish but not overly “cute”. I sewed an off center line down the pocket to divide it into two pockets. Here’s a picture of the other side of the headband so you can see the elastic band that holds it snug when worn. Now I have to make a second set for the girl to keep of course.

headband sewn from Alexander Henry "Granville"

Tags: ,

Broccoli shine

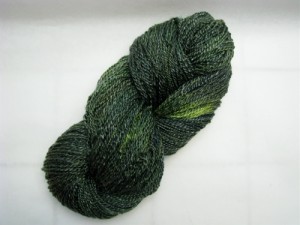
I’m waiting for yarn to dry. This yarn, 6ozs. of hand spun superwash merino/tencel spun to about 13wpi a while ago, dyed yesterday and hung to dry. It’s still a bit damp but I twisted it up to take a picture anyway. It’s just the color of broccoli but shiny. Mostly dark green with some patches of lighter stem color. I can’t wait to knit up a swatch.

hand dyed and hand spun superwash merino/tencel blend yarn

Tags: , ,

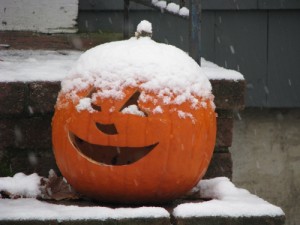
snow on a jack-o-lantern

It was snowing this morning. Rather soggy snow, but snow all the same. It won’t stick around but it is making us thinking seriously about shaking down the rest of those leaves so we can get them raked up off the lawn. Bushes need to be wrapped, outdoor lights need to be checked, basement windows sealed . . . pumpkins disposed of.

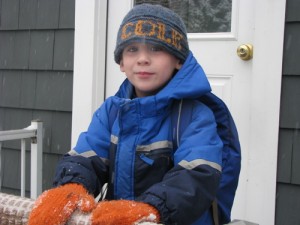
I finished this hat for the boy a week or two ago and he’s been wearing it every day but he hasn’t let me take a picture of it on his head. Finally he relented this morning. It must have been the promise of snow.

knitted colorwork name hat

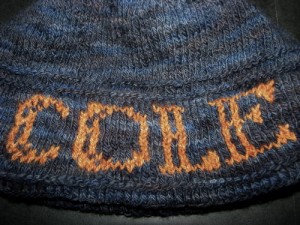
Knit without a pattern, I used the Merino/Corrie handspun/handdyed fingering weight yarn in a color I call stormy autumn blue. The name was knit into the hat using a little Corriedale that I spun, Navajo plied and dyed pumpkin color with Kool-Aid. It’s a handsome color combination and just right for the boy. I used a provisional cast-on so that I would be able to pick up the live stitches after I was done knitting the band making it self-lined under the colorwork. I got the idea from someone else’s blog of a very different looking reenactment hat which I can’t find to link to now, sorry about that. I found the letters here but stretched them taller to fit my gauge.

knitted colorwork letters

I scattered the decreases rather than have obvious lines and that worked pretty well. You can see them if you look for them but they hide in the variegated color of the yarn pretty well. I blocked the hat on my own head for about two hours and then left it to dry overnight over a bowl. This worked out really well but I wish I had one of those styrofoam wig holders to block hats on. Gets kind of hot wearing wet wool indoors!

Tags: , ,

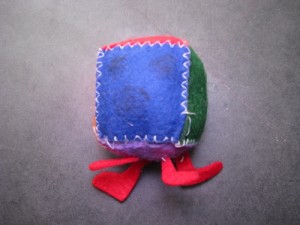
With the machine AND by hand. Last week while we were all still pretty sick he got it into his head that he wanted to make a cube out of felt. I elicited a response that he was willing to do the work himself before we started. He quickly chose six colors and used a wooden block to trace out squares of equal size. He cut most of them out himself and showed me the placement. Since I didn’t want it to take forever and risk him losing interest I decided we should go for machine sewing. So I set him up next to me on the machine and helped him guide the squares through with a zigzag stitch. After the first try or two he could stop on a dime! After doing as many seams by machine as possible he used leftover quilt batting to stuff his creation. Then he enthusiastically agreed to sew up the open side by hand and did so, quite well, considering he’s never tried before. Then he decided to add four feet and also sewed those on, with my help, I tied the knots. He was very proud of himself, as was I. He named his creation Bobby and took it to school to show off what he had learned.

sewn felt cube

Tags:

As I alluded to in the previous post, this past week has been rather a haze. And unfortunately not all of us completely well yet. But it would seem that if I don’t share these now, they’ll lose their newsworthiness.

I love to carve pumpkins with out of the ordinary designs. Over the years we’ve done the Bat signal (Batman), maybe more than once, spiders and Jiji the cat from Kiki’s Delivery Service. This was the first year the kids were really into actually helping with the design. The girl was quite particular about her pumpkin having a “bumpy” smile. So we split up into teams and this is what we came up with. The carving on the girl’s pumpkin is a combination of me following what she actually drew on the pumpkin and copying from her earlier drawing on paper. The boys were much more scientific and drew their pattern on the computer first.

bumpy smile jack-o-lantern traditional jack-o-lantern pumpkin

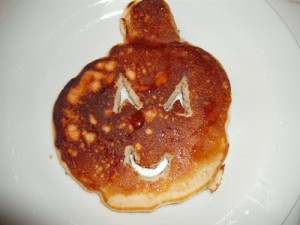
One day this week I managed to make pancakes with a seasonal twist. I used tiny alphabet cookie cutters given to me by my friend Jan to quickly shape the eyes and mouth. Homemade apple syrup from Grandmom drizzled on top for a yummy treat.

jack-o-lantern cut out pumpkin

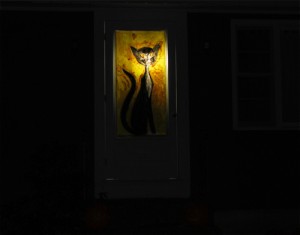
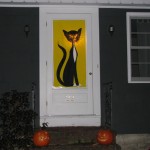
I didn’t realize this until we moved up here but New Englanders really get into Halloween in a big way. Maybe that’s because it actually feels and looks like Halloween in the movies or maybe because it’s a lot easier to decorate your house for a holiday that isn’t covered in snow and ice! In any case, people go all out and we thought we’d join in to this neighborly occasion with some sort of big decoration. We tossed around a few things and I came up with this idea of painting a big cat to fit the opening in the screen door. I looked online for tall silhouettes of black cats and chose one as reference. I unrolled paper and cut it to size and then sketched the cat on the paper. The kids did a lot of the painting. I had intended to do an all black cat but they wanted it to look like Lila, our tuxedo cat so I modified to accomodate. Not quite as scaring but still mysterious. On Halloween night we turned out all the interior house lights and strung a bulb up behind the cat’s face which illuminated the whole painting well. The large brushstrokes reminded Rich of Van Gogh’s style. An unexpected benefit. The kids were awed by their creation and I really enjoyed working together with them. It was difficult to photograph so here is my attempt at a Photoshop combination that simulates what it looks like in real life.

backlit painted Halloween cat

with flash: painted cat

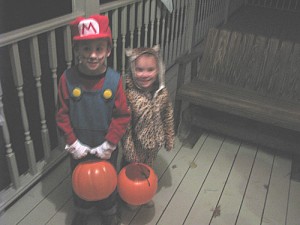
And I did finish sewing those costumes despite my foggy head. But because the camera batteries were dying I only have this one photo of Mr. Mario and the leopard. We took a quick trip around the neighborhood and were rewarded with treats from the neighbors and a surprise scare from Mr. R. across the street sporting a scary ghost mask that made the girl cry.
Mr. R’s wife scolded him and he couldn’t take that mask off fast enough!

IMG_6062

Tags: ,