sewing

You are currently browsing the archive for the sewing category.

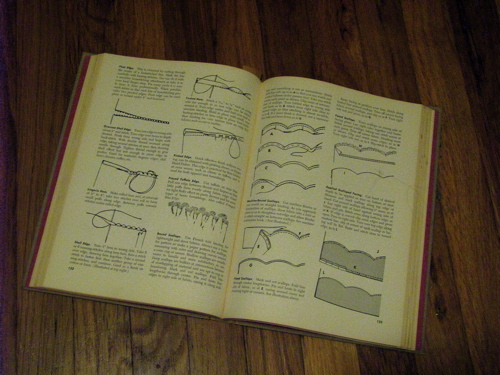
First off I have been wanting a copy of any Mary Brooks Pickens sewing book and I scored this 1953 edition off eBay for less than $10. The outside looks its age but the inside is totally clean! It’s full of all sorts of great knitpicky sewing details that you can’t find in modern books. Now if I can just find a 40’s/50’s vintage pattern drafting book I’ll be all set!

inside of Singer Sewing Book 1953 by Mary Brooks Pickens

I think there was also some household shopping in there which involved a new watchband for me—exactly like my old watchband—just not falling off the pins, a very stylish linen shirt for DH, a bargain pair of pink-trimmed sneakers for the girl and a few pairs of much needed jeans for the boy. Yes, I broke down and bought them. I promise to still finish the scary pair.

But the highlight of my weekend was a visit to Spunky Eclectic. I’ve been searching for a local yarn shop that also carried fiber and spinning wheels/spindles. I had found a few but was kind of intimidated out of actually going for one reason or another. Then I found Spunky Eclectic’s site which just seemed so much more inviting, and not any farther away so I decided I had to go! The shop was full of all sorts of beautiful hand dyed fibers and yarns and so many textures to feel that I’d only had names and word descriptions of previously. And the proprietress, Amy, was so nice, showing me around and answering all my questions, I’m afraid I talked her ear off! I went to buy sock yarn and look at wheels and spindles and fiber. There was just too much to take in, I’ll have to go again of course. But I came home with a Cascade spindle and a sampler of different wools to try spinning. It was really interesting to feel the subtle differences. I didn’t know which to start with. I thought about dyeing them but I don’t have any acid dyes besides Kool-aid and I’m not really thrilled with the idea of citrus colored socks that need to be handwashed . . . so . . . I started spinning anyway. And I forgot to buy sock yarn. Oh well. I guess I’ll have to knit what I spin!

wool fiber sampler from Spunky Eclectic and a Cascade spindle

And yikes. Amy gave me a little demo. I have been spinning all wrong. Of course what I was doing worked on the silk but it did not work on the wool. Well, sort of. I’ve been working hard to do the park-and-draft that she showed me but it’s very difficult. My left hand does not like it at all. I’m not left-handed but I’m pretty ambidextrous. And apparently my left hand likes to be in control! I’ll keep working at it.

Gettng back to books! Annie mentioned that Amy had a new book coming out so I asked about it and I got to thumb through her advance copy of Spin Control which is due out in June I think she said. It looks wonderful! I’m not very good at following directions especially of other people’s ideas, I generally like to just figure things out on my own, so I can be very particular about what few books I will buy. This looks like a book that would be really useful to me. There are a lot of very specific pictures that are just the sort of details that I find helpful to really understanding and mastering a new skill, as well as the pretty pictures that can be inspirational.

Tags: , , ,

Because it’s that bad. I’m working on a pair of jeans for the boy who desperately needs pants that have no gaping holes in the knees and don’t show off his ankles. I was hoping to make it to shorts weather without buying or making new pants but this is Maine and it’s still decidedly long pants weather.

Anyhow, it is not going well. I used the pants pattern I’ve been using but I wasn’t quite sure if it had seam allowance built in or not because of course I didn’t write that info down when I drew the pattern. Tsk, tsk. So I added just a bit of seam allowance. The pants seem huge. I knew the legs were a bit wide since I’ve used the pattern mostly for pajama pants; I should have taken that into account and skipped the extra seam allowance. I’m trying a new idea for a deconstructed look that leaves some edges open to fraying. Already I can tell that I did not think that through. Grain edges do not fray nicely in twill weave, duh. I cut front pockets and the faux fly without a pattern. The fly looks fine but I wish I’d cut the pockets differently. They will work, but I should have chosen a different style to fit with the rest of the look.

It’s tough to mess with jeans styling, there is such an established American style that you have to really think the whole thing through to get something that is different in a good way. I know that the pants will be wearable, by someone, if not the boy. So I just need to take a deep breath and keep sewing, throw the things in the wash to fray and hope for the best. But I’d really rather be spinning.

Tags: ,

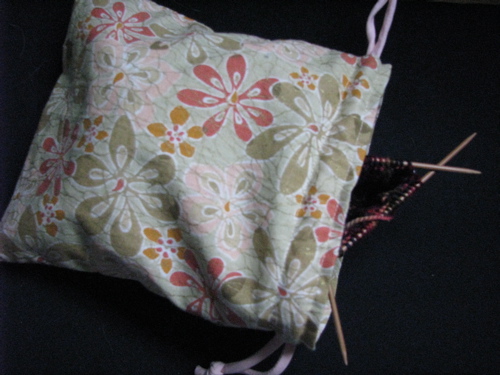
self lined drawstring bag with knitting project
This is the shoe bag tutorial I promised a long time ago. I realized that although I first made it as a shoe bag, it really could be used for anything. Here I have one just the right size for holding a ball of sock yarn, and the sock-in-progress itself. I can pull the knitting out, pull the drawstrings onto my wrist and knit and walk at the same time. It’s sad, just goes to show how suddenly obsessed I am with knitting.

This self-lined drawstring bag is a great way to use pretty remnants of any lightweight fabric. It makes up easily in quilter’s cottons, flannel, satin or velvet, even a salvaged length from a favorite garment. You can piece your fabric to make up enough length or to have a contrast lining. You can even add pockets to the inside or outside before making the bag for even more versatility. A shoestring, ribbon, twill tape, cord or what-have-you can be be used as the drawstring. These make great gift bags especially in smaller sizes and can also be made as a purse for a young girl or a treasure bag for boys. Make one to hold the pieces of a game whose cardboard box is disintegrating. Custom size bags to store craft tools or projects, lingerie or shoes. There are no raw edges, no handsewing and the bag can be used inside out as well.

There is no pattern. It’s just a rectangle, you choose the size for your application. Grab some favorite remnants and the tutorial and make some cute bags. And if you use this pattern, e-mail me a picture of your bag! I’d love to see what you come up with.

Tags: ,

img_3847Phew. That was harder than I expected. But since I intend on doing more patterns and tutorials this was good practice. If you sew at all I would greatly appreciate it if you would take a look at this and see if it all make sense. I’m sure there are some problems, hopefully nothing major, but please let me know if you find anything that is confusing or wrong. I didn’t want to leave anything out but at the same time I didn’t want it to be 7 pages long either. It’s really easier than it looks. So get the pdf pattern and the pdf tutorial (3.9MB), a yard each of two great prints, 5.5 yards of bias tape and make yourself a fun spring bag!

bias trimmed slouch bag with tie straps

PS. Included in the tutorial are instructions on how to join bias tape into a loop which would be useful for lots of other projects such as pillow covers, quilts of course, potholders, etc.

Tags:

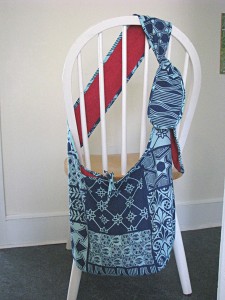
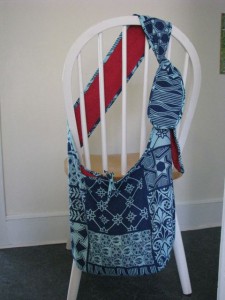
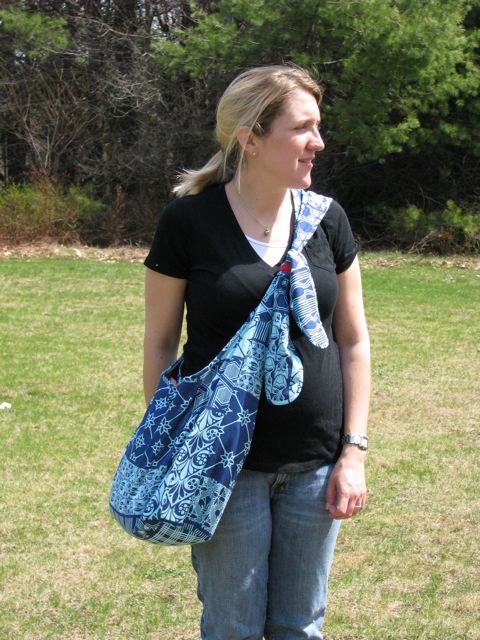
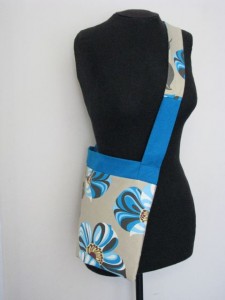
slouch bag with tie strap

JenP’s teenage daughter saw a hobo style bag in a store and loved the shape but not the fabric. A search for a similar pattern came up empty. Since I love to make patterns I volunteered to draft a pattern based on a picture. Yeah, I like to go off on tangents like that.

Since I wasn’t making the bag for anyone in particular I just pulled fabric out of my stash. I got this turquoise Israeli fabric in a trade, I’ve always thought it was interesting but I didn’t know what to do with it. I figured it would look pretty good on a big bag. I had pulled the lipstick red out as a lining for another possible fabric and decided to use the combination as it brought to mind some recent pictures I’d seen of a room decorated in these colors and a fantastic quilt by CocoaDreams. It’s a total departure for me!

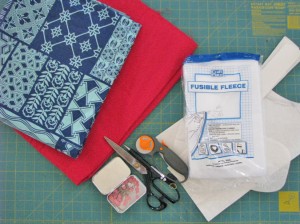
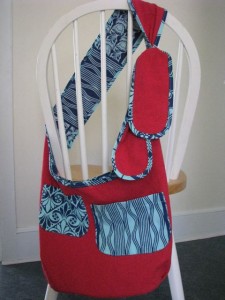
It didn’t take me too long to draft the pattern. It requires 3/4 to 1 yard of the outer print, 3/4 of the lining, 5 yards of bias tape and about two or three hours. Also a small piece of stabilizer of some sort for the base, I used fusible fleece but craft foam would work as well. Mine is made of quilting cotton so it is really lightweight. It’s huge and could easily work as a diaper bag, beach bag, anything. I took pictures along the way so that I can make a tutorial to go along with the pattern which I digitized after I finished the bag. Details: two inner patch pockets, wide tie straps, oval bottom, bias bound straps and top edge, single snap closure and two decorative ties. I wish I had some big red beads to put on the ends of those . . . And guess what? All machine sewing and totally reversible!

slouch bag reversible slouch bag in turquoise and red

I’m not sure how to post the tutorial as it’s quite a lot of pictures for which I have yet to write the accompanying text. It’s all there in my head. So as soon as I figure that out I’ll post the tute and pdf pattern.

I almost forgot. I pulled an AmyDawn to get the photo! The lovely model is a playground aquaintance, not quite a total stranger but almost. I met her about a week ago when she was at the playground with a friend of hers who is the mother of one of the boy’s classmates. Did you get all that? We happened to be the only ones at the same playground again today and she graciously agreed to model the bag for me, isn’t she cute?

Tags: ,

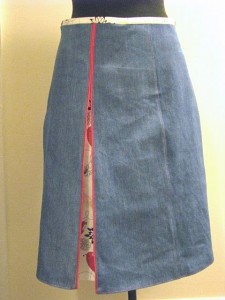
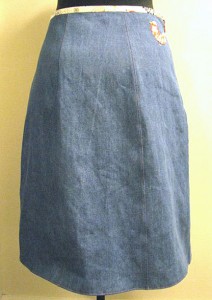
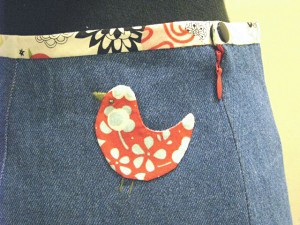
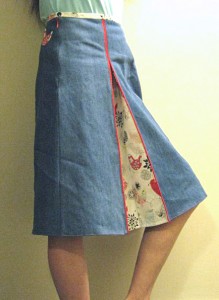
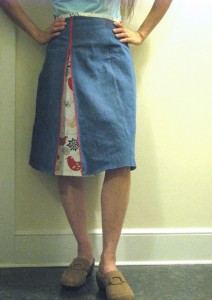
A skirt for me. Wow, it’s been a while. This skirt has a lot of features that I wouldn’t normally wear or sew for myself. First I used a conversation print – Alexander Henry‘s Starlings. I rarely wear prints at all. I also used red! as a secondary accent to highlight the red in the print and contrast with the main fabric of the skirt which is denim. I also appliqued one of the birds to the back waist, I don’t know why but hopefully it looks cute in a good way. I can’t think when was the last time I used piping and I’m sure it wasn’t on a garment for myself. I was originally going to use bias tape as the edging but went with the piping after seeing Rae’s use of piping on a child’s backpack. It really made the lines of the design stand out.

birdskirtfront birdskirtback

Other details: I’ve never cared for waistbands so that’s not new. But I don’t think I’ve ever done one like this. I cut some of the print fabric on the bias and used it to bind the top of the skirt which also helped reduce bulk since the body of the skirt is made from a hefty 12 oz. denim. The pattern is my own, rough modification of an existing six gore skirt pattern I drafted ages ago. Red topstitching. I love invisible zippers! And a resin snap for the closure. I also fused the lightweight print to white cotton to give it some bulk so it would stand up to the denim and a crisper hand to hold the pleat even when walking. That worked out very well.

birdskirtapplique

I apologize for the grainy pictures, these were all taken at night and Frances (my dressmaker’s dummy) was a bit tipsy as well. And unfortunately the skirt turned out a tad big despite stopping for a fitting midway. Oh well. Maybe it will shrink in the wash. (I pre-washed the fabrics of course.)

I need to thank FW and the gals on designer-stashers for turning me on to new fabrics and for hosting a skirt sew-along which is probably the only reason I got this done! And finally, the skirt on the reluctant model, wearing some eye-brow raising 70s looking clogs scored from DH’s office. (Amazing things turn up when you are cleaning out an advertising agency. :) )
birdskirtside birdskirtfrontview

Tags: , , , , ,

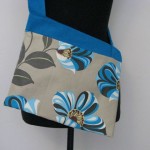
floral and turquoise cyclette bag

I’ve decided to name this bag the Cyclette Bag since it was inspired by cyclists’ musette bags. The two words contract nicely into “cyclette”, which is the French word for bicycle anyway! This one was made a little differently than the original bag to accommodate the constraints of the remnants I was working with so I did not take step-by-step photographs. It is essentially the same construction but inside out to allow the lining to show at the top of the bag creating a contrasting band.

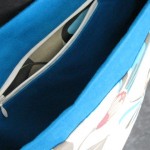
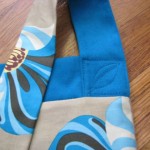
I have to admit that sewing this second one gave me fits. First, I was working with some very meager remnants of Amy Butler Nigella grandiflora home dec fabric and some slightly less meager remnants of a brilliant turquoise brushed cotton twill. So I had to fudge my pattern a bit to get everything to fit and I made one small miscalculation which caused me to have to hand sew a spot which of course was one of the things I was trying to avoid with this pattern construction! C’est la vie – I am pleased with the results anyway. The interior pocket is lined with a bit of the floral print for a nice surprise contrast. And as I was doing the topstitching to secure the strap, I decided on the fly to stitch a leaf shape into the box. I love this subtle detail and how easy it was to incorporate a little something to tie the print to the solid besides the shared color. I’ve been toying with the idea of adding a single snap to the bag but I can’t decide. I’m trying to keep it simple.

cyclette bag made from Amy Butler nigella grandiflora

cyclette bag made from Amy Butler nigella grandiflora

interior pocket showing print lining

interior pocket showing print lining

topstitched leaf detail on strap of cyclette bag

topstitched leaf detail on strap of cyclette bag

Tags: , ,

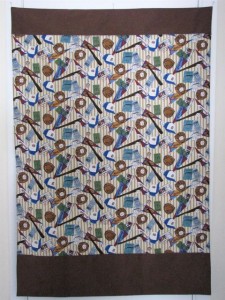
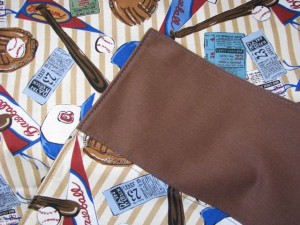
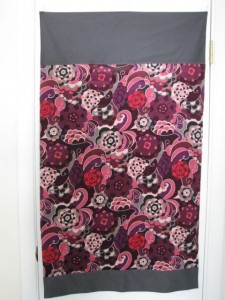
The PTO at the boy’s school is having a fundraising evening including a silent auction. They called especially for handmade items! I haven’t felt able to really help out so I was excited about being able to do something at home. I’m donating a few tie dye baby items and also these lightweight nap blankets. They are generously sized, I wouldn’t call them baby blankets. Fabric is from my stash. I bought both of these fabrics a while ago but realized that I probably wasn’t going to use them. The boy isn’t into baseball and the floral turned out to be a larger scale than I had thought looking at the swatch online. But I’m pretty pleased with the way these turned out and they were quite simple to do, based on yet another spin-off of the technique originally developed for lined shoe bags, which of course, I have yet to show.

Hmmf, I just realized the picture of the girly blanket is upside down. Oh well! I’m having a hard enough time trying to figure out how to photograph stuff. There are fewer blank walls in this house and they are all plaster!

Robert Kaufman nostalgic baseball print cotton with brushed brown cotton twill back. Medium blue topstitching.

Robert Kaufman nostalgic baseball print nap blanket with brown brushed twill back

Robert Kaufman nostalgic baseball print nap blanket with brown brushed twill back

boy's baseball print nap blanket detail

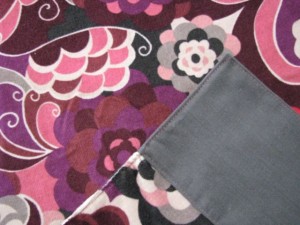
Robert Kaufman mod floral corduroy in merlot backed with grey brushed twill (Don’t ask why I have 300 yards of brushed twill in my basement unless you want to buy some.) Pink topstitching!
Robert Kaufman mod floral corduroy with gray brushed twill, nap blanketdetail of girl's mod floral and gray nap blanket with pink stitching

Tags:

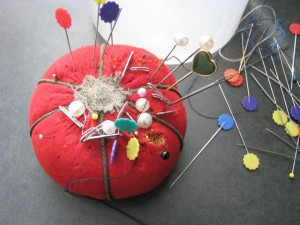
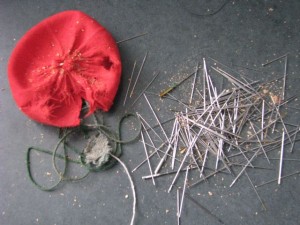
old pin cushion

A few years ago an older friend of ours passed away. She left behind a house full of memories. I inherited a few of her sewing things, including this old pincushion with the heart shaped stickpin and the pearl headed corsage pins. Nothing special about it, you’ve seen them everywhere right? I decided to use it because Anne wouldn’t want anything of hers to go to waste. So the last few years I’ve used it with the increasing realization that it was just falling apart and there was nothing I could do about it. I had some idea of taking it apart to see how it was made so that maybe I could make my own out of a cheery print.

As I opened it up and made an incredible mess, all of these old needles spilled out with the dusty sawdust filling. I was struck with the thought of how Anne had used every one of these needles on some project, for herself or her children. Maybe for the house or for a neighbor, for a grandchild or a friend.

A lifetime of projects sewn with love. Sewn with these needles. A lifetime of needles.

empty old pincushion and needles

Tags:

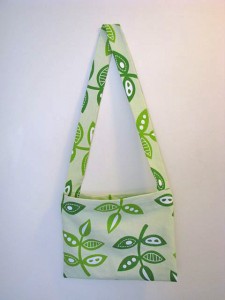
cyclist musette bag inspired toteMy friend, TheJen, has become an avid cyclist and she was telling me about the small bag that cyclists use for carrying food and water. Here’s a link she suggested that shows traditional styles of musette bags or feed bags. Often these are imprinted with promotional messages and handed out at big races. Anyway, I got it stuck in my head and couldn’t get it out so I decided to make a tote based on the basic proportions and idea of the musette bag used by cyclists.

Since this is not for real cyclists, I used a double layer of home dec canvas, a print called Sprig by Jessica Jones for J. Caroline Designs. I really liked this fabric although it’s a large design which is unusual for me. It’s a graphic treatment of leaves, very much up my alley. I had to have it but I really did not know what I was going to do with it! It would make great couch pillows or upholstery for cheery kitchen chairs, or any number of things. But when I got the idea to make the musette bag I knew immediately I wanted to use this fabric. I did use the basic proportions that I could find on the web, about 11x13inches I think. The strap is very long for wearing across the body rather than over the shoulder. There is no closure but I did add a teeny zippered pocket on the inside that would hold cards, money, keys. I was able to cut two bags, including the little pocket, out of a single yard so I went ahead and used the same fabric for the lining. Almost no wasted fabric!

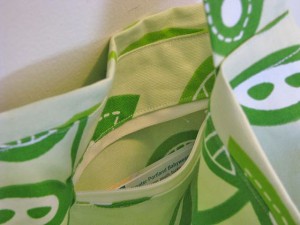
inside zippered pocketThis construction of this lined bag is my own design and was done entirely on the serger and regular sewing machine with no handstitching! It’s roughly based on some self-lined shoe bags I made years ago, also my own design. Anyway, it went together fast and easy (except when I decided to put that little pocket in). I will definitely make this again, especially since I already have the second one cut out, lol. When I make the second one I will take pictures along the way for a tutorial. I am really excited about the construction method I used. It’s fast, trim but sturdy. Now I do have plans to make another musette bag out of a much lighter weight fabric that would actually be more practical for cyclists, but this is one we can all enjoy, yes?
Tags: ,

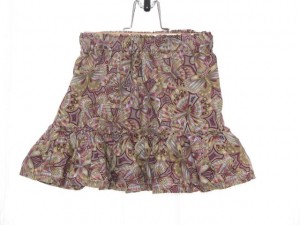
ruffled skirtAnother skirt for the girl . . . again made from those 9″ wide remnants. This is a beautiful butterfly print several years old from Mary Hopkins by Kona Bay.
I used the ruffle foot on the serger to gather and attach the ruffle at the same time! Now I know there are plenty of people who think this is old hat but for those of just getting into using our sergers, this is really cool. This makes it so easy to do ruffles. No pinning, hardly any fussing. Just have to remember to hem the ruffle before applying and write down the tension settings. I’m going to start pinning those up on my idea board. I’ll take a picture of that soon, when there’s a little more on it!

Also, I figured out that a wooden clamp style pants hanger works great for holding up the kids’ elastic waist skirts and pants to take pictures. Now I just need to work on my photography skills.

Tags: , ,

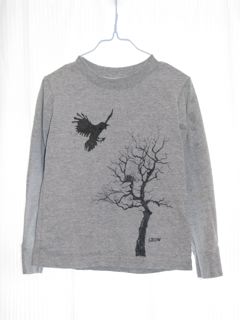
img_3303Ever since I first sewed the crow tee shirt and stencilled the crow on it, the boy has been bugging me to add a tree. With a nest for the crow’s babies. I was kind of hoping he would forget about it because I really liked the starkness of the original design. But persistence won out. I’ve always been afraid of drawing trees, mostly because I’m really bad at drawing trees. Studying lots of pictures and tracing photographs of trees is giving me some confidence. Now just don’t look too closely at the nest!

Tags: , , ,

It’s far worse than I thought. It took me all of three minutes to fill an index card with all the projects that I want to do in the immediate future! 22 in all. This does not include projects that are on the back burner, ack.

On a good note, 14 of them are things I’ve never done or are largely new ideas. A few of them are tutorials I want to do and at least half of them are for the girl. Oops.

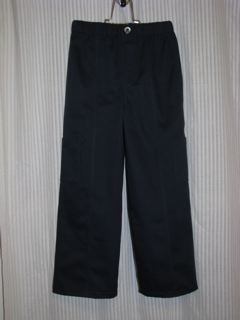
I don’t feel too bad though because I’ve been making a lot of things for the boy lately. He needed them. Today I finished a pair of navy twill pants, start to finish. Yay me! Hopefully they are long enough. He seems to be growing an inch every month lately.

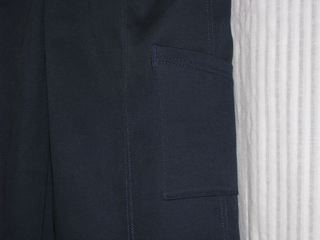
Boy’s pants are a pain. And I didn’t even put a zipper in. Elastic waist with fake fly. Two patch pockets and twin needle topstitching. Why do boy’s pants take more time than girl’s pants? Because the fabric is so plain you have to give it some detail in the design of the pattern or pockets, seams, etc. I did try out a new way to do the patch pockets which I liked and will do a better job with next time. Maybe that will become a tutorial as well. I don’t think I’ve seen this method anywhere.

boy's navy twill pants

boy's navy twill pants

boy's navy twill pants pocket detail

boy's navy twill pants pocket detail

Tags: ,

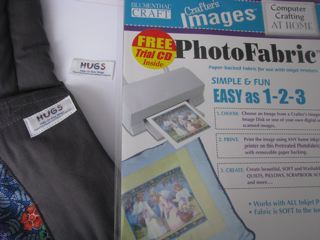
img_3182Did that title make any sense at all? I suppose this is somewhat of a review. I originally got this paper-backed fabric for use with inkjet printers for another project. I used it this week to make labels for some baby carriers I donated to a not-for-profit group, HUGS. HUGS is run by two sisters who sell selendangs through their website. A selendang is a traditional piece of cloth used in Indonesia for many purposes, one of the most important being carrying babies. The sisters then donate the profits back to providing traditional selendang baby carriers to mothers in need, mainly in Indonesia I think. Go check it out, a really lovely family effort.

Anyway, you are wondering what this has to do with me printing fabric labels on my inkjet printer. I purchased and used some of the beautiful HUGS fabric to make into more structured two shoulder carriers. I wanted to put their logo on the strap so I decided to try out this product, PhotoFabric from Blumenthal Craft. I think there are many other brands of this same type of stuff. While the colors could have been more vibrant, I was impressed at the detail I was able to get, 5 point type was perfectly readable. I cut out the labels and turned under the edges with the iron and then sewed them on. It worked very well and looks nice. I test washed one of the labels and it did not bleed at all even under hot water.

You can also draw easily on this paper with colored pencils, which makes it great for kids. You can take their drawing and incorporate it into a sewn fabric creation. I’m curious to see if it can withstand machine washing. If so, I’ll certainly be using it to put “made by mom” tags into my kids’ clothes!

Tags:

This could be a very long list but I’m going to try to limit it to an arbitrary number, say 10. I do a lot of different kinds of crafts so that makes it hard but I’m trying to think of the things I use a lot and would not want to do without. Then maybe I’ll talk a bit about each one at some other point.

  1. My Mac of course. Being a graphic designer, almost everything I do gets touched by the computer at some point.
  2. My sewing machine. I do a lot of sewing and mending, I think this is a must-have for every household.
  3. My serger. Hmmmm. Yes, I could do without it but it’s fast becoming my right hand for sewing projects.
  4. My good Japanese fabric scissors.
  5. My lightbox. I think my parents got it for me when I had just started the advertising design program. This year I got another lightbox that is round! and it spins! It won’t replace my traditional rectangular box but it probably deserves its own post.
  6. An X-acto knife and a metal ruler. I’m going to lump these together because they almost always get used together. Can I squeeze the self-healing cutting mat in here too?
  7. My Japanese sewing awls (meuchi) This probably warrants its own post as well to explain why.
  8. roll of 18″ wide white paper. Someone gave this to me when I was in college and I have been using it ever since, mostly for drafting patterns but not just for sewing.
  9. Flathead pins. If you sew anything these are really the best. Get the finer size with the heat resistant heads.
  10. Beacon’s craft glue. I hesitate to single this out but I discovered it last year and now I use it for everything. It bonds in a similar way and almost as fast as hot glue but without the heat, yet you can also apply it thin and get a repositionable bond like spray adhesive, without the mess.

Well, I can already think of a few more things, like Frances, my dressmaker’s form, made by my husband. You can read about her here.

Tags: ,

« Older entries § Newer entries »