crafting

You are currently browsing the archive for the crafting category.

pokemon wurmple made out of sculpey

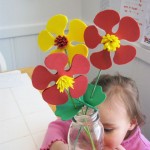
For your amusement, I present Wurmple, a Pokémon caterpillar, or “Murple” as the boy calls him (it?) made out of Sculpey. It looks complicated but it wasn’t that hard. Playing with clay dough with the kids over the last few years has really developed my ability to make recognizeable three dimensional objects!

Anyway, this did not come about without some reluctance on my part. I was vaguely aware of the game/trading cards, etc. for a long time but did really know anything about it. At the beginning of the school year a letter from the school reminded parents that children were not to bring these trading cards to school. Seemed like a good enough reason not to have them at all. Of course they make it onto the bus and the playground anyway. The boy would make reference to Pokémon occasionally but did not seem too interested until he started talking about “Murple”, a butterfly Pokémon and asking me to find a picture. (He knows all about Google Images). He’s been interested in caterpillars and butterflies for a long time so I thought maybe it was time to pay a little more attention.

It was easy enough to find the Pokémon website but not so easy to find a butterfly named “Murple”. But we did find him and his real name and the fact that he was actually a caterpillar that changes into a cocoon and then into a butterfly . . . with a different name. Yes, it’s confusing. And I learned a bit more about the whole phenomenon and decided that maybe the core idea wasn’t so bad after all. Along the way I printed out a number of other Pokémon for the boy. I used it as a way to encourage him to sound out the names. Kind of hard because some of the names are pretty weird. But apparently pretty motivating. Eventually he asked me to make a “Murple” out of clay. Eek. I really didn’t want to tackle it but he did ask nicely. You know the rest.

Tags: ,

handspun silkWe’ll just call this art yarn, haha. I just wanted to see if I could make it look pretty like the pictures I see online of hanks of handspun yarn. What you can’t see is multiple knots and the fact that it’s only 40 yards long. I wonder what I can make with 40 yards??

Tags:

yellow orange handspun silk

I’m guessing I spun it too much so when I tried to unwind it to ply it plied itself into a big mess. But now it’s all calmed down.

It’s April vacation week so we are off to the Children’s Museum with some friends.

Tags:

I was so excited to finish spinning the golden silk that I foolishly decided to go ahead and ply it as well. Disaster, complete and utter disaster to the point there is no picture because I am hoping that maybe I will wake up tomorrow and it will have magically fixed itself. Apparently plying singles is one of the things you are not supposed to do while under the influence of cold medicine. No driving, operating heavy machinery, or plying singles into yarn. Now you know . . . don’t let it happen to you.

Tags:

I just spent the last hour spinning three cocoons worth of golden orange silk with an afghan hook and a wooden wheel. First off this makeshift drop spindle spins much better than the one I made with the crochet hook. Until or if I find the wooden spindle it will do nicely since I don’t know any better anyway. It will spin until I can draft no higher.

Now spinning the silk is so different from the wool I tried. It holds the spin so nicely but I had the hardest time figuring out how to draft. The silk is so strong it needs a firm hand. Also I tried two different methods of drafting the silk hankies dyed by my friend Annie, SpinKnit. I think my biggest problem was actually separating the layers, despite lotioning up, my hands are rough from winter and yard work and getting old I suppose. I’m going to need to get a manicure just to get my hands softened up so I don’t keep snagging on the silk!

First I tried drafting from the center as many instructions on the internet recommended. Bad. Very bad. The first one I thought that I just needed to keep going and not worry about what the start looked like. The second one I was about ready to give up because I couldn’t get a consistent draft no matter how much yanking and pulling I did. So the third layer I tried a different method I remembered reading. Poke a hole in the center of the layer and pull it out into a ring and then you can just keep pulling and drafting and then pull it apart at some point and start spinning. OH! SOOOO much easier!! I was thrilled with the results. And right now I am not going to think about the fact that I’ll have to ply this if I hope to knit anything out of it using needles bigger than straight pins. Yippee! I totally blew off my list of projects in favor of spinning for no reason. I’m glad. Now I feel motivated again. Phew.

handspun silk on makeshift drop spindle

Please forgive the poor lighting. It’s after midnight, I figured a poorly lit photo was better than none at all. Hey at least it’s relatively in focus. (learning how to use that macro setting!)

Tags:

empty black velvet lined boxes


I scored a few of these previously used black boxes, a little dusty but sturdy. They are some sort of thin but hard board covered in faded black paper and lined with foam covered with cheap velvet. (I’m sure these will be very easy to gut.) Some of them have little latches and some of them have self-closing hinges. Some are approximately 5×7″ and others are 6×8″, about 2.5″ deep. I didn’t know what I would do with them but obviously they have great potential. The girl appropriated one for her little dolls as soon as I got them in the door!

So I’m throwing this out there to my readers. What would you do with one of these? I’d love to hear your ideas on how you might decorate the outsides and what you might put inside. I’m thinking treasure boxes, photo storage, special gift packaging, triptychs, memory boxes, craft tool cases, decoupage purse. What are you thinking?  Leave me a comment by May 5th and I’ll be giving a few of these out.** Feel free to spread the word, I want to hear lots of ideas!

**Two catches – I’ll want you to e-mail a picture of your finished project to post here on my blog by May 31 and I won’t be sending any outside the US, because I’m broke, sorry.

lavender tulips in a metal bucket
just because they’re pretty ;)

Tags: ,

long time no knit swatch bottom up
So while I was rummaging around for black rubber cord to string my fern pendant on I found this! It’s cotton, probably for crochet, can’t remember what I bought it for, maybe tying up packages? It’s a nice weight, not to small, maybe something you would knit or crochet baby washcloths out of. Anyway, I immediately thought, I can knit with this! Because I’ve had this knitting bug for the last few weeks but I didn’t think I had any yarn. I immediately grabbed some needles and cast on. How crazy is that? For a split second I thought I should really grub around for a book but I decided to wing it and just see what I could remember from the very few times I have knit anything.

So this is the result. I did go to Ravelry part way through because I started to have lots of questions, not about how to do what I was doing but more of the curiosity killed the cat type. While there I figured that it might be okay to learn to knit right needle to left needle (considered backwards by most I think). I was only wondering about this because I hate to purl. Ah, yes, that is why I never really got into knitting. Although after a few rows of knitting backwards I decided that maybe purling wasn’t so bad after all. My left hand is far better at tensioning evenly than my right hand. No surprise, my left hand also has far better rhythm on the piano or playing percussion. I don’t know why but it’s a very good thing for a pianist, if one of your hands is going to be worse than the other I mean. You’d much rather your left hand have better rhythm, but I digress.

I also think that I cast on using the long tail method, can you tell, knitting people? I really have no idea, I just did what my hands wanted to do. I’m not good with remember the names of stitches but I think besides the plain knit and purl sections there is also seed stitch?, stockinette?, and 3×2 rib which is rather hard to make out.

So the other thing I figured out is that I think I knit Continental style which means I hold the yarn in my left hand. I tried holding it in my right hand, that was pretty well impossible. I couldn’t really wrap my brain around that so I decided not to try tonight. But I am curious because I’m sure that there would be instances where you want to know different methods just to have different options, if I get that far.

So if my knitting friends are reading, bring it on! You know you want to tell me what yarn to buy, what pattern to try, what your favorite knitting style is, etc. and probably more things I have no clue about. I finally figured out what LYS stands for. Local Yarn Shop for you other non-knitting types. ;)

I was going to just rip this out but then I decided that it was kind of cute and I might be sorry since this is one of the more enjoyable pieces of knitting I’ve ever done. So bottom up the way it was knit it looks like a house since I decided to try decreasing there at the end when I was running out of steam. But turned over it looks like an overgrown patch pocket. I thought that was kind of cute. Maybe I can turn it into something.

knitting sampler patch pocket?

Tags:

There are a number of traditional signs of spring – crocuses, robins, etc. Since we’ve lived in Maine, one of my personal signs of spring is the appearance of fiddleheads. These are the tightly coiled baby ferns coming up through last year’s blanket of left over leaves. In our old house we had lots of woods surrounding the house and most years we had lovely swathes of ferns spring up in the dappled sun under the barely budding trees.

fiddleheads just coming up

Now that we’ve moved to a house in town I thought we’d left behind this fascinating miracle of spring. I was so excited to discover these tiny fiddleheads just barely peeking out of the dirt at the edge of the trees. Those tall green leaves are some sort of bulb, maybe daffodils?? Usually the fiddleheads are green but I’ve seen them in a coppery color occasionally too. In the above picture you can see the combination of light green stem and light brown tiny feathery parts that will open up into green fronds.

I chose to incorporate a background of a fully opened fern frond which I made by drawing with colored pencils on shrink plastic. I then formed the copper wire into various sizes of fiddlehead shapes and glued them to the baked shrink plastic rectangle, finishing with a small loop of leather for a bail. I like the combination of copper and green with the dark background. I wish I could have taken a clear picture with the sun shining through the pendant to show the full effect but my photography skills were not up to the task. So I’ve photographed it on an envelope for scale.

fiddlehead pendant made of copper wire and shrink plastic

edited: I did it. Here it is in the sunny window!

fiddlehead fern copper wire and shrink plastic pendant

Tags: , ,

img_3706
A little lamb for you my friends.

Tags: ,

scherenschnitte or papercutting of children dancing
This is my first attempt at scherenschnitte or papercutting in the Swiss/German style. I made this artwork for the spring music program at the boy’s school. Since the program will be photocopied, I was thinking about how to create a strong design in black and white and one thing lead to another . . .

As usual I never make a simple first attempt at anything. I had to include people and words, neither of which are easy in any medium. I cobbled together my design with a combination of sketching by hand and sizing and moving around silhouettes and type on the computer to get the general arrangement I wanted. I then printed out my rough and temporarily stuck it to black paper. Rather than use the traditional tiny scissors, I used a new X-acto blade to cut through both the pattern and the black paper, allowing the knife some freedom to vary from the sketch. I cut on my Merry Glo Round light box which is a treat because it spins freely as well as lighting from underneath! I’ve always “drawn” better with scissors than with a pencil. Years of comping concepts for advertising projects and cutting the occasional stencil has made me pretty handy with the X-acto!

Overall, I’m pretty pleased with the result. I don’t think I’ll be doing a lot of scherenschnitte as it is a bit hard on the hands, but I don’t think this will be the last time either. I took inspiration from several blogs of people who take scherenschnitte much more seriously and do amazing work, particularly this one, another Cindy.

Tags: ,

img_3573 I made a batch of full-size Soapfulls. These are two of my favorites. These were made using a harder soap and they were a bit harder to felt although they seemed to lather better. The veining is the hardest part to do but I enjoy working hard to create a natural “random” look. I’m going to need some more natural colored wool soon!

Tags:

craft foam flowers

I really can’t draw but I’m trying to learn. Having two kids who want me to draw something fast with fat crayons really helps. You can’t think too much you just have to draw something that has the simplest relevant details. I always draw the same sort of flowers, large round center with five round petals crowding around the center. It’s taken me about three years to get the petals all about the same size and shape. Today when the girl asked to make flowers I almost drew those same old flowers. Then I decided it was time to try something different. Without looking at anything I took a pen and drew on some craft foam (yeah that stuff I don’t really care for). Admittedly I had to sketch it several times before I had a decent shape I could cut out but it’s totally different! Almost modern looking. I also attempted a different leaf shape than my standard teardrop. Here are a few pictures to illustrate the process of making the flowers less two dimensional. I’m also including a printable PDF with the patterns and instructions to make your own craft foam flowers or simply print, color and cut on sturdy paper. When I traced the flowers into bezier curves in Freehand, I did my best to retain the loose hand drawn shape of the petals. You’ll notice one of the petals is quite lopsided, almost like a boot shape, makes it easier to line up the mirror images!

PS. I also apologize for the fuzziness of these pictures. I’m trying to work on using natural light because that usually produces truer colors but I was having a hard time getting good focus at the same time.

PPS. A good way to use up those leftover bits of colored paper and craft foam is to cut them into relatively small pieces and use them to make a mosaic on black paper. Kids love this!

Tags: , ,

aluminum flashing tissue box cover "mitered" top of aluminum flashing tissue box cover
I actually made this about 5 years ago, maybe longer. But it’s been at my husband’s office all this time and I just brought it home so I thought I’d post a picture of it. I’m giving it a second life as a desktop wastebin. Why? When I am sewing I constantly create little trimmings of thread and tiny scraps of fabric. Even though there is a trash can right by my feet, they don’t seem to make it in there. So for years I have been using empty square tissue boxes to hold those scraps. Small enough to sit right on the desk, the plastic flaps that allow you to pull one tissue at a time also serve to keep in all those little scraps of thread and fabric if the box should tip over. When it’s completely full I can throw the whole box out or give the trimmings to the birds depending on the time of year.

Now how did I make it? I used aluminum flashing from the hardware store. I think you can get a package of ten small rectangles for a few dollars. I was able to score and cut them to size with regular household tools. I think I used some sort of all purpose thick glue to glue the pieces together. Apparently it worked well enough! I used steel wool to make the brushed texture. Inexpensive and easy modern/retro look for your tissue box!

Tags:

wool felt encased soapwool felt wrapped soapsThis is that wild idea I had yesterday in the shower. It’s certainly a compilation of inspirations from various sources. I’m sure other people have already done this but I’ve never seen any. I did these little samples and they turned out just how I thought, I love when that happens. The first set are meant to look like rocks with either veins of some precious metal in them or maybe lichens, however you choose to interpret. The second set are just vibrant colors for fun. These are soap chunks that I wrapped and felted wool around. The veins of color are wool and/or silk. Wow, that silk is amazing stuff Annie! The best method so far seems to be to wrap the soap snugly in thin layers of roving and then needle felt it quickly with the Clover tool.
Clover felting toolThen a quick squishy bath to really set the felt. They lather really well. Maybe too well, I don’t know how fast the soap will disappear. I started with chunks of unscented glycerin melt-and-pour because that’s what I have. I think something harder would be better. What would be really nice would be some of TheJen’s baby soap. Maybe I can get her to share the recipe. (hint, hint) Cool, I get to use the “fiber” tag, lol.

Tags: ,

img_3303Ever since I first sewed the crow tee shirt and stencilled the crow on it, the boy has been bugging me to add a tree. With a nest for the crow’s babies. I was kind of hoping he would forget about it because I really liked the starkness of the original design. But persistence won out. I’ve always been afraid of drawing trees, mostly because I’m really bad at drawing trees. Studying lots of pictures and tracing photographs of trees is giving me some confidence. Now just don’t look too closely at the nest!

Tags: , , ,

« Older entries § Newer entries »