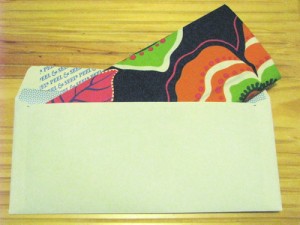
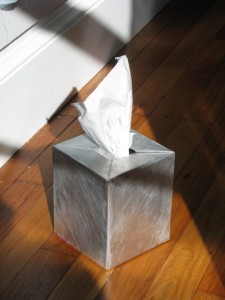
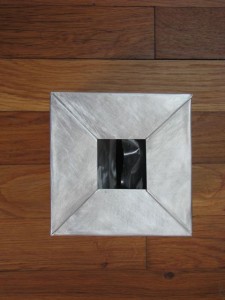
While putting together some packages to mail out, I was looking for a little extra padding to protect the gift I was mailing and noticed a pile of small fabric scraps. They all happened to be cut in rectangles, maybe 12 x 18 or so. Certainly enough to make a little something, but what? So rather than leave them sitting there, I used one to add a little extra padding around a gift before putting it in an envelope. I didn’t bother to finish the edges of the fabric remnant since I was sending it to a friend who sews. So she’ll get a colorful wrapping that she can then reuse for a little project!
You are currently browsing the archive for the repurposing category.
Tags: remnants
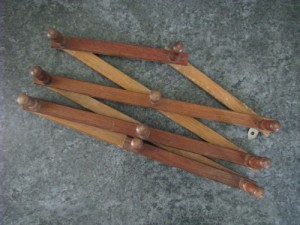
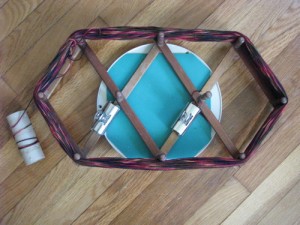
Generally when you need to wind a skein of yarn into a ball before use, you would use a ball winder and a contraption called a swift to hold the skein. Since I own neither of those mechanical aids, I had to do it by hand. The first skein I did completely by hand and it was quite a mess. I resolved to find a better way to wind the second skein.
At the transfer station (otherwise known as the dump) I spied this old folding mug rack. Once home, I set it on a lazy susan and clamped it with bulldog clips into the right position to hold the skein taut. And presto! Not perfect, as the oval shape made the whole thing turn in fits and starts, but certainly passable. On the other end of the yarn is the crafter’s oft used but least praised tool, the empty toilet paper tube. While it makes a decent center-pull ball of yarn, I think I’ll be looking for an alternate method there as well.
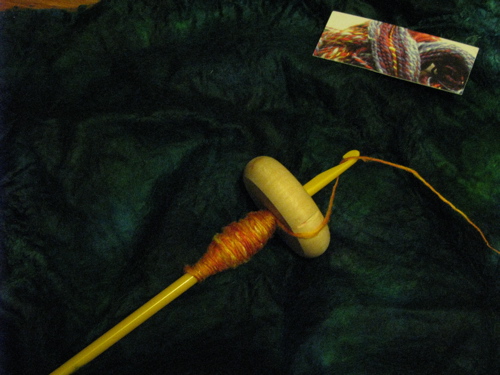
I just spent the last hour spinning three cocoons worth of golden orange silk with an afghan hook and a wooden wheel. First off this makeshift drop spindle spins much better than the one I made with the crochet hook. Until or if I find the wooden spindle it will do nicely since I don’t know any better anyway. It will spin until I can draft no higher.
Now spinning the silk is so different from the wool I tried. It holds the spin so nicely but I had the hardest time figuring out how to draft. The silk is so strong it needs a firm hand. Also I tried two different methods of drafting the silk hankies dyed by my friend Annie, SpinKnit. I think my biggest problem was actually separating the layers, despite lotioning up, my hands are rough from winter and yard work and getting old I suppose. I’m going to need to get a manicure just to get my hands softened up so I don’t keep snagging on the silk!
First I tried drafting from the center as many instructions on the internet recommended. Bad. Very bad. The first one I thought that I just needed to keep going and not worry about what the start looked like. The second one I was about ready to give up because I couldn’t get a consistent draft no matter how much yanking and pulling I did. So the third layer I tried a different method I remembered reading. Poke a hole in the center of the layer and pull it out into a ring and then you can just keep pulling and drafting and then pull it apart at some point and start spinning. OH! SOOOO much easier!! I was thrilled with the results. And right now I am not going to think about the fact that I’ll have to ply this if I hope to knit anything out of it using needles bigger than straight pins. Yippee! I totally blew off my list of projects in favor of spinning for no reason. I’m glad. Now I feel motivated again. Phew.
Please forgive the poor lighting. It’s after midnight, I figured a poorly lit photo was better than none at all. Hey at least it’s relatively in focus. (learning how to use that macro setting!)
Tags: fiber
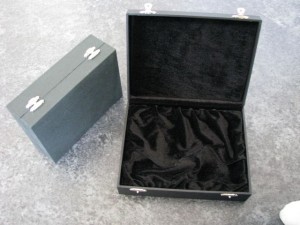
I scored a few of these previously used black boxes, a little dusty but sturdy. They are some sort of thin but hard board covered in faded black paper and lined with foam covered with cheap velvet. (I’m sure these will be very easy to gut.) Some of them have little latches and some of them have self-closing hinges. Some are approximately 5×7″ and others are 6×8″, about 2.5″ deep. I didn’t know what I would do with them but obviously they have great potential. The girl appropriated one for her little dolls as soon as I got them in the door!
So I’m throwing this out there to my readers. What would you do with one of these? I’d love to hear your ideas on how you might decorate the outsides and what you might put inside. I’m thinking treasure boxes, photo storage, special gift packaging, triptychs, memory boxes, craft tool cases, decoupage purse. What are you thinking? Leave me a comment by May 5th and I’ll be giving a few of these out.** Feel free to spread the word, I want to hear lots of ideas!
**Two catches – I’ll want you to e-mail a picture of your finished project to post here on my blog by May 31 and I won’t be sending any outside the US, because I’m broke, sorry.
Tags: embellishing, flowers
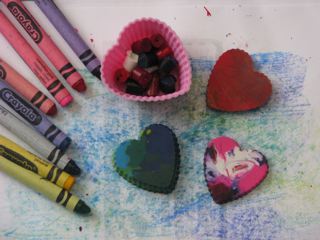
I know this post is probably a little late, seeing as it’s 11pm EST on Valentine’s Day but I’m posting it anyway. We did these earlier in the week, I just haven’t had time to upload the pictures.
The boy and I, with help from the girl, made heart shaped crayons for Valentine’s day for all their school and church friends. This is quite easy to do and you can use up the broken crayons this way. There are lots of instructions already available on the web but I will give my method and suggestions having done it several times now. The easiest way to make your own heart shaped crayons is to use:
- Crayola brand crayons*
- silicon mini muffin molds in any shape
- toaster oven at 300°
- First peel the paper off the crayons. Using a craft knife to slice down the paper makes it much easier. If you are using new crayons, you will need 9-12 crayons to fill 6 wells of a mini muffin tray.
- Cut up your crayons with craft scissors or a kitchen knife. If you are making single color hearts it doesn’t matter how small the pieces are as long as they fit in your molds. If you are using multiple colors, I like to cut them into 1/4 inch to 1/2 inch size pieces depending on the size of your molds.
- Silicone molds are the easiest because you can easily pop the finished crayons out when they are fully hardened. If you use a metal tray, stick it in the freezer for a few minutes and the molded crayons should come out fairly easily. In either case use at least a layer and a half of crayon bits to make a 1/4 inch thick molded crayon. More bits makes a thicker crayon. Do not fill all the way to the top of the mold!
- If you are using individual molds, like I did, place them on a cookie sheet so you can easily slide them in and out of the toaster oven. Be especially careful when removing from the oven as you want your pretty colors to stay separated. Stirring the melted wax is not necessary and will leave a mark on the other side. Depending on your oven and the size of your molds it can take 5 to 10 minutes for the crayons to melt.
- Allow the molded crayons to cool fully before unmolding. Be patient!
The bottom side will be the prettier side. Any little edges sticking up can be smoothed by simply sliding the crayon over paper. I like to use two to three complimentary or analogous colors. But experiment and find your own favorite combinations! Pair a handmade molded crayon or two with a little notebook for a nice little gift any time of year for a friend of any age. Everyone should draw with crayons, not just kids!
*If you have used other brands of crayons there will most likely be a layer of clear/cloudy wax that hardens on the top. This is not pretty and it’s frustrating to kids. You can fix this by very carefully sliding the crayons across a vegetable slicer until you have removed the clear layer. This will actually make the inferior crayons draw better than before because the process concentrates the pigments and removes excess wax.
It’s also prudent not to use the same tools for food and for crafting. I admit to not always being prudent. eek!
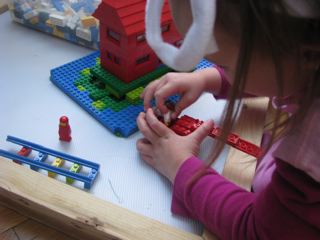
lego play tray
So I went down into the basement and dug up an old corkboard and an old artist’s canvas that happened to be the same size, about 2 feet by 3 feet I think. I’d been meaning to recover the corkboard with fabric and paint it or something but that hadn’t happened in several years so I decided to get over that idea and use it. The canvas was rotting off the frame so it was quick work to pull that off, a little slower to remove all the staples and the corner braces. I cut a piece of spare neoprene to fit the depression on the corkboard and then glued some leftover nylon boat canvas on top of that and screwed the emptied frame on top of that into the corkboard’s frame.
The whole thing is light, , super easy to clean, fits behind or under the sofa and can hold a lot of Legos. Don’t ask me why I have spare neoprene, I don’t remember but it comes in handy! I’ve been very pleased with how well this tray works for the kids, especially considering everything I used was leftover or salvage. I suppose it might be nice to paint or seal the frame . . .
 I’m not exactly sure when I made this because I didn’t take the picture right away. The boy couldn’t wait to get into it. He’s been needing some long sleeve tee shirts so I’ve just been trying to make them from fabric or our old tee shirts that we haven’t been wearing rather than buy, especially since he is so thin that the store bought ones tend to look too wide to get the sleeves long enough. My husband donated a grey tee shirt to the cause and I recut and serged it up one night, intending to leave it plain. The boy however wanted to know what animal I was going to put on it. Since we had been watching the crows outside the window earlier he hit upon that. I looked for some pictures of crows on the internet and he chose one in flight. I printed out several and then quickly composited them on my lightbox to get the features I wanted from each, the wings from one, the open beak of another, the grasping feet of a third. I then simply cut a paper stencil and dabbed on fabric dye and heat set it with the iron. I lobbied for a small critter on the run at the bottom of the shirt but the boy preferred to have the word “crow” so that’s what I did. The boy was reluctant to help with the actual shirt but did do a second stencil of the crow onto a scrap piece of fabric that will hopefully appear on a later garment for the girl. All done in time to catch the bus to PM kindergarten. I’m afraid they are getting a little too used to this!
Tags: animals, boy clothes, fabric dyes, serger, stencil
 Hey! I’m almost caught up, we’re in January now. I got this cute bug fabric last year as a credit for something else. I really didn’t have a plan for it but I finally figured out how to use a bit of it as an applique. I took two old tee shirts, one of mine and one of my husband’s. Using the tee shirt pattern I created for the boy I cut the pieces to make a two-tone shirt, mostly because the light blue shirt was not big enough to make a complete shirt. But I needed the light blue background for the appliques to look right. I fused the bug fabric appliques to the shirt but ended up sealing the edges with clear nail polish and whipstitching by hand because I forgot to sew the appliques before finishing the shirt. I made a ton of mistakes putting this shirt together, mostly because I didn’t bother to make separate pattern pieces for the color blocking. But it fits, it looks fine, and the boy likes it. And it’s survived several trips through the wash so I think it will last the season. At the rate the boy is growing, he won’t be wearing it past the next few months whatever the weather.
Tags: boy clothes, knit applique, serger

 The girl got a really nice set of metal pots and pans for Christmas from her grandparents. Problem was, she needed a stove, and she needed it now! Rather than using a cardboard box that wouldn’t last long, I looked around for something that wouldn’t take up extra room but would be appealing to the girl. I decided to use the top of a plastic storage drawer unit that held the kids’ art supplies. I rearranged the contents to empty the top drawer to hold the new pots and pans and the girl’s tin tea set. I layered several colors of craft foam to make the stove top. For a long time I despised craft foam but I’ve finally decided that it does have its uses on occasion. I made the stove knobs from some wooden craft pieces glued together and painted red. I used my snap press to put snaps through the foam pieces and glued the other side to the bottom of the knob. Once snapped together the knobs are secure but able to turn smoothly. I love it when I can take stuff I already have around the house and turn it into a completed project!

 This faux suede/sherpa coat came to us in a bag of hand-me-downs from a friend. The shoes used to belong to the boy but were now the right size for the girl. Unfortunately Miss Picky only likes girly shoes. In an effort to get her to wear something that would be safe for running around in I decided to embellish the shoes and jacket to match with some autumn colored leaves. Since I really can’t draw I looked online for some inspiration and came up with a few pictures of leaves on branches that I could use to make my own design. I used my Tsukineko fabric inks in empty markers from Dharma Trading. These are absolutely great for someone like me who is not so handy with a paint brush. Pencil didn’t work so well on the suede so I took a deep breath and my chosen colors and worked freehand. I love the way this project turned out and the girl wears this coat every chance she gets. She even wears the shoes!
The front of the jacket and details of the pocket, the shoulder and the shoes:


Tags: embellishing, fabric dyes, shoes

 Speaking of my friend Jan, she taught me how to tie dye. We get together every so often and do a batch for fun and for gifts and sometimes to revive stained kids clothes that still have life in them. We get most of our supplies including clothing blanks and dye stuff from Dharma Trading. I tried out a new colorway here: red/tangerine/blue. I like it quite a bit. The itty bitty socks were dyed to coordinate. Aren’t they cute?

 There’s a bit of a story here. My good friend Jan handles the ordering and artwork for camper clothing at our summer camp, Gander Brook Christian Camp. (My husband designed and built the website BTW, pretty sweet don’t you think?) Anyway, this is supposed to be about sewing. The last few years, Jan and I have worked together on the artwork for the tee shirts and while the colors have traditionally been gender neutral we decided to try some pink. It was a big hit year before last so we did another one this past season and I designed the typography myself and we picked out three or four colorways. Unfortunately they only come in camper/staff sizes which means 7/8 years old up to adults. Jan and I both have little girls who adored these pink camp shirts and desperately wanted one. When we were packing up the left over clothing at the end of the season I had the idea to turn a ladies size medium into a little girl dress. I lucked out in finding a long sleeve tee shirt to fit underneath that matched the color of the lettering perfectly. I turned the tee shirt inside out and went to work with the serger, love that thing. The dresses turned out quite well and our little girls were pleased as punch.
Tags: serger, typography

